Bone fractures are breaks in the continuity of bone tissue, classified by location, severity, and whether the skin is intact. They impact mobility and require timely treatment.
Overview of Fracture Classification
Fracture classification systems organize fractures based on location, severity, and displacement, aiding in diagnosis and treatment planning. Key systems include AO/OTA and Sanders, which categorize fractures by morphology and stability. These classifications help identify fracture patterns, such as transverse, oblique, or spiral breaks, and guide surgical or non-surgical interventions. Accurate classification ensures standardized communication among healthcare professionals and informs prognosis. It also distinguishes between complete, incomplete, closed, or open fractures, influencing treatment strategies and patient outcomes. By providing a structured framework, fracture classification enhances precision in managing bone injuries and improves clinical decision-making.

Types of Bone Fractures
Bone fractures are categorized into complete, incomplete, closed, open, and pathologic types. Classifications like AO/OTA and Sanders further define fractures by location, displacement, and morphology.
Complete Fractures
A complete fracture refers to a full break across a bone, resulting in two or more distinct fragments. Unlike incomplete fractures, the bone snaps entirely, leading to potential instability. This type can be further classified based on the fracture’s orientation and displacement. Complete fractures may be transverse, oblique, or spiral, depending on the angle of the break. Proper alignment and immobilization are critical for healing to prevent complications such as malunion or nonunion. The AO/OTA classification system provides detailed categorization of complete fractures, aiding in standardized treatment approaches for orthopedic care.
Incomplete Fractures
Incomplete fractures involve a partial break in the bone, where the continuity of the bone is not entirely lost. These fractures occur when the bone bends but does not fully separate into distinct fragments. Common types include stress fractures, greenstick fractures, and torus fractures. Stress fractures are small cracks caused by repetitive stress, often seen in athletes. Greenstick fractures occur primarily in children, where the bone bends but does not break completely. Torus fractures involve a buckling of the bone cortex. Incomplete fractures often result from minor trauma or overuse and are typically treated with immobilization, physical therapy, or rest. Early diagnosis is crucial for proper healing and to prevent progression to a complete fracture.
Closed Fractures
Closed fractures, also known as simple fractures, occur when the bone breaks but does not pierce the skin. The surrounding soft tissues remain intact, and there is no open wound. These fractures are less severe compared to open fractures and carry a lower risk of infection. Closed fractures can further be classified based on the degree of displacement, such as nondisplaced or minimally displaced fractures. Treatment typically involves immobilization using casts, braces, or splints to stabilize the bone and promote healing. In some cases, surgery may be required if the fracture is unstable or misaligned. Early diagnosis and proper care are essential to ensure optimal recovery and prevent complications.
Open Fractures
Open fractures occur when the bone breaks through the skin, creating an open wound. This type of fracture is more severe and carries a high risk of infection due to exposure to external contaminants. Open fractures are classified based on the severity of soft tissue damage and contamination, often using the Gustilo-Anderson classification system. Type I involves minimal soft tissue damage, while Type III includes extensive damage with possible bone exposure. Immediate treatment is critical to prevent infection and promote healing. This typically involves urgent cleaning of the wound, administration of antibiotics, and surgical intervention to stabilize the bone. Open fractures require careful management to avoid complications and ensure proper recovery.
Pathologic Fractures
Pathologic fractures occur when a bone breaks due to an underlying disease or condition that weakens the bone structure. These fractures are not caused by trauma but by factors like osteoporosis, bone tumors, or congenital conditions. Symptoms may include sudden pain or swelling in the affected area, even without a significant injury. Pathologic fractures often require specialized treatment, as they involve addressing the underlying condition. For instance, fractures due to osteoporosis may need medications to strengthen bone density, while those caused by tumors may require oncologic intervention. Proper diagnosis, including imaging and biopsy, is crucial to determine the cause and develop an effective treatment plan. This type of fracture underscores the importance of managing chronic health conditions to prevent bone fragility and related complications.

Fracture Classification Systems
Fracture classification systems are standardized methods to categorize fractures based on location, type, and severity. They aid diagnosis, treatment planning, and communication among healthcare professionals.
AO/OTA Fracture Classification
The AO/OTA fracture classification is a comprehensive system developed by the Orthopaedic Trauma Association (OTA) and the AO Foundation. It categorizes fractures based on bone location, fracture type, and severity. This system is widely used for long bone fractures, providing detailed classification into types such as extra-articular (A), partial articular (B), and complete articular (C). Each type is further subdivided, allowing precise documentation and standardized communication among healthcare professionals. The AO/OTA system enhances consistency in diagnosis and treatment planning, facilitating research and clinical decision-making. Its detailed structure ensures accurate fracture assessment, aiding in optimal patient care and outcomes.
Sanders Classification
The Sanders classification is a system used to categorize fractures of the calcaneus (heel bone). It focuses on the intra-articular fractures, dividing them into three main types based on the number of fragments. Type I involves non-displaced fractures, Type II involves two-part fractures, and Type III involves three-part fractures. This classification helps in determining the severity and guides treatment decisions. It emphasizes the importance of accurate imaging, particularly CT scans, for proper assessment. The Sanders classification is widely recognized for its practicality in clinical settings, aiding surgeons in planning appropriate interventions for calcaneal fractures. It is a valuable tool in orthopedic trauma care.
Garden Classification
The Garden classification is a system used to categorize fractures of the femoral neck, which is the region just below the head of the femur. It divides fractures into four stages based on the degree of displacement. Stage I is an incomplete fracture with valgus angulation, Stage II is a complete fracture without displacement, Stage III involves partial displacement, and Stage IV is a complete displacement. This classification assists in determining the appropriate treatment, such as whether surgical intervention is necessary. It is particularly useful in assessing the stability of the fracture and guiding therapeutic decisions. The Garden classification is a cornerstone in orthopedic surgery for femoral neck fractures, ensuring standardized care and prognosis evaluation.
Bado Classification
The Bado classification is a system used to categorize fractures of the proximal ulna, particularly in the context of forearm injuries. It consists of four types: Type I involves anterior radial dislocation, Type II involves posterior radial dislocation, Type III is a fracture of the ulnar metaphysis with radial dislocation, and Type IV includes a fracture of the proximal ulna with dislocation of both the radius and ulna. This classification is often associated with Monteggia fractures, where the ulna is fractured, and the radius is dislocated. The Bado classification helps in determining the severity and appropriate treatment for complex forearm fractures, especially those involving multiple bones and joints. It is widely used in orthopedic trauma care to guide surgical and non-surgical interventions.

Fracture Location and Configuration
Fractures are described by their location in the bone (proximal, distal) and configuration (transverse, oblique, spiral). This classification aids in understanding injury severity and treatment planning.
Proximal and Distal Fractures
Proximal fractures occur near the joint, affecting weight-bearing and mobility, while distal fractures are farther from the joint, often more stable. Proximal fractures, like those in the femoral neck, are more complex due to limited blood supply, increasing the risk of nonunion or avascular necrosis. Distal fractures, such as those in the tibia or radius, tend to heal faster but may require precise alignment to restore function. The location of the fracture significantly influences treatment options, recovery time, and prognosis. Accurate classification of proximal and distal fractures is critical for developing effective treatment plans and ensuring optimal patient outcomes.
Transverse, Oblique, and Spiral Fractures
Transverse fractures occur at a right angle to the bone’s long axis, often due to bending stress. Oblique fractures form an angle, typically from twisting injuries. Spiral fractures, also from twisting, have a helical pattern. Transverse fractures are common in falls or direct blows. Oblique and spiral fractures often result from high-energy trauma, like sports injuries. Each type requires specific treatments, with spiral fractures sometimes needing surgery. Accurate diagnosis through imaging is crucial for proper management, ensuring alignment and healing. Understanding these patterns aids in predicting instability and planning interventions for optimal recovery and function restoration.

Diagnostic Approaches
Diagnosing bone fractures involves imaging techniques like X-rays, CT scans, and MRIs to assess fracture type, location, and severity. AI tools aid in accurate classification and treatment planning.
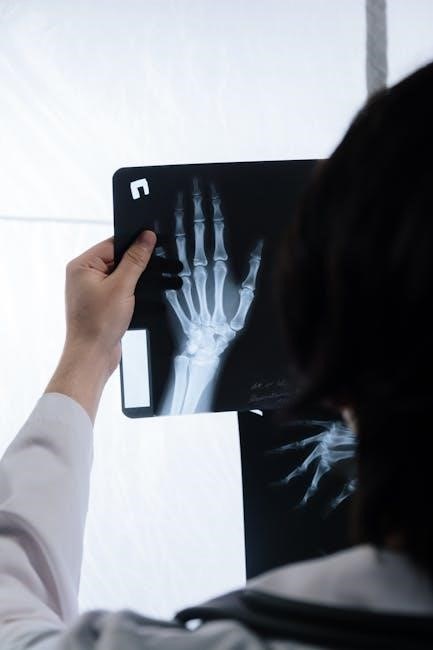
Imaging Techniques for Fracture Diagnosis
Imaging techniques are crucial for accurately diagnosing bone fractures. X-rays are the first-line method, providing clear views of bone structures and fracture patterns. CT scans offer detailed cross-sectional images, especially for complex fractures. MRIs are used to assess soft tissue damage and detect stress fractures. Ultrasonography is less common but useful for specific cases. Advanced technologies, like AI-powered algorithms, enhance fracture detection and classification by analyzing X-ray images. These tools improve diagnostic accuracy and aid in treatment planning. Proper imaging ensures timely and effective management of fractures, reducing complications and promoting better patient outcomes.
Role of AI in Fracture Classification
Artificial Intelligence (AI) is revolutionizing fracture classification by enhancing accuracy and efficiency. Deep learning algorithms analyze X-ray and CT images to identify fracture patterns, classify types, and detect subtle abnormalities. AI models, such as convolutional neural networks (CNNs), are trained on large datasets to recognize fracture characteristics, reducing diagnostic errors. These systems can automate the classification process, improving consistency and speed. AI also aids in feature extraction, enabling precise differentiation between fracture types, such as stress or pathologic fractures. By integrating AI into diagnostic workflows, healthcare providers can achieve more reliable outcomes, streamline decision-making, and improve patient care. This technology is particularly valuable for complex fractures requiring detailed analysis.
Bone fractures are a common and significant medical concern, requiring precise classification and treatment. Understanding the various types, such as complete, incomplete, closed, open, and pathologic fractures, is essential for effective management. Classification systems like AO/OTA, Sanders, Garden, and Bado provide structured frameworks for diagnosis and treatment planning. Advances in imaging techniques and AI-driven tools enhance accuracy in fracture detection and classification. Early diagnosis and appropriate interventions are critical to restoring function and preventing complications; By integrating modern technologies with established methodologies, healthcare providers can improve patient outcomes and quality of life. This comprehensive approach ensures optimal care for individuals with bone fractures.