Country Time Lemonade Mix offers a convenient and refreshing way to enjoy classic lemonade. With simple preparation, it provides a tangy, sweet flavor perfect for any occasion.
Overview of Country Time Lemonade Mix
Country Time Lemonade Mix is a popular powdered drink mix designed to create a refreshing, sweet, and tangy lemonade. Available in various sizes, it offers convenience for individuals and families. The mix is easy to prepare by combining it with water, making it a quick solution for gatherings or everyday hydration. Its versatility allows for creative uses, such as enhancing recipes or crafting unique beverages. With a classic flavor, Country Time Lemonade Mix remains a favorite for those seeking a simple yet delicious drink option.
Popularity and Convenience
Country Time Lemonade Mix has gained immense popularity for its ease of use and refreshing taste. Perfect for gatherings, picnics, or everyday hydration, it simplifies lemonade preparation by eliminating the need for fresh lemons. The mix is portable, making it a favorite for outdoor events. Available in various sizes, it caters to both small and large groups. Its convenience lies in its quick preparation—just mix with water—and its ability to be enjoyed anywhere, anytime. This hassle-free beverage solution has made it a staple in many households, offering a classic, tangy flavor that appeals to all ages.
Brief History of Country Time Lemonade
Country Time Lemonade Mix was first introduced in the 1970s, quickly gaining popularity for its convenient and flavorful approach to homemade lemonade. Its innovative powdered formula allowed families to create refreshing drinks effortlessly. Over the years, Country Time became a staple in many households, offering a consistent taste that rivaled traditional homemade recipes. The brand has since expanded its product line to include various flavors and sizes, catering to evolving consumer preferences. Its enduring success lies in its ability to simplify entertaining while delivering a timeless, tangy lemonade experience.

Ingredients andNutritional Information
Country Time Lemonade Mix contains citric acid, preservatives, and artificial flavors. It is high in sugar, making it a treat best enjoyed in moderation for health-conscious consumers.
Key Ingredients in Country Time Lemonade Mix
Country Time Lemonade Mix primarily contains citric acid, preservatives, artificial flavors, and sweeteners. It includes natural lemon juice concentrate for authentic citrus taste. The mix also has anti-caking agents to maintain texture. Sugar or alternative sweeteners are added for sweetness. These ingredients blend to create a refreshing, tangy flavor. The mix is designed to dissolve easily in water, ensuring a smooth and consistent taste. No high-fructose corn syrup is used, aligning with consumer preferences for simpler ingredients. The formula balances sweetness and acidity for a classic lemonade experience.
Nutritional Facts and Caloric Content
Country Time Lemonade Mix contains ingredients like citric acid, natural flavors, and preservatives. Each serving (1 teaspoon mixed with 8 oz water) provides approximately 90 calories and 22 grams of sugar. The mix is free from major allergens but may contain traces due to manufacturing processes. It offers no fat, cholesterol, or protein. For health-conscious users, the mix can be adjusted to reduce sugar content. Always check the label for detailed nutritional information and allergen warnings to ensure suitability for your dietary needs.
Basic Preparation Instructions
Combine 1 cup of Country Time Lemonade Mix with 3 cups of cold water in a large pitcher. Whisk until dissolved, then chill before serving.
Measuring the Lemonade Mix
Measure 1 cup of Country Time Lemonade Mix for every 2 cups of cold water for the perfect flavor balance. Using a measuring cup ensures accuracy, avoiding a drink that’s too sweet or weak. Adjust the amount slightly based on personal preference for sweetness or tartness. Proper measurement is essential for enjoying the intended taste.
Adding Cold Water
After measuring the mix, gradually add cold water to the pitcher. Use 3 cups of cold water for every 1 cup of Country Time Lemonade Mix to achieve the perfect balance. Stir thoroughly to dissolve the powder completely. Cold water helps bring out the refreshing flavor and ensures a smooth texture. Avoid using warm or hot water, as it may alter the taste. Once the mix is fully dissolved, the lemonade is ready to chill or serve immediately for optimal refreshment. This step is crucial for achieving the desired consistency and flavor profile.
Mixing the Lemonade
To mix Country Time Lemonade, combine 1 cup of lemonade mix with 2 cups of cold water in a large pitcher. Whisk thoroughly until the powder dissolves completely, ensuring a smooth consistency. For best results, use a whisk or spoon to mix vigorously for about 30 seconds. This step is crucial to avoid any grainy texture and achieve the perfect balance of sweet and tangy flavors. Once well-mixed, the lemonade is ready to serve. Adjust the ratio of mix to water based on personal taste preferences for stronger or lighter flavor.
Chilling the Lemonade
After mixing, pour the lemonade into a refrigerated container and chill for at least 30 minutes to allow the flavors to meld. For a colder drink, refrigerate for 1-2 hours. Adding ice cubes can enhance the refreshing taste. Optionally, garnish with fresh fruit slices or mint leaves for a visually appealing presentation. Chilling ensures the lemonade is crisp and flavorful, making it perfect for hot days or gatherings. Always store leftovers in the fridge to maintain freshness and safety.
Serving Suggestions
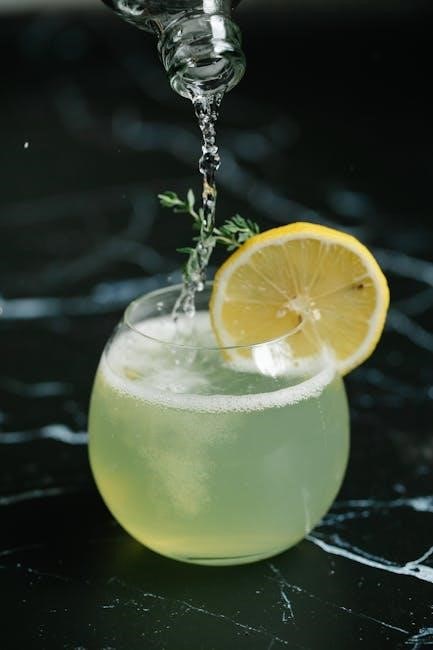
Country Time Lemonade Mix can be served over ice for a refreshing drink or paired with fresh fruits like strawberries or raspberries for added flavor. For a tropical twist, mix with pineapple juice or mango puree. Consider using sparkling water for a fizzy version or adding mint leaves for a cooling effect. Perfect for picnics, barbecues, or summer gatherings, this lemonade pairs well with snacks like cookies or fruit salad. You can also serve it in colorful glasses for a festive touch, making it ideal for both kids and adults alike. Its versatility ensures it suits any occasion.

Variations and Creative Uses
Enhance your Country Time Lemonade by preparing it at half strength, adding fresh fruit like strawberries or raspberries, or using sparkling water for a fizzy twist.

Preparing Half-Strength Lemonade
To make half-strength Country Time Lemonade, reduce the amount of mix used while keeping the water quantity the same. For a standard pitcher, use half the recommended mix, ensuring it dissolves fully for consistent flavor. This method results in a less sweet and lighter-tasting lemonade, perfect for those preferring a milder taste. Adjustments can be made for smaller batches by proportionally reducing the mix and water. Optional additions like fresh lemon juice or sugar can enhance flavor without increasing the mix concentration. Clear instructions ensure ease of preparation for both standard and smaller servings.
Adding Fresh Fruit for Enhanced Flavor
Enhance your Country Time Lemonade by incorporating fresh fruit for a burst of natural flavor. Slice strawberries, raspberries, or lemons and add them to the pitcher for a refreshing twist. For a tropical vibe, mix in diced oranges or grapes. You can also muddle the fruit slightly to release its juices and flavors before adding the lemonade mix. This method not only adds flavor but also creates a visually appealing drink. Experiment with combinations like mango-pineapple or berry blends for unique taste profiles. Chilling the mixture allows the flavors to meld perfectly, ensuring a delicious and revitalizing beverage.
Using Sparkling Water for a Fizzy Twist
For a refreshing twist, add sparkling water to your Country Time Lemonade Mix. Combine 1 cup of mix with 3 cups of cold sparkling water in a pitcher. Stir gently to dissolve. Adjust sweetness by adding more mix if desired. The fizz enhances the citrus flavor, creating a light, bubbly drink perfect for celebrations or hot days. Serve immediately for maximum effervescence. Optional: Add fresh fruit like strawberries or lemons for extra flavor and visual appeal. This fizzy version is a delightful alternative to traditional lemonade, offering a modern spin on a classic favorite.

Storage and Safety Guidelines
Store Country Time Lemonade Mix in a cool, dry place; Ensure the container is tightly sealed. Check expiration dates for freshness and inspect for foreign particles before use.
Proper Storage of the Mix
Country Time Lemonade Mix should be stored in a cool, dry place to maintain its flavor and quality. Keep the container tightly sealed to prevent moisture exposure. Avoid direct sunlight and heat sources, as this can affect the mix’s texture and taste. If the mix is opened, it’s best to store it in an airtight container to preserve freshness. Refrigeration is not required unless the mix has been exposed to air for an extended period. Proper storage ensures the mix remains fresh and ready for use whenever needed.
Shelf Life and Expiration
The shelf life of Country Time Lemonade Mix typically ranges between 18 to 24 months when stored properly. The expiration date is printed on the packaging, ensuring freshness and quality. Proper storage in a cool, dry place away from moisture helps maintain its shelf life. If the mix is past its expiration date, it may lose flavor or clump. Always check for visible signs of spoilage before use. Additionally, due to recent recalls, verify the batch number to ensure the product is safe for consumption. Proper handling and storage are key to enjoying the mix at its best quality.
Safety Precautions and Allergen Information
Country Time Lemonade Mix is generally safe for consumption when prepared as directed. However, individuals with allergies should check the ingredient list for potential allergens like citric acid or preservatives. The product may contain traces of soy or other allergens due to manufacturing processes. Recently, there was a voluntary recall of certain powdered drink mixes, including Country Time, due to the possible presence of small metal or glass pieces. Always verify the product’s packaging for any recall notices and ensure proper storage in a cool, dry place. Keep out of reach of children and handle the mix with clean utensils to avoid contamination.

Nutritional Considerations
Country Time Lemonade Mix contains calories and sugar, making it a treat to consume in moderation. Check packaging for dietary needs and allergen information.
Calorie and Sugar Content
Country Time Lemonade Mix contains significant amounts of sugar, contributing to its sweet flavor. One serving (1 tablespoon mixed with 8 oz water) has approximately 70 calories and 17 grams of sugar. This makes it a treat that should be consumed in moderation. The mix is designed to dissolve easily in water, ensuring a consistent taste. However, for those monitoring sugar intake, portion control is essential. Additionally, recent recalls have highlighted the importance of checking product safety before consumption. Always verify the product’s condition and expiration date for optimal enjoyment.
Dietary Restrictions and Alternatives
Country Time Lemonade Mix contains soy and gluten, making it unsuitable for those with allergies. For low-sugar options, consider using natural sweeteners like stevia or monk fruit.
Vegan alternatives can be made by substituting traditional sweeteners with plant-based options. For gluten-free diets, ensure the mix aligns with your requirements.
Homemade lemonade using fresh lemons and minimal sugar offers a healthier alternative. Always check the ingredient list for allergens and modify recipes accordingly.
These adjustments allow everyone to enjoy lemonade while adhering to dietary preferences, ensuring inclusivity and safety for all consumers.

Recent Recalls and Safety Notices

Select Country Time Lemonade Mix batches were recalled due to potential metal or glass fragments. Kraft Heinz issued a voluntary recall for safety precautions.
Details of the Recall
Select Country Time Lemonade Mix, along with Kool-Aid, Tang, and Arizona Tea powdered drink mixes, were recalled due to potential contamination with small metal or glass fragments. Kraft Heinz issued this voluntary recall to ensure consumer safety. The affected products were distributed nationwide, prompting immediate action. Consumers are advised to check batch codes and expiration dates to identify recalled items. Any affected products should be discarded or returned for a refund. This precautionary measure underscores Kraft Heinz’s commitment to maintaining product quality and safety standards.
How to Check for Affected Products
To identify if your Country Time Lemonade Mix is part of the recall, check the batch number and expiration date on the packaging. Visit the Kraft Heinz website or contact their customer service for a list of affected batch numbers. Ensure the product is within the specified date range. If it matches, discard the product and seek a refund. Always verify the official recall list before consuming to ensure safety and compliance with the voluntary recall notice.

Creative Recipes Using Country Time Lemonade Mix
Explore beyond the pitcher with unique recipes like lemonade pie and refreshing punches. Combine mix with fresh fruit or sparkling water for exciting flavor twists easily.
- Lemonade Pie: A sweet, tangy dessert perfect for summer.
- Fruity Punch: Mix with juice and soda for a fizzy drink.
- Sparkling Lemonade: Add bubbles for a light, refreshing twist.
Country Time Lemonade Pie
A refreshing dessert, Country Time Lemonade Pie combines the tangy sweetness of lemonade with a creamy texture. Mix 1 cup of Country Time Lemonade Mix with 1 can of sweetened condensed milk and 1 cup of whipped topping. Pour the mixture into a pre-made graham cracker crust and refrigerate until set. This no-bake pie is perfect for summer gatherings or as a light dessert. Garnish with fresh fruit for added flavor and visual appeal. Its simplicity and quick preparation make it a crowd-pleasing treat for any occasion.
Lemonade Punch Recipes
Country Time Lemonade Mix is a versatile base for creating delicious and refreshing punch recipes. Start by combining 1 cup of Country Time Lemonade Mix with 2 cups of cold water and stir until dissolved. For added flavor, mix in a 46 oz can of pineapple juice. Add slices of fresh orange for a vibrant garnish. Serve chilled and enjoy as a perfect drink for gatherings or parties. This simple recipe yields 8 servings and requires minimal prep time, making it ideal for any occasion. Experiment with variations by incorporating sparkling water or fresh fruit for extra flair.
Troubleshooting Common Issues
Troubleshoot by adjusting sweetness with less mix or adding water for dilution. Ensure proper mixing to avoid clumping and achieve the perfect balance of flavor.
Why Your Lemonade Might Be Too Sweet
Your lemonade might be too sweet if you added more than the recommended 1 cup of mix per 3 cups of water. This over-sweetness can also occur if the mix wasn’t dissolved properly, leading to an uneven flavor distribution. Additionally, using very cold water might reduce the perceived tartness, making the sweetness more pronounced. To fix this, start by adding a little more water and taste as you go. Adjusting the mix-to-water ratio carefully ensures a balanced flavor.
Fixing Overly Diluted Lemonade
If your lemonade turns out too watery, there are easy fixes. Start by adding a small amount of Country Time Lemonade Mix, stirring well, and tasting until the flavor balances. For a sweeter touch, mix in a little sugar or honey. Adding fresh lemon juice can also enhance the citrus flavor. If the issue persists, reduce the water amount in future preparations. Experimenting with these adjustments ensures your lemonade is perfectly refreshing and flavorful every time.
- Add a small amount of mix gradually.
- Incorporate sugar or honey for sweetness.
- Stir in fresh lemon juice for extra zing.
Country Time Lemonade Mix is a classic and convenient choice for creating refreshing beverages at home. Its simple preparation and versatile flavor make it perfect for gatherings, picnics, or everyday enjoyment. While it offers a delicious taste, it’s important to consider nutritional content and safety guidelines. Recent recalls highlight the need to check product details before purchase. With creative recipes and troubleshooting tips, Country Time Lemonade Mix remains a popular and adaptable drink mix for many occasions.