Ballade Pour Adeline is a timeless instrumental piece composed by Paul de Senneville, dedicated to his daughter. Its sheet music remains a vital resource for pianists, offering insights into its emotional depth and intricate arrangements. The PDF format ensures accessibility, allowing musicians to study and perform this beloved ballad with precision and passion.
Overview of the Piece and Its Popularity
Ballade Pour Adeline is a captivating instrumental piece that has gained global acclaim for its emotional depth and soothing melody. Composed by Paul de Senneville, it was popularized by Richard Clayderman, becoming a staple in instrumental music. Its timeless appeal lies in its ability to evoke nostalgia and hope, resonating with listeners of all ages. The sheet music, widely available in PDF format, has further amplified its reach, allowing pianists worldwide to interpret and perform the piece. Its popularity endures, making it a cherished choice for concerts, weddings, and personal enjoyment, showcasing its universal emotional resonance and artistic significance.
Importance of Sheet Music in Understanding the Composition
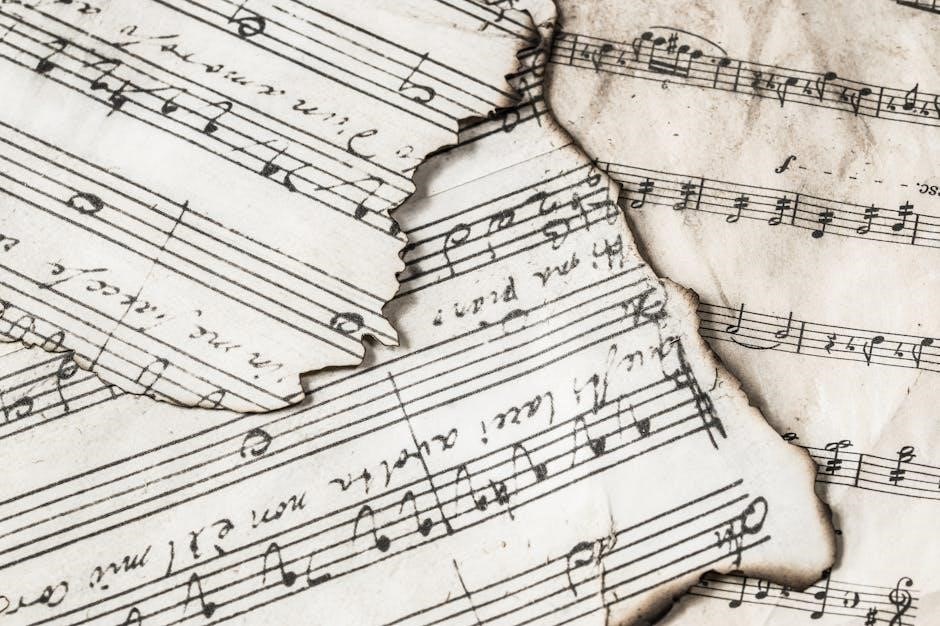
The sheet music for Ballade Pour Adeline is essential for pianists to fully grasp the composition’s nuances. It provides a detailed roadmap of the melody, harmony, and rhythm, allowing for precise interpretation. The PDF format ensures clarity and accessibility, making it easier to study the piece’s structure and emotional depth. Whether for practice or performance, the sheet music serves as a vital tool for mastering the ballad’s expressive qualities. Its availability in various arrangements, including piano solo and vocal versions, caters to diverse skill levels and preferences. By using reliable sheet music, musicians can ensure accuracy and respect for the composer’s original intent.

Historical Background of “Ballade Pour Adeline”
Ballade Pour Adeline was composed by Paul de Senneville in 1984 as a tribute to his daughter. Its elegant melody quickly gained global recognition, becoming a timeless classic.
Composer Paul de Senneville and His Inspiration
Paul de Senneville, a renowned French composer, crafted Ballade Pour Adeline in 1984 as a heartfelt tribute to his newborn daughter, Adeline. This piece reflects his deep paternal love and emotional depth. Senneville’s inspiration stemmed from the joy of fatherhood, creating a melody that resonates universally. The composition’s gentle, flowing structure showcases his mastery in evoking emotions through music. Ballade Pour Adeline became an instant classic, celebrated for its simplicity and beauty, making it a cherished piece for pianists worldwide.

The Role of Richard Clayderman in Popularizing the Piece
Richard Clayderman, a celebrated French pianist, played a pivotal role in popularizing Ballade Pour Adeline. His emotive rendition of Paul de Senneville’s composition brought the piece to global acclaim, making it a beloved instrumental classic. Clayderman’s interpretation, with its delicate nuances and expressive phrasing, captured the hearts of millions, elevating the ballad to international fame. His performance not only introduced the piece to a broader audience but also solidified its place in contemporary instrumental music. Clayderman’s collaboration with de Senneville marked a turning point, transforming Ballade Pour Adeline into a timeless masterpiece cherished by pianists and music lovers worldwide.

Structure and Arrangement of the Sheet Music
The sheet music for Ballade Pour Adeline is meticulously arranged, offering clear notation for piano solos and optional vocal or instrumental accompaniments. Its detailed structure ensures accessibility for musicians of all skill levels, providing a harmonious blend of melody and harmony that enhances the emotional impact of the piece.
Piano Solo Arrangement Details
The piano solo arrangement of Ballade Pour Adeline is beautifully crafted, featuring a flowing melody in the right hand accompanied by harmonic chord progressions in the left. The sheet music is presented in a clear, readable format, making it accessible for pianists of various skill levels. High-quality PDF versions ensure precise notation, allowing for accurate interpretation. Many arrangements include dynamics, tempo markings, and phrasing guides, which help musicians convey the piece’s emotional depth. Some versions also offer interactive features, enabling players to adjust keys or practice sections selectively. This arrangement remains a popular choice for both performance and personal enjoyment.
Vocal and Instrumental Arrangements Available
Beyond the piano solo, Ballade Pour Adeline is available in various vocal and instrumental arrangements, catering to diverse musical preferences. Vocal arrangements often include lyrics and chord frames, while instrumental versions feature adaptations for guitar, strings, and winds. Some editions offer fake books with chords and lead sheets, ideal for improvisation. Additionally, transposable PDFs allow musicians to adjust the key to suit their range or instrument. These arrangements ensure that the piece’s timeless beauty can be enjoyed by a wide range of performers, from solo artists to ensembles. The availability of such diverse formats highlights the composition’s versatility and enduring appeal.
Downloading and Accessing the Sheet Music
Easily access Ballade Pour Adeline sheet music in PDF or MIDI formats online. Free and official sources offer various arrangements, ensuring quality and convenience for musicians worldwide.
Free PDF Sources and Their Reliability
Free PDF sources for Ballade Pour Adeline sheet music are widely available online, with platforms like MuseScore and Scribd offering high-quality downloads. However, reliability varies, as some files may lack proper formatting or licensing. While these sources provide convenient access, they often bypass copyright protections, raising legal concerns. Users should verify the authenticity and completeness of free PDFs to ensure accuracy. Official platforms, despite requiring purchase, guarantee legal compliance and superior quality. For casual use, free sources suffice, but professionals are advised to opt for licensed versions to support creators and maintain ethical standards. Always prioritize verified sites to avoid unauthorized distributions.
Official Platforms for Purchasing the Sheet Music
Official platforms like Musicnotes and Sheet Music Plus offer high-quality, legally licensed PDFs of Ballade Pour Adeline. These platforms ensure accurate arrangements and support creators. They provide various versions, including piano solo and vocal arrangements, catering to different skill levels. Purchasing from these sites guarantees genuine sheet music, free from formatting issues common in free downloads. Some platforms also offer interactive and transposable versions, enhancing versatility for musicians. By choosing official sources, users not only access reliable sheet music but also contribute to the sustainability of musical creation. These platforms are recommended for professionals and enthusiasts seeking precise and legally compliant materials.

Legal and Copyright Considerations
The copyright of Ballade Pour Adeline is owned by Coronet-Delphine, Inc., requiring legal purchase or licensing for use. Unauthorized distribution or use constitutes copyright infringement, leading to legal consequences. Always obtain sheet music from authorized platforms to ensure compliance and avoid penalties.
Understanding Licensing and Usage Rights
The sheet music for Ballade Pour Adeline is protected under copyright laws, with rights owned by Coronet-Delphine, Inc. Licensing is managed by Ivan Mogul Music Corporation, ensuring legal distribution. Users must obtain proper licenses for public performance, reproduction, or commercial use. Unauthorized sharing or use without a license violates copyright laws, leading to legal consequences. Licensing ensures fair compensation for the composer and publishers while adhering to intellectual property rights. Always verify the source and licensing terms when accessing the sheet music to avoid infringement. Proper licensing also supports the creation of future musical works by ensuring creators are fairly compensated for their work.
Consequences of Using Pirated Sheet Music
Using pirated sheet music for Ballade Pour Adeline violates copyright laws, potentially leading to legal consequences such as fines or lawsuits. Piracy deprives composers and publishers of fair compensation, undermining their ability to create future works. Legal action may also result in financial penalties and damage to one’s reputation. Additionally, pirated versions often lack quality, with missing or incorrect notes that hinder proper performance. Supporting official sources ensures both legal compliance and the integrity of the music. Always prioritize purchasing or downloading from licensed platforms to avoid these risks and contribute to the sustainability of musical creation and distribution.
Tips for Playing “Ballade Pour Adeline”
Mastering Ballade Pour Adeline requires attention to tempo and dynamics. Start with a slow, emotional pace, gradually building intensity. Practice arpeggios and chord progressions to ensure smooth transitions. Focus on maintaining a delicate, expressive touch to capture the piece’s heartfelt essence. Regular practice will refine your interpretation, allowing you to convey the deep emotion embedded in the composition. Emphasize phrasing and control to create a captivating performance that resonates with listeners. This approach will help you deliver a rendition that honors the piece’s beauty and significance. Dedication and patience are key to mastering this beloved ballad.
Techniques for Beginners to Master the Piece
Beginners can master Ballade Pour Adeline by breaking it into manageable sections. Start with a slow tempo to build confidence and dexterity. Focus on chord progressions and arpeggios, as they form the piece’s foundation. Practice finger independence exercises to navigate complex passages smoothly. Use a metronome to maintain steady timing and rhythm. Emphasize expressive touches, such as legato playing and subtle rubato, to convey emotion. Break down difficult measures and practice them repeatedly before combining sections; Regular practice, even in short sessions, will help refine technique and familiarity with the piece. Pay attention to dynamics and phrasing to capture the composition’s emotional depth. Patience and consistent effort will allow beginners to gradually master this beautiful ballad.
Advanced Interpretations and Variations
Advanced pianists can explore intricate reinterpretations of Ballade Pour Adeline by experimenting with dynamic contrasts and nuanced phrasing. Tempo rubato and expressive articulations add emotional depth. Transcribing for other instruments or ensembles offers unique arrangements, while modern elements like electronic layers or world music influences provide fresh perspectives. Digital tools enable innovative variations through multi-track recording or MIDI editing, allowing precise control. These explorations expand the piece’s boundaries, showcasing technical prowess and creative vision, ensuring its relevance across musical landscapes.
Ballade Pour Adeline sheet music remains a timeless, globally cherished piece, offering accessible PDF formats for pianists of all levels, inspiring emotional performances and enduring musical appreciation.
Final Thoughts on the Sheet Music and Its Significance
Ballade Pour Adeline sheet music holds a special place in the hearts of pianists and music enthusiasts worldwide. Composed by Paul de Senneville, this piece transcends generations with its emotional depth and timeless beauty. The availability of PDF and MIDI formats has made it accessible to a global audience, allowing pianists of all skill levels to connect with its melody. Whether for personal enjoyment or professional performance, the sheet music serves as a bridge between the composer’s vision and the interpreter’s artistry. Its enduring popularity underscores its universal appeal, making it a cherished part of musical heritage.