Discover the charm of cross back apron patterns‚ a stylish and practical design perfect for sewing enthusiasts. These Japanese-inspired aprons are easy to make and offer a comfortable fit. Ideal for cooking or gardening‚ they provide durability and a trendy look. Find free PDF patterns online to create your own customizable apron.
What is a Cross Back Apron?
A cross back apron is a stylish and functional design featuring crisscross straps that create a secure and comfortable fit. Popularized as a Japanese-style apron‚ it offers a sleek look with its overlapping straps at the back. Perfect for both adults and children‚ this apron is known for its ease of use and versatility. The design often includes a reversible option‚ allowing for two different looks in one garment. Ideal for cooking‚ gardening‚ or crafting‚ the cross back apron provides excellent coverage and durability. Its simple yet elegant design makes it a favorite among sewers of all skill levels. With free PDF patterns widely available‚ creating your own cross back apron is an accessible and rewarding project.

Why Choose a Cross Back Apron Pattern?
A cross back apron pattern is a fantastic choice for sewers due to its unique design and practical benefits. The crisscross straps provide a comfortable and secure fit‚ eliminating the need for neck straps‚ which can be restrictive. This design is perfect for individuals who value both style and functionality. The apron is versatile‚ suitable for cooking‚ baking‚ gardening‚ or even as a gift. Its simplicity makes it an excellent project for beginners‚ while its customization options appeal to experienced sewers. Additionally‚ the availability of free PDF patterns ensures accessibility for everyone. The reversible feature of many cross back aprons adds extra value‚ offering two distinct looks in one garment. Overall‚ this pattern combines comfort‚ elegance‚ and practicality‚ making it a popular choice for various sewing projects.
Where to Find Free Cross Back Apron PDF Patterns

Find free cross back apron PDF patterns on various sewing websites. These patterns are easily downloadable and suitable for different skill levels. They offer versatile designs and sizes‚ perfect for any project.

Popular Websites for Free Apron Patterns
Several websites offer free cross back apron PDF patterns‚ perfect for sewing enthusiasts; Hey June and PorcupinePatterns.com provide high-quality‚ downloadable designs. Craftsy and Pinterest are great resources for tutorials and inspiration. These sites cater to all skill levels‚ ensuring a seamless sewing experience. Many patterns are customizable‚ allowing you to personalize your apron with pockets‚ straps‚ or unique fabrics. Some websites also include video guides and step-by-step instructions‚ making it easier to follow along. Whether you’re a beginner or an experienced sewer‚ these platforms offer a wide variety of styles and sizes to suit your needs. Explore these websites to find the perfect pattern for your next project and create a functional yet stylish apron.
How to Download and Print the PDF Pattern
Downloading and printing a cross back apron PDF pattern is straightforward. Visit websites like Hey June or PorcupinePatterns.com‚ where free patterns are available. Locate the pattern‚ click the download link‚ and save the PDF to your device. Ensure your printer is set to “Actual Size” or “100%” scale to maintain accuracy. Print the pattern on standard paper or cardstock for durability. If the pattern is split into multiple pages‚ assemble it by matching the alignment marks. Cut out the fabric pieces according to the template. Some patterns may include layers or optional features‚ so review the instructions carefully. Once printed‚ you’re ready to begin sewing your cross back apron.

Materials and Tools Needed
Gather 1-2 yards of durable fabric like cotton or linen. Essential tools include a sewing machine‚ scissors‚ pins‚ a measuring tape‚ and a seam ripper. Thread matching your fabric is also required.
Fabric Requirements for the Apron
For a cross back apron‚ choose durable‚ breathable fabrics like cotton‚ linen‚ or rayon. Cotton is ideal for its strength and ease of care‚ while linen offers a rustic‚ textured look. Rayon blends provide softness and drape. Consider the season: heavier fabrics like canvas or denim are great for winter‚ while lighter options like voile or chambray are perfect for spring and summer. Ensure the fabric is pre-washed to avoid shrinkage after sewing. For a reversible apron‚ select two complementary fabrics. Measure and cut accurately‚ using the pattern’s guidelines for yardage‚ typically 1-2 yards depending on the design. Choose a fabric that matches your lifestyle and desired aesthetic‚ ensuring comfort and functionality for cooking‚ gardening‚ or crafting. Always coordinate thread color with your fabric for a polished finish.
Essential Sewing Tools and Supplies
To sew a cross back apron‚ gather basic sewing tools and supplies. Start with a sewing machine‚ sharp fabric scissors‚ and straight pins for precise fabric alignment. A measuring tape or ruler ensures accurate cuts‚ while a seam ripper helps correct mistakes. An iron and ironing board are crucial for pressing seams and creating crisp folds. Use thread that matches your fabric color for a seamless look. Additionally‚ have a few hand-sewing needles on hand for any small repairs or details. Optional supplies include a zipper or Velcro for adjustable straps and a serger for finishing raw edges professionally. Organize your workspace with a cutting mat and rotary cutter for efficient fabric preparation. These tools will help you craft a high-quality‚ durable apron tailored to your needs.

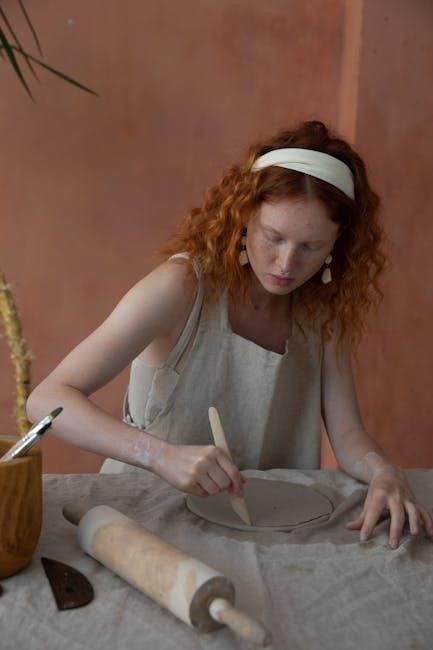
How to Sew a Cross Back Apron
Cutting fabric‚ sewing straps‚ and attaching pockets are key steps. Hem edges‚ assemble the apron body‚ and secure straps for a durable finish. Follow a pattern or tutorial for guidance.
Step-by-Step Sewing Instructions
To sew a cross back apron‚ start by gathering your materials and printing the free PDF pattern. Cut out the fabric pieces according to the pattern‚ ensuring accurate measurements. Sew the apron body together‚ leaving openings for turning. Hem the edges for a clean finish. Next‚ create the crisscross straps by sewing two fabric strips together and turning them right side out. Attach the straps to the apron body at the designated points‚ ensuring they are secure. Add pockets if desired‚ sewing them in place before assembling the apron. Finally‚ topstitch all seams for durability and a professional look. Follow the pattern instructions for specific details‚ and customize as needed for a personalized touch.

Customizing Your Apron: Tips and Ideas
Customizing your cross back apron allows you to add a personal touch. Choose vibrant fabrics or seasonal prints to match your style. Add pockets of varying sizes for practicality or decorative accents like embroidery. Adjustable straps ensure a perfect fit for any wearer. Consider a reversible design for versatility‚ offering two looks in one apron. For a unique flair‚ incorporate contrasting thread colors or appliqué designs. You can also personalize the apron with a name or message‚ making it a thoughtful gift. Experiment with different textures‚ such as linen or cotton blends‚ for a professional or casual look. These customizations enhance functionality and aesthetics‚ making your apron truly one-of-a-kind.
Making a cross back apron is a fun and rewarding sewing project that combines style with functionality. With free PDF patterns readily available‚ you can create a customizable apron tailored to your preferences. Whether you’re cooking‚ gardening‚ or crafting‚ this design offers comfort and practicality. The Japanese-inspired cross-back straps provide a secure fit‚ while the simple construction makes it accessible for sewists of all skill levels. By choosing your own fabrics and adding personal touches‚ you can create a unique apron that reflects your personality. This project is not only useful but also makes a thoughtful gift. With these patterns‚ you can enjoy the satisfaction of creating something beautiful and functional for yourself or loved ones.