The Tortoise and the Hare: A Comprehensive Guide & PDF Resources (Updated 02/27/2026)
Discover readily available PDF versions of “The Tortoise and the Hare,” including illustrated editions from PUSAT SUMBER SKKP2 and Nathasa Wongjukkam’s adaptation․
Explore resources like the 20-page flip PDF, offering a classic retelling, alongside educational materials perfect for children’s literature studies․
Download and share these free PDFs, enriching learning experiences with this timeless fable, as of today, February 27th, 2026․
“The Tortoise and the Hare” stands as one of the most universally recognized fables, a cornerstone of children’s literature and moral instruction․ Its enduring appeal lies in its simple yet profound message about the virtues of perseverance and the dangers of overconfidence․ The story, readily available in numerous PDF formats today – including versions from PUSAT SUMBER SKKP2 and adaptations by Nathasa Wongjukkam – recounts a race between an arrogant, swift hare and a determined, slow tortoise;
Originating from ancient Greek storytelling traditions, the fable has been retold and reinterpreted across cultures for centuries․ Modern PDF resources offer both classic versions and contemporary adaptations, making the tale accessible to a wide audience․ These digital versions often include vibrant illustrations, enhancing the reading experience for young learners․ The core narrative centers on the hare’s boastful nature and subsequent complacency, leading to an unexpected victory for the steadfast tortoise․
Exploring these PDF resources reveals the fable’s consistent theme: slow and steady wins the race․ The story serves as a powerful reminder that consistent effort and humility are often more valuable than natural talent and arrogance․
The Core Moral of the Story
At its heart, “The Tortoise and the Hare” delivers a potent moral lesson: consistent, diligent effort triumphs over arrogance and fleeting speed․ Numerous PDF versions of the fable, easily accessible online, reinforce this message through the narrative of the determined tortoise and the overconfident hare․ The hare’s initial lead and subsequent nap symbolize the pitfalls of complacency, while the tortoise’s unwavering pace embodies the power of perseverance․
The story, often found in illustrated PDF formats for children, isn’t simply about speed; it’s about dedication and focus․ It cautions against underestimating others and highlights the importance of humility․ Resources like those from PUSAT SUMBER SKKP2 and adaptations by Nathasa Wongjukkam, available as PDF downloads, consistently emphasize this central theme․
Ultimately, the fable teaches that success isn’t guaranteed by innate ability, but rather by sustained effort and a refusal to give up, even when facing seemingly insurmountable odds․ The readily available PDF resources ensure this timeless lesson continues to resonate with readers of all ages․
Historical Context of the Fable
Tracing the origins of “The Tortoise and the Hare” reveals a history steeped in ancient storytelling traditions․ While often attributed to Aesop, variations of the tale predate his formalized fables, existing in oral traditions for centuries․ Numerous PDF versions available today demonstrate the story’s enduring appeal and adaptability across cultures․
Early iterations likely served as moral instruction, emphasizing the virtues of perseverance and humility․ The widespread availability of the fable in PDF format, including adaptations like those from PUSAT SUMBER SKKP2 and Nathasa Wongjukkam, speaks to its continued relevance in educational settings․ The story’s simplicity and clear moral message facilitated its transmission and adaptation․
Throughout history, the fable has been reinterpreted and retold, appearing in various literary and artistic forms․ Modern PDF resources showcase these diverse adaptations, highlighting the story’s ability to resonate with contemporary audiences while retaining its core message․ Its longevity confirms its status as a classic piece of moral literature․

Understanding the Characters
Explore the contrasting personalities of the Hare and Tortoise through various PDF adaptations, revealing the Hare’s boastfulness and the Tortoise’s quiet determination․
Discover how these characters embody symbolic meanings, readily available in downloadable PDF resources․
The Hare: Personality and Traits
The Hare, as depicted in numerous PDF versions of the fable, consistently embodies arrogance and overconfidence․ He’s characterized by a boastful nature, frequently proclaiming his speed and dismissing the Tortoise’s capabilities – “Im the fastest animal of all!” is a common refrain found within these downloadable stories․
PDF adaptations highlight the Hare’s tendency towards carelessness and a lack of focus․ His belief in his inherent superiority leads to a critical error: taking a nap mid-race, assuming victory is guaranteed․ This demonstrates a significant flaw in his character – a disregard for consistent effort and a reliance on natural talent alone․
Furthermore, the Hare’s personality, as presented in resources like those from PUSAT SUMBER SKKP2 and Nathasa Wongjukkam, reveals a degree of disrespect towards his competitor․ He doesn’t take the Tortoise seriously, viewing the race as a mere amusement rather than a genuine challenge․ This ultimately contributes to his downfall, vividly illustrated in the PDF versions of the tale․
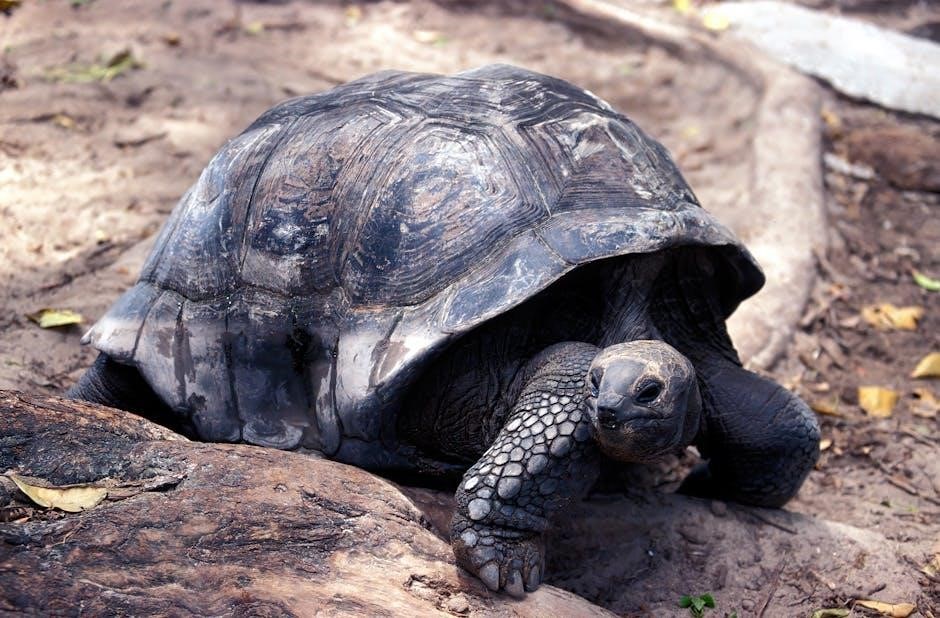
The Tortoise: Personality and Traits
The Tortoise, consistently portrayed across various PDF versions of the fable, embodies perseverance and humility․ Unlike the Hare’s boastfulness, the Tortoise is described as quiet and kind, accepting the challenge without arrogance․ PDF resources, such as those available for download, emphasize his unwavering determination․
Central to the Tortoise’s character, as illustrated in adaptations by authors like Nathasa Wongjukkam, is his steadfast commitment to completing the race, regardless of his perceived disadvantage․ He doesn’t underestimate the Hare, but focuses solely on maintaining a steady pace, a trait repeatedly highlighted in the downloadable stories․
Moreover, the PDF versions showcase the Tortoise’s lack of discouragement․ He doesn’t allow the Hare’s speed or taunts to deter him, demonstrating remarkable resilience․ This quiet strength ultimately leads to his unexpected victory, a powerful message conveyed through the numerous illustrated PDFs available online․
Symbolism of the Hare
The Hare, frequently depicted in PDF versions of “The Tortoise and the Hare,” symbolizes arrogance and the dangers of overconfidence․ His speed, a prominent feature in illustrated PDFs, represents natural talent squandered through complacency․ He believes victory is assured, leading to his fatal mistake – a leisurely nap․
Across various adaptations, including those found as downloadable files, the Hare embodies the pitfalls of underestimating opponents․ His boastful nature, often highlighted in the text of these PDF resources, demonstrates a lack of respect for the Tortoise’s determination․
Furthermore, the Hare’s character, as presented in resources like PUSAT SUMBER SKKP2’s publication, serves as a cautionary tale․ The PDFs illustrate how relying solely on innate ability, without consistent effort, can lead to failure, even for those with significant advantages․ His symbolism remains potent in modern interpretations․
Symbolism of the Tortoise
The Tortoise, consistently portrayed in “The Tortoise and the Hare” PDFs, embodies perseverance, dedication, and the power of consistent effort․ Despite lacking the Hare’s natural speed, as visually depicted in illustrated PDF versions, he achieves victory through unwavering commitment․
Throughout various adaptations available as downloadable files, the Tortoise symbolizes the triumph of slow and steady progress over fleeting brilliance․ His quiet determination, often emphasized in the narrative within these PDF resources, highlights the importance of discipline and focus․
Moreover, the Tortoise, as presented in publications like those by Nathasa Wongjukkam, represents humility and a lack of arrogance․ The PDFs demonstrate that success isn’t solely dependent on inherent talent, but also on a steadfast spirit․ His symbolism resonates deeply, offering a valuable life lesson․
Exploring Different Versions & Adaptations
Discover diverse retellings of “The Tortoise and the Hare” in readily available PDF formats, from classic Aesop’s versions to modern interpretations and illustrated editions․
Early Origins and Variations of the Tale
Tracing the fable’s roots reveals a history extending beyond the well-known Aesop’s version, with early iterations appearing in various cultures and oral traditions․ While pinpointing a singular origin proves challenging, similar narratives emphasizing the virtues of perseverance and the dangers of overconfidence surface across ancient literature․
PDF resources showcasing these early forms are somewhat limited, often appearing as excerpts within larger collections of folklore․ However, scholarly articles, frequently available as PDF downloads, detail comparative analyses of the tale’s evolution․
Notably, variations exist in the specific animals involved; some cultures feature different creatures embodying the same contrasting traits․ The core message, however, remains consistent: slow and steady wins the race․ Digitized versions of ancient texts, accessible as PDFs, offer glimpses into these nuanced adaptations, revealing how the story resonated with different societies throughout history․
Exploring these early forms enriches our understanding of the fable’s enduring appeal․
Aesop’s Fable: The Classic Version
Aesop’s rendition of “The Tortoise and the Hare” remains the most widely recognized iteration, frequently found in children’s literature and readily available as a PDF download․ This version centers on the boastful hare, confident in his speed, and the determined tortoise, accepting the challenge despite his slowness․
Numerous PDF versions cater to young readers, featuring vibrant illustrations and simplified language․ These often include moral lessons explicitly stated, reinforcing the fable’s central theme․ The story details the hare’s mid-race nap, born of overconfidence, allowing the tortoise to steadily overtake him․
Digital libraries and educational websites offer free PDF copies, alongside interactive versions․ Examining these PDFs reveals consistent narrative elements: the initial challenge, the hare’s arrogance, the tortoise’s persistence, and the surprising outcome․ The tale’s simplicity and clear moral contribute to its enduring popularity and accessibility in PDF format․
It is a cornerstone of fable collections․
Modern Retellings and Interpretations
Contemporary adaptations of “The Tortoise and the Hare” extend beyond the classic Aesop’s tale, often available as downloadable PDFs․ These versions frequently explore themes of perseverance, humility, and the dangers of complacency with fresh perspectives․
Many PDF retellings incorporate diverse characters and settings, updating the fable for modern audiences․ Some focus on the hare’s internal struggles with pride, while others emphasize the tortoise’s strategic approach to the race․ These interpretations are often found in educational resources and children’s story collections in PDF format․
Digital platforms host creative PDF versions, including comic book adaptations and illustrated stories designed to engage young readers․ These modern takes often maintain the core moral while adding layers of complexity․ Searching online yields numerous PDFs showcasing these innovative retellings, demonstrating the fable’s continued relevance and adaptability․
They offer new insights into the story․
Finding & Utilizing PDF Resources
Locate “The Tortoise and the Hare” PDFs on platforms like FlipPDF, PUSAT SUMBER SKKP2, and through general web searches for free downloads․
Utilize these PDFs for educational purposes, enjoying illustrated versions and classic retellings readily available online today․
Where to Download “The Tortoise and the Hare” PDFs
Numerous online resources offer downloadable PDF versions of “The Tortoise and the Hare․” A prominent platform is FlipPDF, showcasing at least one readily accessible version of the fable for free viewing and download․
Additionally, PUSAT SUMBER SKKP2 provides a 20-page PDF adaptation, easily found through a quick online search․ Exploring general search engines with keywords like “Tortoise and Hare PDF,” “Aesop’s Fables PDF,” or “Children’s Story PDF” will yield a variety of results, including potentially illustrated editions and versions tailored for different age groups․
Remember to exercise caution when downloading from unfamiliar websites, ensuring the source is reputable to avoid malware․ Many educational websites and online libraries also host classic fables in PDF format, offering safe and reliable access to this beloved story․
Consider checking online bookstores as they sometimes offer free PDF samples or complete versions of children’s books, including “The Tortoise and the Hare․”
PDFs for Educational Purposes (Children’s Literature)
Several PDF versions of “The Tortoise and the Hare” are specifically suited for educational use in children’s literature․ The fable’s simple narrative and clear moral make it ideal for early reading comprehension exercises and discussions about perseverance and humility․
Resources like those found on FlipPDF and PUSAT SUMBER SKKP2 offer visually engaging versions, enhancing the learning experience for young readers․ These PDFs often feature larger fonts and simplified language, catering to different reading levels․
Teachers and parents can utilize these resources for story time, reading assignments, or as a springboard for creative writing activities․ The story lends itself well to discussions about character traits, plot development, and the importance of effort over arrogance․
Furthermore, searching for “Aesop’s Fables for Kids PDF” will uncover collections containing “The Tortoise and the Hare” alongside other valuable moral tales, providing a comprehensive resource for character education․
PDFs with Illustrations and Visual Aids
Numerous PDF versions of “The Tortoise and the Hare” prioritize visual learning through vibrant illustrations․ These resources, readily available on platforms like FlipPDF, significantly enhance engagement for younger audiences, bringing the classic fable to life․
Illustrated PDFs often depict key moments in the story – the hare’s boastful sprint, his confident nap, and the tortoise’s determined progress – aiding comprehension and retention․ The visual aids help children visualize the narrative and connect with the characters․
Educational resources from sources like PUSAT SUMBER SKKP2 frequently include detailed artwork, making the story more appealing and accessible․ These illustrations aren’t merely decorative; they actively contribute to the storytelling process․
Searching for “The Tortoise and the Hare illustrated PDF” yields a wealth of options, ranging from simple line drawings to full-color depictions, catering to diverse preferences and learning styles․ These visually rich resources are invaluable for educators and parents;
Analyzing the Race Itself
The race began with an agreement, the hare’s overconfidence leading to a crucial nap, while the tortoise’s steady pace secured victory, as detailed in PDFs․
The Initial Challenge and Agreement
The story, readily available in PDF format from sources like PUSAT SUMBER SKKP2 and Nathasa Wongjukkam’s adaptation, centers around the hare’s boastful claim of unmatched speed․
He openly mocked the tortoise, declaring his inability to ever win a race, prompting the surprisingly resolute tortoise to issue a challenge․
This audacious proposition, detailed within the downloadable PDFs, stunned the hare, who readily accepted, underestimating his slower competitor․
The agreement established a clear course, with animals gathering to witness the unlikely contest, as illustrated in various PDF versions․
The hare, brimming with arrogance, anticipated an easy victory, while the tortoise quietly prepared for a test of endurance, documented in the fable’s PDFs․
This initial exchange sets the stage for a compelling narrative about perseverance and the dangers of complacency, beautifully captured in these accessible PDF resources․
The Hare’s Overconfidence and Nap
As depicted in the readily available PDF versions of “The Tortoise and the Hare,” the hare swiftly took a commanding lead, reinforcing his belief in an effortless win․
Consumed by overconfidence, and as the story unfolds in the PDFs from sources like PUSAT SUMBER SKKP2, he decided to take a leisurely nap midway through the race․
He reasoned that the tortoise’s slow pace afforded him ample time for rest, a critical error in judgment highlighted in Nathasa Wongjukkam’s PDF adaptation․
The hare, lulled into a false sense of security, underestimated the tortoise’s unwavering determination, a key theme within the fable’s PDF resources․
This moment of complacency, vividly illustrated in some PDF editions, proved to be his downfall, allowing the tortoise to steadily close the gap․
The hare’s nap, a pivotal point in the narrative, serves as a cautionary tale against arrogance, powerfully conveyed through these accessible PDF materials․
The Tortoise’s Steady Progress
Throughout the race, as detailed in the various “Tortoise and the Hare” PDFs, the tortoise maintained a consistent, albeit slow, pace, embodying perseverance․
Unlike the hare, whose speed fluctuated, the tortoise’s unwavering commitment to forward motion is a central theme in the fable, clearly shown in PDF versions․

The PDF adaptation by Nathasa Wongjukkam and resources from PUSAT SUMBER SKKP2 emphasize the tortoise’s quiet determination, a stark contrast to the hare’s boastfulness․
He didn’t allow the hare’s initial lead to discourage him, continuing his journey with unwavering focus, a lesson powerfully illustrated in these PDF materials․
This consistent effort, often depicted visually in illustrated PDFs, allowed him to gradually gain ground while the hare rested, changing the race’s dynamic․
The tortoise’s steady progress serves as a testament to the power of persistence, a moral effectively communicated through the accessible and engaging PDF resources․
The Finish Line and the Outcome
As depicted in numerous “Tortoise and the Hare” PDFs, the hare, awakened by the cheering crowd, discovered the tortoise nearing the finish line․
The PDF versions, including those from PUSAT SUMBER SKKP2 and Nathasa Wongjukkam’s adaptation, vividly portray the hare’s shock and dismay at this unexpected turn․
Despite his superior speed, the hare’s overconfidence and mid-race nap resulted in a stunning victory for the tortoise, a key lesson in the fable․
The animals erupted in joyous celebration, shouting “Hooray!” as the tortoise crossed the finish line, a scene frequently illustrated in PDF resources․
These PDFs consistently highlight the moral of the story: slow and steady wins the race, emphasizing the importance of perseverance over arrogance․
The outcome, clearly presented in these accessible PDF materials, serves as a timeless reminder that consistent effort triumphs over fleeting bursts of speed․

The Tortoise and the Hare in Popular Culture
Numerous PDF versions of the tale demonstrate its enduring legacy, appearing in literature and film adaptations for generations․
The fable’s impact is evident in common idioms, reinforcing the “slow and steady” principle, readily available in PDF format․
References in Literature and Film
The enduring appeal of “The Tortoise and the Hare” extends far beyond its original form, permeating various facets of literature and film․ Numerous adaptations, often available as downloadable PDF resources, showcase the fable’s adaptability across different media․
From children’s storybooks featuring vibrant illustrations – easily found in PDF format – to animated shorts and even subtle allusions in larger cinematic works, the core message resonates․ The tale frequently serves as a metaphorical touchstone, representing the triumph of perseverance over arrogance․

Specifically, the story’s themes are echoed in narratives where underdogs overcome seemingly insurmountable odds․ Many PDF compilations of classic fables include “The Tortoise and the Hare,” solidifying its place in literary canons․ The story’s simplicity allows for easy reinterpretation, making it a popular choice for educational materials, often distributed as free PDF downloads․
Furthermore, the characters themselves – the boastful hare and the determined tortoise – have become archetypes, frequently referenced in contemporary storytelling․ Finding these references often begins with accessing the original fable in convenient PDF versions․
The Fable’s Impact on Language (Idioms)
“The Tortoise and the Hare” has profoundly impacted the English language, giving rise to several enduring idioms; The most prominent, “slow and steady wins the race,” encapsulates the fable’s central moral, frequently appearing in motivational contexts․
This phrase, readily found within summaries of the story available as PDF downloads, emphasizes the value of consistent effort over fleeting bursts of speed․ Another related idiom, “hare-brained,” describes someone impulsive or reckless, directly referencing the hare’s overconfidence․
The story’s influence extends to expressions highlighting the dangers of complacency․ Accessing the fable in PDF format often reveals discussions about the hare’s fatal flaw – underestimating his opponent․ These linguistic remnants demonstrate the fable’s lasting cultural relevance․

Moreover, the tale serves as a cautionary reminder against arrogance, a theme consistently reinforced in various PDF adaptations and analyses․ The enduring power of these idioms proves the fable’s continued resonance in everyday communication․
The Story’s Relevance Today
“The Tortoise and the Hare” remains remarkably relevant in today’s fast-paced world, offering valuable lessons applicable to various aspects of life․ The fable, easily accessible in numerous PDF versions, underscores the importance of perseverance and dedication, qualities often overshadowed by the pursuit of instant gratification․
In a society that often celebrates quick wins, the story serves as a potent reminder that consistent effort, like the tortoise’s steady pace, ultimately leads to success․ Many PDF resources highlight this message for children, fostering a growth mindset․
Furthermore, the tale cautions against overconfidence and complacency, traits that can hinder progress․ Examining the story through PDF analyses reveals its applicability to fields like business, sports, and personal development․
The enduring popularity of “The Tortoise and the Hare,” evidenced by its continued presence in digital formats like PDFs, confirms its timeless wisdom and universal appeal, making it a story for all generations․