
Canon in C sheet music PDF for practice and performance, appreciating its elegant simplicity mixed with complexity. Its widespread popularity ensures availability in diverse formats, making it accessible to all.
What is the Canon in C?
The Canon in C is one of Johann Pachelbel’s most celebrated compositions, known for its timeless melody and harmonic depth. Often performed as a piano solo, it is celebrated for its elegant structure and emotional resonance. The composition revolves around a repeating bass line, harmonically enriched with counterpoint, creating a< i> sense of balance and warmth.
Its distinctive melody and harmonies have made it a favorite among pianists and music enthusiasts. This piece, typically written in 3/4 time, features a flowing sixteenth-note pattern, adding complexity to its seemingly simple framework. The Canon in C is often associated with classical music education, offering pianists a chance to explore intricate harmonic analysis and melodic development.
Available in various formats, including piano sheet music PDF, the piece is widely accessible for practice and performance. Its adaptability allows for numerous variations and arrangements, making it a versatile piece for different settings.
The Historical Background of the Canon
The Canon in C is a composition by Johann Pachelbel, a prominent Baroque composer known for his contributions to music theory and composition. While often confused with his more famous “Canon and Gigue in D major,” the “Canon in C” holds its own significance in the realm of classical music. Composed during the late Baroque period, around the late 17th century, this piece exemplifies the era’s preference for counterpoint and complex harmonies.
Originally written for three violins and a continuo, the Canon in C has since been adapted for various instruments, including solo piano. This adaptation, available in piano sheet music PDF formats, allows pianists to explore the piece’s intricate melodies and harmonies. The creation of piano versions required meticulous arranging to preserve the original structure and essence of the composition.
The piece’s enduring popularity can be attributed to its timeless appeal and accessibility. Its use in weddings and popular culture highlights its universal appeal, likely due to its melodic simplicity and emotional resonance. This adaptability has contributed to its lasting legacy, making it a staple in classical music education and performance.
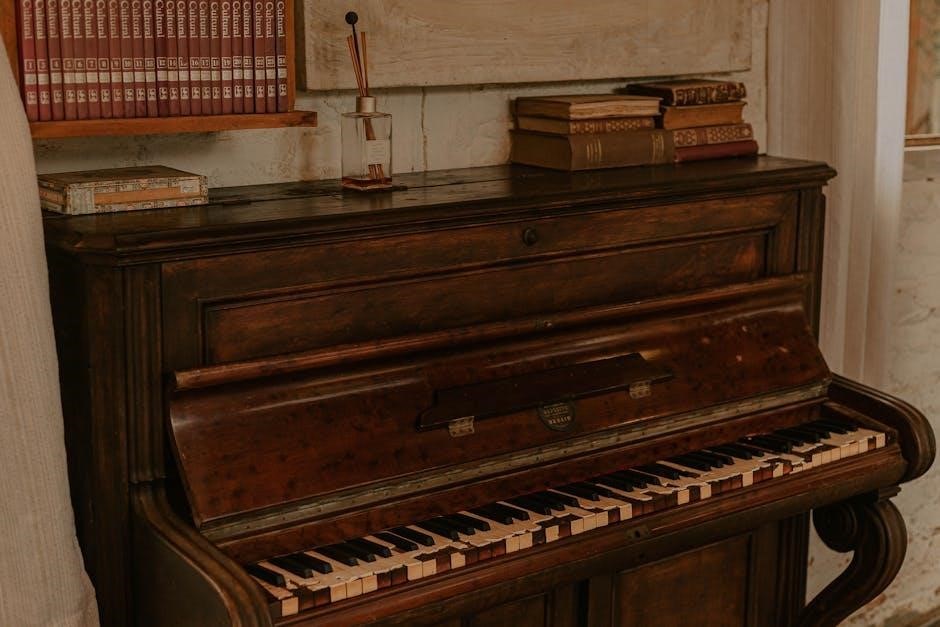
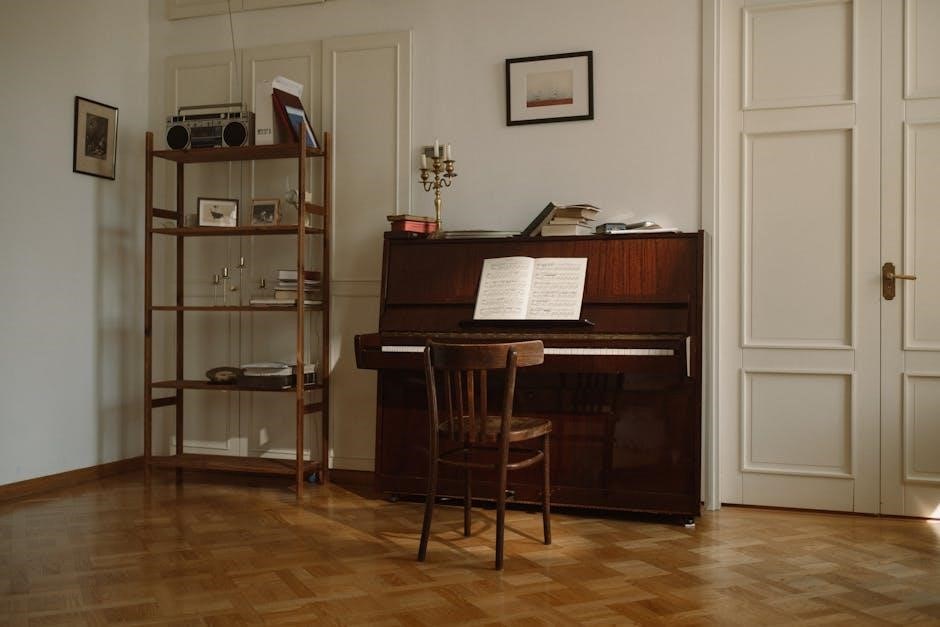
Canon in C for Piano
The Canon in C is a beloved piece for pianists, offering a timeless classic to explore. Originally composed by Johann Pachelbel for three violins and continuo, the adaptation for solo piano allows musicians to experience its intricate melodies and harmonies in a fresh light. The piece’s graceful counterpoint and rich harmonies make it a staple in piano repertoire, suitable for both casual practice and formal performances.
Available in piano sheet music PDF formats, the Canon in C is accessible to pianists of all skill levels. Its structure encourages creative interpretation, allowing performers to highlight its melodic beauty while showcasing technical precision. The piece’s popularity stems from its universal appeal, often featured in weddings and popular media, cementing its place in classical and contemporary culture.
Whether for practice or performance, the Canon in C remains a cherished composition in piano music. Its enduring legacy ensures it will continue to inspire pianists and audiences alike for generations to come.
.Our.Favorite.Favorites
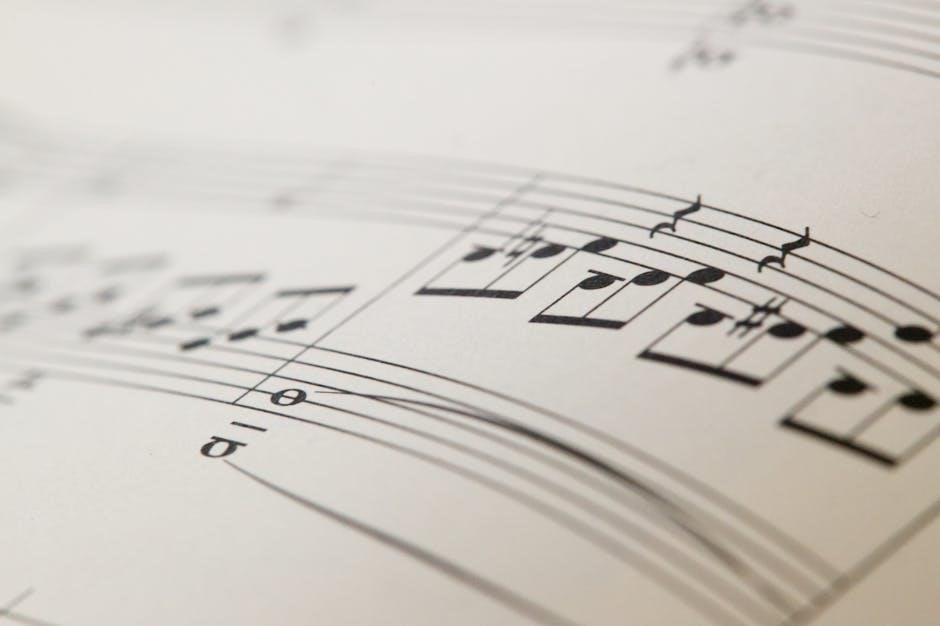
When it comes to the “Canon in C piano sheet PDF,” several versions stand out as favorites among pianists. Johann Pachelbel’s timeless composition, originally scored for strings, has been masterfully arranged for solo piano, offering a rich tapestry of counterpoint and harmony. The digital format of piano sheet music, particularly PDF, provides unparalleled convenience, allowing pianists to access and print the score instantly, whether for practice or performance.

Among the available PDF versions, certain editions are particularly cherished for their clarity and artistic interpretation. Some arrangements adapt the piece to varying skill levels, making it accessible to both beginners and advanced players. Websites like IMSLP and SheetMusicPlus are reliable sources for high-quality PDF scores, ensuring that pianists can find editions that suit their preferences and needs.
These PDF versions often enhance the piece with unique arrangements, such as extended harmonies or contemporary twists, while maintaining the essence of the original composition. The digital format also offers practical benefits, such as the ability to adjust the score size or easily transpose keys, further aiding in mastering the piece.
_PIANO (_.SOLO_
The “Canon in C” has long been a cornerstone of classical music, and its adaptation for piano solo offers a unique opportunity for pianists to engage with this timeless piece; The piano solo version allows for a deeply personal interpretation, enabling musicians to convey the piece’s emotional depth and complexity through the keyboard. This version is particularly cherished for its ability to highlight the nuanced interplay between melody and harmony, which can sometimes be overshadowed in orchestral arrangements.
Digital formats like PDF have revolutionized access to sheet music, providing pianists with convenient and versatile tools for learning and performing. The PDF format offers several advantages: easy sharing, portability, and the flexibility to adjust the viewing size or transpose keys as needed. This accessibility has made the “Canon in C” more approachable than ever, with resources available for pianists of all skill levels.
The piano solo arrangement of the “Canon in C” requires a strong grasp of polyphony, as the piano must simultaneously carry both melodic and harmonic elements. This challenge, while daunting, also presents an exciting opportunity for musicians to develop their technical and interpretative skills. The piece’s foundation in the ostinato pattern provides a structure for exploration, allowing pianists to experiment with dynamics and articulation to create a truly unique performance.
For those embarking on learning the “Canon in C,” it is advisable to begin with simpler arrangements, gradually progressing to more complex versions as their skills develop. Understanding the piece’s structural elements, such as the recurring bass line and its harmonic variations, is crucial for a meaningful interpretation. This journey into the “Canon in C” not only honours the work of Johann Pachelbel but also fosters a deeper appreciation for the piano’s expressive capabilities.
The Popularity of the Canon in C
The “Canon in C” by Johann Pachelbel has become one of the most iconic and universally beloved compositions in classical music. Its enduring appeal lies in its simple yet profound melodic structure, combined with the timeless beauty of its harmonic progression. This piece is frequently performed in weddings,часто played in movies and TV shows, and even adapted in popular music, making it a cultural staple across generations.
The widespread availability of the “Canon in C” piano sheet music in PDF format has further contributed to its popularity. This digital format allows easy access, sharing, and printing, making it accessible to pianists of all skill levels. Whether performed as a solo or arranged for other instruments, the “Canon in C” remains a versatile piece that resonates deeply with audiences worldwide.

Its universal appeal extends across cultures and languages, as its memorable bassline and melodic phrasing create a sense of familiarity and emotional connection. Musicians and listeners alike find comfort in its predictability and delight in its subtle variations, ensuring its place as a cherished in both classical and contemporary music.
Understanding the Musical Structure
The Canon in C’ is built on its signature bassline and harmonious variations. Its melody weaves over a repetitive bass pattern, creating a captivating interplay. The piece’s musical structure features intricate chord progressions, adding depth and emotional appeal. Exploring the Canon in C piano sheet music reveals how these elements come together, offering insight into Pachelbel’s genius and the timeless charm of this classical gem.
The Melody of the Canon
The melody of the Canon in C is one of its most distinctive and enchanting features. Its simplicity and elegance make it universally appealing, while its structure ensures it remains deeply. The piece is built around a repeating bassline, over which multiple melodic variations unfold, creating a sense of both familiarity and novelty. The melody itself is serene, often described as timeless, with aplaintes that evoke a sense of timeless beauty and emotional resonance.
The interplay between the bassline and the melody is central to the piece’s charm. As the bassline progresses, the melody weaves in and out, creating a dialogue that feels organic and natural. This fluid interplay is a hallmark of Pachelbel’s compositional style, blending technical sophistication with accessible beauty.
The melody’s structure is inherently flexible, allowing for countless interpretations and arrangements. While its foundation is rooted in traditional baroque counterpoint, its simplicity allows pianists to bring their own interpretation to the piece. Whether played as a solo piano piece or arranged for other instruments, the melody retains its core appeal.
For those studying the Canon in C piano sheet music, the melody serves as a gateway to understanding the piece’s deeper complexities. Its structure encourages exploration of rhythm, phrasing, and dynamics, making it an ideal study for pianists of all levels. The melody’s enduring popularity lies in its ability to transcend time, connecting listeners across generations and musical preferences.
Harmonic Analysis
Understanding the harmonic structure of Johann Pachelbel’s Canon in C provides valuable insights into its timeless appeal. The piece is renowned for its intricate interplay between melody and harmony, which contributes to its emotional depth and complexity. At its core, the Canon employs a repeating bassline that serves as the foundation for a series of ascending melodic variations, creating a sense of continuity and progression.
The harmonic analysis of the Canon in C reveals its reliance on tonal harmony, with a focus on consonant intervals and functional chord progressions. Pachelbel’s use of counterpoint allows the melody and bassline to interlock seamlessly, creating a rich tapestry of sound. The piece is built on a series of I, IV, V, and vii° chords, which provide a sense of resolution and movement, guiding the listener through its evolving structure.
What sets the Canon apart is its cyclical nature. The bassline repeats, undergoing harmonic transformations while the melodic voices introduce new variations. This cyclical form is a hallmark of the piece, contributing to its hypnotic and meditative quality. The interplay between the bassline and the upper voices creates a sense of dialogue, enhancing the harmonic complexity without overwhelming the listener.
For pianists studying the Canon in C sheet music, the harmonic structure offers endless opportunities for interpretation. The interplay between voices allows for dynamic and expressive playing, making the piece a favorite among performers. The piece’s harmonic simplicity belies its complexity, making it both accessible and challenging, a truly masterful composition that continues to captivate musicians and audiences alike.
.pem Choi
While the term “.pem Choi” might seem obscure or possibly misspelled, it’s essential to focus on the topic at hand: the Canon in C Piano Sheet PDF. This piece of music, known for its enduring popularity, is widely available in PDF format, offering convenience and flexibility for musicians; PDFs provide several advantages, such as easy printing and sharing, making them ideal for practice and performance. To access these PDFs, musicians often turn to reputable sources like music stores or trusted websites where accuracy and quality are guaranteed. Additionally, exploring different editions or arrangements of the Canon in C in PDF format can offer fresh insights and new dimensions to the composition, enhancing the learning and playing experience.
Piano-sheet-music
Piano sheet music for the Canon in C is a universally sought-after resource for musicians and enthusiasts. This composition, attributed to Johann Pachelbel, remains one of the most iconic and widely performed works in classical music. The Canon in C is often interpreted as a piano solo, allowing pianists to explore its intricate harmonies and melodic beauty with precision and expression. The availability of piano sheet music in PDF format has made it easier than ever for musicians to access and study this timeless piece. PDF formats ensure clarity and convenience, as they allow seamless printing and sharing. Additionally, pianists can find various editions of the Canon in C sheet music, each offering unique interpretative insights. Whether you are a beginner or a seasoned performer, the Canon in C piano sheet music PDF serves as a valuable tool for mastering this beloved composition. Its simple yet profound structure makes it accessible to all, while its harmonic richness provides endless opportunities for artistic expression. Whether practiced for personal enjoyment or prepared for public performance, the Canon in C remains a cornerstone of piano repertoire, cherished by audiences and musicians alike.
Mastering the Structure for Performances
Mastering the structure of the Canon in C for performance requires a deep understanding of its musical components and technical challenges. This piece, often performed as a piano solo, demands precision in phrasing, tempo, and articulation to convey its emotional depth. Practicing the piece in sections helps build familiarity with its repetitive yet evolving harmonic structure, ensuring smooth transitions between parts. Paying attention to the tempo markings and dynamic nuances is crucial for capturing the intended musicality.
Performers should focus on developing finger dexterity and control, as the Canon in C requires seamless legato passages and articulated rhythms. Studying the sheet music in detail reveals subtle variations in dynamics and phrasing, allowing for a more expressive interpretation. Additionally, understanding the historical context of the piece can enhance its performance, as it reflects Baroque-era compositional techniques. Regular practice, combined with a thorough analysis of the score, ensures a polished and confident execution of this timeless work. By mastering its structure, pianists can deliver a captivating performance that honors the beauty of theCanon in C. Patient practice and attention to detail are key to unlocking its full potential on the keyboard.

Canon in C Sheet Music Explained
Delve into Pachelbel’s Canon in C with its piano sheet music PDF, offering clear notation for practice and performance. The layout highlights the piece’s elegant harmonic progressions and melodic flow, perfect for piano solos. The PDF format provides portability and customization, allowing for personalized annotations and dynamic interpretation. This resource is essential for mastering the Canon in C as a standalone piano piece and understanding its musical intricacies.
Chaconne in C Major
Although the title “Canon in C” is often used interchangeably with “Chaconne in C Major,” they are distinct compositions by Johann Pachelbel. The Chaconne in C Major is a standalone piece that shares similar melodic and harmonic characteristics with the Canon, but it is more elaborate in structure. This piece is often included in the same collections as the Canon, making it a popular choice for piano solo performances. The sheet music for the Chaconne in C Major is widely available in PDF format, allowing pianists to explore its intricate variations and rich harmonies. The composition begins with a bold statement in C major, followed by a series of basso ostinato patterns that create a hypnotic effect. Pianists appreciate the balance between technical complexity and emotional depth in this piece, which makes it a favorite for both practice and public performances. Its structure, including repeated bass patterns and evolving upper melodies, provides a foundation for creative interpretation. Whether for personal study or public display, the Chaconne in C Major remains a staple of classical piano repertoire, celebrated for its timeless beauty and intricate musical design.

Practicing the Canon in C
Mastery of the Canon in C requires a strategic approach to practice. Start by understanding the piece’s structure, focusing on the interplay between melody and harmony. Break the music into sections, practicing hands separately to build foundational skills before integrating them. Pay attention to tempo and dynamics, avoiding rushing; instead, emphasize a steady, expressive rhythm with clear articulation. To ensure accuracy,repeat challenging passages until they are perfected. Additionally, explore the piece’s phrasing, allowing your interpretation to convey its emotional depth. Utilize the wealth of resources available, such as detailed Piano-sheet-music PDFs and Canon tutorials online. Regular practice and patience are essential, as developing the necessary technical and interpretive skills takes time. Finally, seek feedback through recordings or lessons to refine your approach and enhance your performance. Consistency is key, as it fosters gradual improvement and confidence in your playing.

Variations and Arrangements
“Canon in C” has inspired countless variations and arrangements across genres, showcasing its versatility. From classical orchestrations to jazz improvisations, composers and performers have reimagined Pachelbel’s masterpiece. For instance, some artists fuse the melody with electronic beats, creating modern hybrids while preserving the original’s essence. Pianists often explore dynamic contrasts and tempo deviations, offering fresh perspectives. Additionally, educational arrangements simplify the piece for students, ensuring accessibility while maintaining its melodic integrity. Musicians like Billy Tombaugh and Jacques Loussier have reinterpreted the Canon, blending it with swing and bossa nova rhythms. The availability of Canon in C piano sheet music PDF allows enthusiasts to experiment freely, adapting the piece to their style. These creative reinterpretations highlight the Canon’s enduring appeal and adaptability, ensuring its relevance across generations and musical tastes. Whether as a gentle lullaby or an energetic dance, the Canon in C continues to evolve, proving its timeless charm.