Archive title

Autem vel eum iriure dolor in hendrerit in vulputate velit esse molestie consequat, vel illum dolore eu feugiat nulla facilisis at vero eros et dolore feugait.

Monthly Archive April 28, 2025

bravos xl washer manual

Welcome to the Maytag Bravos XL Washer Manual, your comprehensive guide to understanding and operating your high-efficiency washing machine․ This manual covers essential information for installation, operation, maintenance, and troubleshooting, ensuring optimal performance and longevity of your appliance․

1․1 Overview of the Maytag Bravos XL Washer

The Maytag Bravos XL Washer is a high-efficiency, top-loading washing machine designed for energy savings and reliable performance․ It features advanced wash cycles, a spacious interior, and low-water technology․ Built for durability and ease of use, this model offers customizable settings and a robust design, making it a practical choice for households seeking efficient and effective laundry solutions․

1․2 Importance of Reading the Manual

Reading the Maytag Bravos XL Washer manual is crucial for understanding its features, proper operation, and maintenance․ It provides essential safety guidelines, troubleshooting tips, and warranty details․ By following the manual, you ensure optimal performance, prevent damage, and extend the lifespan of your appliance․ It also helps you resolve issues quickly and make the most of its advanced settings and energy-efficient capabilities․

Installation and Setup Instructions

Proper installation ensures safe and efficient operation of your Maytag Bravos XL Washer․ Follow the manual’s guidelines for site preparation, water and electrical connections, and leveling to guarantee optimal performance and prevent potential issues․

2․1 Preparing the Installation Site

Ensure the installation area is clear of obstacles and has enough space for the washer․ Check that the floor is strong, level, and can support the machine’s weight․ Avoid placing the washer in direct sunlight or near water sources to prevent damage․ Ensure proper ventilation and keep the site dry to maintain safety and optimal performance;

2․2 Connecting Water and Electrical Supplies

Connect the washer to a grounded electrical outlet using the provided cord․ Attach the hot and cold water supply lines to the corresponding taps, ensuring they are securely fastened to prevent leaks․ Use Teflon tape for added sealing․ Ensure the electrical outlet matches the washer’s voltage and amperage requirements, and avoid using extension cords for safety․ After connections, run a test cycle to verify proper function․

2․3 Leveling the Washer for Optimal Performance

Ensure the washer is level to prevent vibration and noise; Use the provided legs to adjust the height, making sure each leg touches the floor firmly․ Check balance by placing a spirit level on the lid․ If adjustments are needed, turn the legs clockwise to lower or counterclockwise to raise․ Tighten the locking nuts after leveling․ Ensure the floor is firm and level for optimal performance․ If the floor is uneven, consider using anti-vibration pads to minimize movement during operation․ Run a test cycle after leveling to confirm stability and proper function․

Operating the Bravos XL Washer

Choose the right wash cycle, water temperature, and load size for optimal results․ Follow the guidelines for loading clothes and selecting options to ensure efficient and effective washing․

3․1 Understanding Wash Cycles and Options

The Bravos XL Washer offers multiple wash cycles, including normal, heavy-duty, and delicate settings․ Choose options like soil level, fabric type, and steam cleaning for customized care․ Selecting the right cycle ensures optimal cleaning while protecting fabrics․ Refer to the cycle guide in your manual for details on each setting and its recommended use․

3․2 Selecting the Right Water Temperature

Selecting the right water temperature is crucial for effective cleaning and fabric care; Use hot water for heavily soiled items, cold water for delicate fabrics, and warm water for general loads․ Always follow garment label instructions to prevent shrinking or color fading․ The Bravos XL Washer allows you to customize water temperature settings for optimal results and fabric protection․

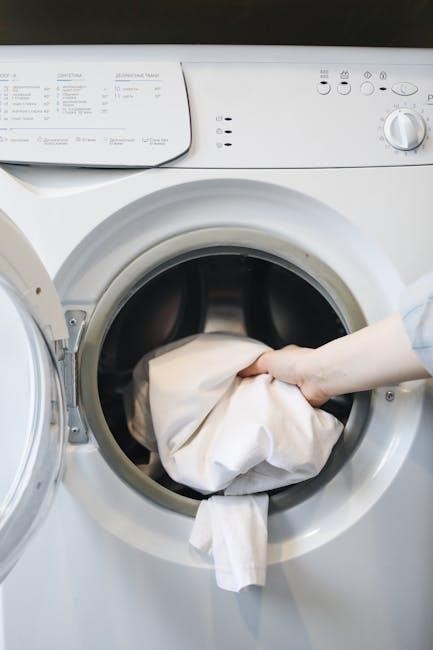
3․3 Loading Clothes Properly

Load clothes evenly to ensure balanced washing․ Avoid overloading, as this reduces cleaning efficiency and may damage fabrics․ Separate delicate or fragile items from heavier fabrics․ Place bulky items like towels at the bottom and lighter items on top․ Always check garment labels for specific washing instructions to prevent damage․ Proper loading ensures optimal performance and fabric care․

Maintenance and Care Tips

Regular maintenance ensures optimal performance․ Clean the interior monthly and run a cleaning cycle to prevent odors․ Check and clean the gasket and detergent dispenser regularly․ Schedule professional servicing annually for parts inspection․ Proper care extends the washer’s lifespan and maintains efficiency․

4․1 Cleaning the Interior of the Washer

Regular cleaning is essential for maintaining your Bravos XL washer’s performance․ Run a cleaning cycle monthly using a washer cleaner or 1 cup of white vinegar․ Leave the lid open after cycles to dry the interior․ Check and clean the gasket and detergent dispenser regularly to prevent mold and odors․ This routine ensures freshness and optimal functionality․

4․2 Monthly Maintenance Procedures

Perform monthly maintenance to keep your Bravos XL washer running smoothly․ Check and clean the gasket, drain pump filter, and detergent dispenser․ Run a cleaning cycle with a washer cleaner or 1 cup of white vinegar to remove buildup․ Ensure the drain hose is kink-free and the washer is properly leveled․ Regular upkeep prevents odors and maintains efficiency․

Troubleshooting Common Issues

Identify and resolve common issues with your Bravos XL washer by checking error codes and addressing operational problems․ Refer to the manual for detailed solutions․

5․1 Diagnosing Error Codes

Diagnosing error codes on your Bravos XL washer is essential for resolving issues quickly․ Common codes like “Sud” or “F20” indicate specific problems, such as excessive suds or water inlet issues․ Refer to your manual for detailed explanations of each code and follow the recommended troubleshooting steps to restore normal operation and prevent further complications․

5․2 Resolving Common Operational Problems

Resolving common operational problems with your Bravos XL washer involves checking for issues like clogged water inlet hoses or drainage problems․ Ensure the washer is properly leveled and not overloaded․ Regularly cleaning the interior and gasket can prevent odors and mold․ Refer to the manual for specific troubleshooting guides tailored to your model for effective solutions․

Safety Precautions and Guidelines

Read the manual carefully and follow all safety guidelines to avoid accidents․ Ensure proper installation and usage․ Keep children away from hot surfaces and sharp edges․ Use only recommended detergents and avoid overloading the washer․ Regular maintenance ensures safe and efficient operation․

6․1 Important Safety Information

Always follow the manufacturer’s safety guidelines to ensure safe operation․ Keep children away from the washer during operation․ Avoid overloading the machine, as this can cause imbalance․ Use only recommended detergents and avoid mixing chemicals․ Never leave the washer unattended while it is in use․ Regularly inspect hoses and connections for wear․ Refer to the manual for detailed safety precautions and guidelines․

6․2 Child Safety Features

The Bravos XL Washer includes a Child Lock feature to prevent accidental operation․ This feature ensures that children cannot start or alter wash cycles, enhancing safety in households with kids․ Activate the Child Lock by pressing and holding the designated button to lock the controls․ This feature provides peace of mind and helps protect both children and the appliance from unintended use․

Warranty and Customer Support

Welcome to the Warranty and Customer Support section․ Maytag offers comprehensive warranty programs and dedicated customer service to ensure your Bravos XL Washer operates smoothly․ Visit the Maytag Owners Center for service manuals, troubleshooting guides, and direct support options to address any questions or concerns about your appliance․

7․1 Understanding Your Warranty Coverage

Your Maytag Bravos XL Washer is backed by a comprehensive warranty program․ Coverage details, including duration and conditions, can be found in the manual or on the Maytag website․ Ensure to register your appliance and review the terms to understand what is covered and for how long․ This helps protect your investment and ensures hassle-free service if issues arise․

7․2 Contacting Maytag Customer Service

For assistance with your Bravos XL Washer, contact Maytag customer service through their official website or by phone․ The website offers a range of resources, including troubleshooting guides, warranty information, and live chat support․ Representatives are available to address questions, provide repair scheduling, and offer guidance on maintenance and operation․

Visit the Maytag Owners Center for direct access to service manuals, videos, and support․ You can also call their dedicated customer service line for personalized help with your appliance․ This ensures you receive timely and effective support to keep your washer running smoothly․

Downloading and Printing the Manual

Visit the Maytag Owners Center website to easily download and print the Bravos XL Washer Manual․ Enter your model number, select the desired literature, and save or print the document for future reference․

8․1 Finding the Correct Model Number

Locate the model number on the washer’s serial plate, typically found inside the lid or on the back․ It is labeled as “Model” or “MOD․” Visit the Maytag Owners Center website, enter the model number, and access the corresponding manual for download or printing․

8․2 Step-by-Step Download Instructions

Visit the Maytag Owners Center website, navigate to the “Manuals & Guides” section, and enter your washer’s model number․ Search for your specific model, select the correct manual, and click the download button․ Save the PDF to your device for easy access and printing․ Ensure your model number matches the one on your washer for the correct guide․

Advanced Features of the Bravos XL Washer

The Bravos XL Washer offers advanced features like energy efficiency and high-efficiency settings, providing superior cleaning with less water․ Special wash cycles and steam cleaning options enhance performance, while adaptive technologies optimize cleaning power for various fabrics and loads․

9․1 Energy Efficiency and High-Efficiency Settings

The Bravos XL Washer is Energy Star certified, ensuring high efficiency and reduced energy consumption․ Its advanced settings optimize water and detergent usage while maintaining powerful cleaning performance․ High-efficiency cycles are designed to minimize water and energy without compromising results, making it eco-friendly and cost-effective for everyday use․

9․2 Special Wash Cycle Options

The Bravos XL Washer offers specialized cycles tailored for specific needs, such as bulky items, delicate fabrics, and heavy-duty cleaning․ These cycles are designed to provide optimal results for various fabric types and soil levels․ Advanced sensors adjust water temperature and agitation to ensure gentle care for sensitive items or powerful cleaning for heavily soiled loads, enhancing fabric protection and cleaning efficiency․

Additional Resources and Tips

Explore online support, video tutorials, and user-generated tips for troubleshooting and optimizing your Bravos XL Washer․ Visit the Maytag website or forums for additional guidance and resources․

10․1 Online Support and Video Tutorials

Visit the official Maytag website for extensive online support, including video tutorials and troubleshooting guides․ These resources provide step-by-step instructions for installation, maintenance, and resolving common issues․ You can also find model-specific guides by entering your washer’s model number, ensuring you get tailored assistance for your Bravos XL Washer․

10․2 User-Generated Tips and Tricks

Users share practical advice for optimizing your Bravos XL Washer․ Tips include running cleaning cycles monthly, avoiding overloading, and using high-efficiency detergent․ Many recommend checking pockets before washing and utilizing the machine’s diagnostic features to prevent issues․ These insights enhance performance and extend the washer’s lifespan․

genki workbook pdf

The Genki Workbook PDF is a supplementary material designed to accompany the Genki textbook‚ a widely used resource for learning elementary Japanese․ It provides a comprehensive set of exercises that reinforce the concepts introduced in the main textbook‚ making it an essential tool for learners of all levels․ The workbook is structured to align with the lessons in the Genki textbook‚ ensuring a smooth and integrated learning experience․

One of the standout features of the Genki Workbook PDF is its accessibility․ Available in digital format‚ it allows learners to practice anytime and anywhere‚ whether on a computer‚ tablet‚ or smartphone․ This flexibility is particularly beneficial for students who prefer a digital learning environment or need to study on the go․ Additionally‚ the PDF format ensures that the content is easily searchable and can be annotated for better retention of information․

The workbook is divided into sections that correspond to the chapters in the Genki textbook․ Each section includes a variety of exercises‚ such as grammar drills‚ vocabulary practice‚ listening comprehension‚ and kanji worksheets․ These exercises are designed to help learners master the material step-by-step‚ with a focus on practical application․ For example‚ the listening comprehension exercises are supported by audio files‚ which can be downloaded separately‚ allowing learners to improve their listening skills in a real-world context․

Another key feature of the Genki Workbook PDF is its emphasis on reinforcing previously learned material․ Many exercises include review sections that ensure learners do not forget earlier concepts as they progress through the course․ This approach helps build a strong foundation in Japanese grammar‚ vocabulary‚ and kanji‚ which is crucial for advancing to more complex topics․

The Genki Workbook PDF is particularly useful for self-study learners‚ as it provides clear instructions and answers to exercises‚ enabling learners to track their progress independently․ However‚ it is also widely used in classroom settings‚ where instructors can assign specific exercises as homework or in-class activities․ The workbook’s structure makes it easy for teachers to integrate it into their lesson plans․

have yourself a merry little christmas lead sheet pdf

The Have Yourself a Merry Little Christmas lead sheet PDF is a popular holiday arrangement by Hugh Martin and Ralph Blane. Available for piano‚ guitar‚ and other instruments‚ it offers a timeless melody with chord progressions‚ ideal for musicians of all skill levels to perform and enjoy.

Have Yourself a Merry Little Christmas is a timeless holiday song written by Hugh Martin and Ralph Blane for the 1944 film Meet Me in St. Louis‚ where it was famously performed by Judy Garland. The song captures a bittersweet mood‚ blending joy and longing‚ making it a beloved classic for generations. Its melody and lyrics evoke a sense of nostalgia and warmth‚ resonating with audiences of all ages. The lead sheet PDF provides musicians with a concise arrangement‚ including the melody‚ chords‚ and lyrics‚ making it accessible for performances across various musical styles and instruments. Whether for piano‚ guitar‚ or vocal arrangements‚ the lead sheet offers a flexible foundation for both professional and amateur musicians to bring this cherished song to life. Its enduring popularity is a testament to its universal appeal and emotional depth‚ making it a staple in holiday playlists and performances worldwide.

Historical Background and Composition

Have Yourself a Merry Little Christmas was composed by Hugh Martin and Ralph Blane for the 1944 MGM musical film Meet Me in St. Louis‚ starring Judy Garland. The song was introduced in the movie by Garland’s character‚ Esther Smith‚ during a poignant scene where she tries to comfort her younger sister. Initially‚ the lyrics had a more melancholic tone‚ reflecting the character’s emotional state. However‚ Judy Garland and Tom Drake‚ her co-star‚ persuaded Martin to revise the lyrics to make them more uplifting. This collaboration led to the version we know and love today. The song’s composition is notable for its balance of bittersweet nostalgia and hopeful optimism‚ which resonated deeply with audiences during the World War II era. Its melody‚ written in a lush harmonic style‚ features a memorable chorus and verse structure‚ making it a standout piece in the Great American Songbook. The song’s historical significance is further highlighted by its enduring popularity‚ with countless covers and arrangements over the decades‚ including the widely used lead sheet PDF.

Lead Sheet Structure and Components

A lead sheet for Have Yourself a Merry Little Christmas typically includes the essential elements of the song‚ providing a clear and concise guide for musicians to perform it. The structure usually features the melody‚ lyrics‚ and chord progressions‚ arranged in a format that is easy to read and interpret. The lead sheet is often written in a specific key‚ such as C major‚ to accommodate a wide range of instruments and vocal ranges. It may also include key signatures‚ time signatures (commonly 4/4 for this song)‚ and dynamic markings to guide expression and tempo.

The lead sheet typically consists of a single line of melody with chords notated above‚ allowing for flexibility in arrangement. For example‚ jazz versions may include extended chords like Cmaj7 or Am7‚ while a simpler arrangement might use basic triads. The verses and choruses are clearly delineated‚ with lyrics printed below the melody line. Additionally‚ some lead sheets may include introductions‚ instrumental breaks‚ or ending phrases to enhance performance. The structure is designed to be adaptable‚ making it suitable for solo performers‚ small ensembles‚ or full bands.

Overall‚ the lead sheet provides a foundational framework‚ enabling musicians to interpret the song in their own style while maintaining its timeless essence.

Importance of Lead Sheets in Music Performance

Lead sheets play a vital role in music performance‚ offering a versatile and efficient way to convey musical information. For Have Yourself a Merry Little Christmas‚ the lead sheet serves as a foundational guide‚ allowing musicians to quickly grasp the song’s structure and essence. Unlike full scores‚ lead sheets are concise‚ making them ideal for spontaneous performances or rehearsals where time is limited.

One of the key advantages of lead sheets is their adaptability. They provide the melody‚ lyrics‚ and chord progressions‚ enabling performers to interpret the song according to their style or instrumentation. This flexibility is particularly valuable in jazz and improvisational settings‚ where artists can use the lead sheet as a starting point for creative exploration. For example‚ a pianist might use the chord chart to create intricate harmonies‚ while a vocalist can focus on delivering the lyrics with emotional depth.

Lead sheets also foster collaboration among musicians. They offer a common reference point‚ ensuring that all performers are on the same page‚ literally and figuratively. This consistency is crucial for achieving a cohesive sound‚ especially in ensemble settings. Furthermore‚ lead sheets are often used in educational contexts‚ helping students and beginners to understand musical composition and arrangement.

How to Download and Use the Lead Sheet PDF

Downloading and using the Have Yourself a Merry Little Christmas lead sheet PDF is a straightforward process. Start by visiting reputable sheet music platforms like Musicnotes or SheetMusicPlus‚ where the arrangement is widely available. Use the search bar to find the specific lead sheet‚ ensuring it includes the melody‚ lyrics‚ and chord progressions.

Once found‚ review the arrangement details to confirm compatibility with your instrument or vocal range. Proceed to purchase or download the PDF‚ following the site’s instructions. Some versions are also available for free on forums or music communities‚ though ensure you respect copyright laws.

After downloading‚ open the PDF using a viewer like Adobe Acrobat. Print the sheet music on high-quality paper for optimal readability. For digital use‚ load the PDF into a tablet or music reader for convenient access during performances or rehearsals.

Musicians can use the lead sheet to practice the melody‚ accompany vocals‚ or improvise over chord progressions. Pianists and guitarists will find the chord charts particularly useful for harmonization. Vocalists can focus on delivering the lyrics with emotional depth‚ guided by the melody line.

Many lead sheets are compatible with music software‚ allowing for transpose or tempo adjustments. This adaptability makes the PDF a versatile tool for performances‚ teaching‚ or personal enjoyment. By leveraging the lead sheet‚ musicians can bring this timeless holiday classic to life with ease and creativity.

Popular Arrangements and Versions

Have Yourself a Merry Little Christmas has been interpreted in countless ways‚ making it a versatile holiday classic. The original version‚ performed by Judy Garland in the 1944 film Meet Me in St. Louis‚ carries a bittersweet tone that resonates deeply. Over the years‚ iconic artists like Frank Sinatra‚ Ella Fitzgerald‚ and Bing Crosby have recorded their own renditions‚ each infusing the song with unique styling.

Jazz interpretations are particularly popular‚ with pianists and vocalists adding improvisational flair. Instruments like the piano‚ guitar‚ and flute have been featured in instrumental-only arrangements‚ offering a fresh take on the melody. Additionally‚ choral versions with SATB harmonies have become staples in holiday performances‚ blending rich vocals with the song’s timeless lyrics.

Modern artists continue to reimagine the song‚ from acoustic ballads to upbeat orchestral arrangements. These diverse versions ensure that the song remains relevant across generations. The lead sheet PDF often includes multiple arrangements‚ catering to various skill levels and preferences‚ making it a go-to resource for musicians seeking inspiration or a faithful rendition of this beloved holiday song.

Tips for Musicians Using the Lead Sheet

Using the Have Yourself a Merry Little Christmas lead sheet PDF effectively requires a thoughtful approach to interpretation and performance. Musicians should start by familiarizing themselves with the melody and chord progressions‚ ensuring a solid understanding of the song’s structure. Pianists‚ for instance‚ can begin with a simple accompaniment‚ gradually adding harmonic complexity as they gain confidence. Guitarists may benefit from experimenting with various strumming patterns to match the desired mood‚ whether intimate or upbeat.

Vocalists should pay attention to phrasing and dynamics‚ as the song’s emotional depth hinges on these elements. Collaborating with other musicians can also enhance the performance‚ blending voices or instruments to create a rich‚ layered sound. Additionally‚ exploring the song’s tempo and key variations‚ as provided in the lead sheet‚ can help tailor the arrangement to suit individual styles or ensemble needs. By focusing on these aspects‚ musicians can bring a fresh yet respectful interpretation to this holiday classic‚ ensuring it resonates with audiences of all ages.

The Role of Chord Progressions in the Song

The chord progressions in Have Yourself a Merry Little Christmas play a pivotal role in shaping the song’s emotional depth and timeless appeal. The harmony‚ crafted by Hugh Martin and Ralph Blane‚ features a mix of major‚ minor‚ and seventh chords that create a bittersweet yet uplifting atmosphere. The progression often begins with a C major chord‚ moving through A7 and D7‚ setting a foundational structure that supports the melody and lyrics seamlessly.

One of the standout features of the song is its use of extended chords‚ such as the G suspended 7th‚ which adds a touch of sophistication and modernity. These chords not only enhance the song’s harmonic richness but also provide a versatile framework for improvisation. The progression’s subtle modulations and resolutions are designed to mirror the song’s themes of hope and nostalgia‚ making it resonate deeply with listeners.

The lead sheet’s chord progressions are particularly useful for musicians‚ as they offer a clear guide for accompaniment while leaving room for interpretation. Whether performed in a jazz‚ pop‚ or classical style‚ the chord progressions remain the backbone of the song‚ ensuring its enduring beauty and adaptability across genres and arrangements.

Melody and Harmony Analysis

The melody of Have Yourself a Merry Little Christmas is a masterful blend of simplicity and emotional depth‚ making it instantly recognizable and memorable. Composed by Hugh Martin and Ralph Blane‚ the melody ascends and descends in a way that complements the song’s bittersweet lyrics‚ creating a sense of introspection and hope. The melody’s range is moderate‚ allowing vocalists and instrumentalists to interpret it with ease while maintaining its expressive qualities.

Harmonically‚ the song features a sophisticated interplay of major‚ minor‚ and seventh chords‚ which add layers of complexity to the melody. The use of suspensions‚ such as the Gsus7 chord‚ introduces a modern and timeless quality‚ while the resolution of these chords provides a sense of emotional resolution. The harmony also supports the melody’s phrasing‚ ensuring that the lyrical message is conveyed effectively.

The melody’s contour‚ with its gentle rises and falls‚ mirrors the emotional arc of the lyrics‚ creating a powerful connection with listeners. The harmony‚ meanwhile‚ provides a rich and supportive framework that enhances the melody’s beauty. Together‚ they form a timeless musical narrative that continues to resonate across generations.

The Cultural Impact of the Song

Have Yourself a Merry Little Christmas has left an indelible mark on cultural history‚ transcending its origins as a film song to become a global holiday classic. Introduced by Judy Garland in the 1944 movie Meet Me in St. Louis‚ the song captured the bittersweet essence of the holiday season‚ resonating with audiences during a tumultuous time. Its emotional depth and universal themes have made it a staple of Christmas playlists and performances worldwide.

Over the decades‚ the song has been covered by countless artists‚ from Frank Sinatra and Ella Fitzgerald to modern performers‚ each bringing their unique interpretation. Its versatility has allowed it to adapt to various musical genres‚ ensuring its relevance across generations. The song’s poignant lyrics and soaring melody evoke feelings of nostalgia‚ hope‚ and togetherness‚ making it a cultural touchstone.

Beyond its musical appeal‚ the song has played a significant role in shaping holiday traditions and media. It frequently appears in films‚ TV shows‚ and commercials‚ further cementing its place in popular culture. Its enduring legacy is a testament to the power of music to connect people and evoke emotions‚ solidifying its status as a timeless holiday classic.

Jazz and Modern Interpretations

Have Yourself a Merry Little Christmas has been reimagined in countless jazz and modern arrangements‚ showcasing its timeless appeal. Jazz musicians often infuse the song with intricate improvisations‚ complex chord substitutions‚ and syncopated rhythms‚ transforming it into a sophisticated holiday standard. Artists like Ella Fitzgerald and Frank Sinatra have recorded iconic versions‚ blending their unique styles with the song’s emotional depth.

Modern interpretations have further expanded the song’s boundaries‚ incorporating genres like pop‚ rock‚ and electronic music. Contemporary artists such as Michael Bublé and Sam Smith have offered fresh takes‚ maintaining the song’s nostalgic charm while introducing it to new generations. These reinterpretations highlight the versatility of the melody and lyrics‚ allowing them to flourish in diverse musical settings.

The song’s adaptability has made it a favorite among jazz ensembles and solo performers‚ with many creating arrangements that emphasize harmonic richness and improvisational freedom. Its enduring popularity in jazz and modern music underscores its ability to evolve while retaining its heartfelt essence‚ ensuring its place as a holiday classic for years to come.

Resources for Learning and Playing

For musicians seeking to learn and play Have Yourself a Merry Little Christmas‚ numerous resources are available to enhance your experience. Websites like MuseScore and Musicnotes offer a wide range of sheet music arrangements‚ from simple melodies to intricate jazz interpretations‚ catering to various skill levels and instruments.

Jazz-Library provides detailed jazz arrangements‚ including chord progressions and improvisational ideas‚ perfect for those looking to add a modern twist. Additionally‚ online forums and communities‚ such as Reddit’s music-related subreddits‚ are rich with shared knowledge‚ tips‚ and personal insights from fellow musicians.

YouTube channels and online tutorials are excellent for visual learners‚ offering step-by-step lessons and breakdowns of the song’s harmony and melody. Platforms like TrueFire and GuitarLessons365 feature in-depth lessons tailored to specific instruments‚ helping you master the piece in your preferred style.

For those interested in historical context‚ Sheet Music Plus and IMSLP offer original scores and arrangements‚ providing a deeper understanding of the song’s composition. Practice tools like Transcribe! and AmazingMIDI allow you to slow down‚ loop‚ and analyze performances‚ aiding in precise learning.

Finally‚ BackingTrackPlay and similar platforms offer high-quality backing tracks‚ enabling you to practice alongside professional accompaniments. These resources collectively ensure that you can learn and perform Have Yourself a Merry Little Christmas with confidence and creativity.

pelonis 1500 watt heater manual

The Pelonis 1500 Watt Heater is a high-efficiency, portable space heater designed for safe and reliable performance. It offers three power settings (600W, 900W, 1500W), an adjustable thermostat, and overheating protection for consistent heating and energy efficiency, making it ideal for home or office use.

Overview of the Heater’s Key Features

The Pelonis 1500 Watt Heater is equipped with multiple advanced features to ensure efficient and safe operation. It offers three power settings: 600W, 900W, and 1500W, allowing users to customize heating based on their needs. The heater includes a built-in thermostat for precise temperature control, maintaining a consistent warmth in the room. Safety features such as overheating protection and a tip-over switch automatically shut off the unit in case of potential hazards. Additionally, it comes with a fan-only function for circulating air without heat and oscillation for even heat distribution. The compact and portable design, with caster wheels, makes it easy to move around. This heater is designed to operate on 120V AC power and draws 12.5 amps during operation;

Importance of Reading the Manual

Reading the Pelonis 1500 Watt Heater manual is essential for safe and effective operation. It provides critical information on power settings, thermostat usage, and safety precautions. The manual outlines proper installation, maintenance, and troubleshooting steps, ensuring users understand how to handle the heater correctly. By following the guidelines, users can avoid potential hazards such as burns or electrical issues. The manual also explains how to utilize features like oscillation and fan-only modes efficiently. Understanding these details ensures optimal performance and longevity of the heater. Always refer to the manual before first use to familiarize yourself with the device’s operation and safety measures. This helps in preventing accidents and ensures a hassle-free heating experience.

Installation and Initial Setup

Unpack the heater carefully, ensuring all components are included. Place it on a flat, stable surface away from flammable materials. Plug it into a 120V outlet, ensuring the circuit isn’t overloaded. Allow at least 3 feet of clearance for proper air circulation; Before first use, inspect the power cord for damage and ensure all controls are functioning correctly. Follow the manual’s guidelines for initial setup to ensure safe and efficient operation.

Unpacking and Placement Guidelines

Carefully unpack the Pelonis 1500 Watt Heater from its box, ensuring all components, including the power cord and manual, are included. Place the heater on a flat, stable surface, away from flammable materials like curtains or bedding. Maintain at least 3 feet of clearance from any combustible objects to ensure safe operation. Avoid placing the heater on uneven or soft surfaces, as this could lead to instability. Do not expose the heater to water or moisture. Position the heater in an area where it can circulate air freely, avoiding blockages. Keep children and pets away from the heater during operation. Always follow the manual’s guidelines for proper placement and installation.

Power Supply Requirements

The Pelonis 1500 Watt Heater requires a 120V, 60Hz AC power supply. It draws 12.5 amps during operation, so it should not be plugged into a circuit with other high-power appliances to avoid overloading. Always use the provided power cord and ensure it is in good condition. Before turning on the heater, check the power cord for any signs of damage or wear. The heater features three power settings (600W, 900W, 1500W), allowing you to choose the appropriate energy consumption based on your needs. Ensure the heater is plugged directly into a wall outlet and avoid using extension cords to maintain safe and efficient operation. Proper power supply setup is essential for optimal performance and safety.

Operating the Pelonis 1500 Watt Heater

The Pelonis 1500 Watt Heater features three power settings (600W, 900W, 1500W) for customizable heating. Use the thermostat to set your desired temperature and enjoy efficient, even warmth. Turn the power knob to select your preferred setting, and the indicator light will confirm it’s operational. The heater also includes overheating protection and a tip-over switch for added safety during use. Always ensure the heater is placed on a stable surface and kept away from flammable materials.

Understanding the Power Settings (600W, 900W, 1500W)

The Pelonis 1500 Watt Heater offers three distinct power settings to cater to varying heating needs. The 600W setting provides gentle, energy-efficient warmth, ideal for smaller spaces or milder conditions. The 900W setting delivers moderate heat, suitable for medium-sized rooms, while the 1500W setting offers maximum power for rapid heating in larger areas. A power selection knob allows easy switching between these modes, ensuring flexibility. Additionally, the heater features a fan-only function for circulating air without heat. An indicator light confirms the selected power mode. Always choose the appropriate setting based on room size and desired comfort to optimize energy use and safety. The heater also includes overheating protection and a tip-over switch for added security.

Using the Thermostat and Temperature Control

The Pelonis 1500 Watt Heater features an intuitive thermostat and temperature control system, allowing precise regulation of room temperature. Users can set their desired temperature between 40°F and 95°F using the UP and DOWN buttons. The thermostat maintains the selected temperature by cycling the heating elements on and off, ensuring consistent warmth without overheating. The control panel includes a clear display and straightforward buttons for easy operation. This feature not only enhances comfort but also helps reduce energy consumption by preventing unnecessary heating. The thermostat’s accuracy and responsiveness make it ideal for maintaining a cozy environment in any room. Always refer to the manual for specific instructions on setting and adjusting the temperature for optimal performance.

Safety Precautions and Protections

The Pelonis 1500 Watt Heater is equipped with advanced safety features, including overheating protection and a tip-over switch, ensuring safe operation and preventing potential hazards.

Overheating Protection and Tip-Over Switch

The Pelonis 1500 Watt Heater features built-in overheating protection, which automatically shuts off the unit if it exceeds a safe temperature, ensuring reliable and secure operation. Additionally, the tip-over switch activates if the heater is tilted or knocked over, immediately halting its functions to prevent accidents. These advanced safety mechanisms are designed to protect users from potential hazards, making the heater a trustworthy choice for home or office use. Regular maintenance, such as cleaning the heater and ensuring proper placement, further enhances its safety performance. By integrating these features, the Pelonis heater provides a safe and efficient heating solution for various spaces.

Preventing Burns and Electrical Hazards

To ensure safe operation, avoid touching the heater’s hot surfaces while it is in use, as they can cause burns. Keep the heater out of reach of children and pets to prevent accidental contact. Always place the heater on a stable, heat-resistant surface, away from flammable materials like curtains or bedding. Never use the heater near water or in humid environments, as this could lead to electrical hazards. Avoid overloading circuits by plugging the heater into a dedicated outlet, and never use damaged cords or extensions. Following these guidelines helps prevent burns and electrical risks, ensuring safe and efficient heating.

Maintenance and Care

Regularly clean the heater to prevent dust buildup and ensure proper airflow. Check for damage before use and store the heater correctly when not in operation.

Cleaning the Heater and Replacing Parts

Regular cleaning is essential to maintain the heater’s efficiency and safety. Turn off and unplug the heater before cleaning. Use a soft cloth to wipe down the exterior, removing dust and debris. Avoid using harsh chemicals or abrasive materials, as they may damage the finish. For internal components, refer to the manual for specific instructions. If any parts are damaged, such as the power cord or thermostat, replace them immediately using genuine Pelonis parts. Proper maintenance ensures optimal performance and extends the heater’s lifespan. Always follow the manufacturer’s guidelines to avoid voiding the warranty.

Troubleshooting Common Issues

Common issues include the heater not turning on, overheating, or uneven heating. Check the power supply, ensure the thermostat is set correctly, and clean any dust buildup. Always refer to the manual for specific solutions to avoid further complications.

Diagnosing and Resolving Operational Problems

When the Pelonis 1500 Watt Heater fails to operate, start by ensuring it is properly plugged into a 120V outlet and the circuit is not overloaded. If the heater does not turn on, check the power switch and thermostat settings. For overheating issues, allow the unit to cool down before restarting. If the heater oscillates unevenly, inspect the base for stability. Regularly clean dust from the vents to maintain airflow. Refer to the manual for detailed troubleshooting steps. Always unplug the heater before performing any maintenance to ensure safety. If problems persist, contact customer support for assistance.

free scroll saw patterns pdf free download

Discover endless creativity with free scroll saw patterns in PDF format, perfect for all skill levels. Download, print, and craft intricate designs effortlessly, bringing your woodworking visions to life.

What Are Scroll Saw Patterns?

Scroll saw patterns are detailed templates used to guide the creation of intricate wood designs. Available as free PDF downloads, these patterns offer precise cutouts for various woodworking projects. They cater to all skill levels, from simple shapes for beginners to complex designs for experienced craftsmen. Patterns often feature geometric shapes, nature-inspired themes, or customizable templates. By downloading and printing these files, users can achieve professional-looking results with ease, making them a versatile tool for enhancing woodworking creativity and precision.

Why Use Free Scroll Saw Patterns?

Free scroll saw patterns offer a cost-effective way to explore woodworking creativity. They provide pre-designed templates, saving time and effort. With a wide variety available, users can choose projects suited to their skill level. These patterns are ideal for practice, allowing beginners to hone their skills and experienced craftsmen to experiment with new techniques. Downloadable PDFs ensure convenience, enabling quick access to designs for various applications, from decorative items to functional pieces. This accessibility makes free patterns a valuable resource for woodworking enthusiasts of all levels.

Benefits of Downloadable PDF Patterns

Downloadable PDF patterns offer unmatched convenience and accessibility. They provide scalable designs, ensuring compatibility with various project sizes. Instant access allows you to start crafting quickly, while easy printing eliminates the need for physical copies. PDFs are also eco-friendly and space-saving, reducing clutter. With a wide range of designs available, you can explore different styles and complexity levels. These patterns cater to all skill levels, making them ideal for both beginners and experienced craftsmen. Their versatility and practicality make downloadable PDFs a must-have for scroll saw enthusiasts.

Popular Types of Scroll Saw Patterns

Explore a variety of scroll saw patterns, including geometric designs, animal and nature-inspired themes, and customizable templates for all skill levels and creative preferences.

Geometric Patterns for Beginners

Geometric patterns are an excellent starting point for those new to scroll sawing. These designs feature simple shapes like squares, circles, and triangles, making them easy to follow. They help develop essential skills such as blade control and precision cutting. Many free PDF downloads offer intricate yet manageable geometric templates, allowing beginners to practice and build confidence. These patterns also introduce users to the basics of creating symmetrical and visually appealing designs. Start with basic shapes and gradually move to more complex geometric layouts as your skills improve.

Animal and Nature-Inspired Designs

Nature-inspired scroll saw patterns bring the outdoors to life with intricate designs featuring animals, birds, and foliage. These patterns are perfect for creating decorative pieces like bird silhouettes, leaf motifs, or wildlife portraits. Many free PDF downloads offer detailed templates for various species, allowing crafters to add a personal touch to their projects. From simple bird shapes for beginners to complex wildlife scenes for advanced users, these designs cater to all skill levels. They also make thoughtful gifts or additions to home decor, combining artistry with functionality.

Customizable Templates for Advanced Users

Advanced crafters can explore customizable scroll saw templates designed for intricate projects; These patterns allow for personalization, enabling the creation of unique designs tailored to specific themes or preferences. With detailed SVG, PNG, and JPEG files available, users can modify and enhance their work. Many free PDF downloads cater to experienced users, offering complex designs for challenges. These templates are ideal for creating intricate cuts, such as intarsia pieces or detailed fretwork, ensuring each project stands out with precision and artistry.

How to Download and Use Scroll Saw Patterns

Download free PDF patterns, print them on paper or cardstock, and attach to wood. Use a scroll saw to cut intricate designs. Follow the template for precise results.

Step-by-Step Guide to Downloading PDF Files

Visit a trusted website offering free scroll saw patterns. Browse the catalog, select your desired design, and click the “Download” button. Choose the PDF format for compatibility. Open the file using a PDF viewer like Adobe Reader. Print the pattern on paper or cardstock. Cut carefully along the lines or attach to wood for cutting. Ensure your printer settings match the pattern size for accuracy. Always preview before printing to avoid errors.

Printing and Preparing Patterns for Cutting

Print your downloaded PDF pattern on high-quality paper or cardstock for clarity. Ensure your printer settings match the pattern’s size and scale. Check the preview to confirm accuracy. For durability, laminate the pattern or attach it to thin cardboard. Cut out intricate details with scissors if needed. Secure the pattern to your wood using spray adhesive or double-sided tape. Ensure the pattern is centered and smooth for precise cutting with your scroll saw. Proper preparation ensures clean, accurate cuts and professional results.

Essential Tools and Materials Needed

scroll saw, assorted blades, and a work light for visibility. Use high-quality wood suitable for intricate cuts. Keep sandpaper and clamps handy for smoothing and securing materials. A dust mask and safety glasses are crucial for protecting yourself while cutting. Ensure your workspace is well-ventilated and organized to optimize efficiency and safety. These tools and materials are fundamental for achieving professional-looking results with your scroll saw patterns.

Best Sources for Free Scroll Saw Patterns

Popular websites and online communities offer free PDF downloads of scroll saw patterns, featuring geometric, animal, and customizable designs for various skill levels and projects.

Websites Offering Free PDF Downloads

Several websites provide an extensive collection of free scroll saw patterns in PDF format. 3axis.co offers over 100 downloadable patterns, while SuncatcherStudio.com features customizable designs. Scrollsaw Workshop provides a variety of templates for all skill levels, including intricate fretwork and intarsia designs. These sites cater to both beginners and advanced users, offering geometric, animal, and nature-inspired themes. Additionally, online communities and forums share user-contributed patterns, making it easy to find unique and creative designs for your woodworking projects. Explore these resources to enhance your scroll saw crafting experience.

Online Communities and Forums for Pattern Sharing

Online communities and forums are vibrant hubs for sharing and discovering free scroll saw patterns. Websites like Facebook groups and Reddit host active discussions where users exchange customizable templates and design ideas. Specialized forums dedicated to woodworking and scroll saw enthusiasts offer a wealth of free PDF downloads, from intricate fretwork to nature-inspired designs. These platforms foster collaboration, allowing creators to share their work, receive feedback, and inspire others. They are invaluable resources for both beginners and experienced craftsmen seeking new ideas and motivation.

Designing Your Own Custom Patterns

Designing custom scroll saw patterns allows for unparalleled creativity and personalization. Use software like Adobe Illustrator or online tools to create intricate designs. Convert ideas into SVG, PNG, or JPEG formats for easy cutting. Many websites offer free design templates and tutorials to guide beginners. Experiment with geometric shapes, nature-inspired motifs, or even custom text for unique projects. Test your designs on paper before cutting wood to ensure accuracy. This approach lets you craft truly one-of-a-kind pieces tailored to your vision or specific needs, making every project truly special.

Tips for Working with Scroll Saw Patterns

Tips for working with scroll saw patterns include selecting the right wood, mastering blade selection, and maintaining sharpness. Techniques for intricate details require patience and practice.

Choosing the Right Wood for Your Project

Selecting the right wood is crucial for scroll saw projects. Opt for thin, stable woods like plywood or MDF for intricate cuts. Hardwoods like cherry or maple offer durability and a polished finish. Softwoods, such as pine, are ideal for beginners due to their ease of cutting. Always ensure the wood is dry and free of knots to avoid blade breakage. Sand surfaces before cutting for smoother results. Proper wood selection enhances both the appearance and longevity of your scroll saw creations.

Mastering Blade Selection and Maintenance

Choosing the right blade is essential for precise cutting. Select blades based on the wood type and desired cut complexity. Thicker blades are ideal for straight cuts, while thinner ones excel at intricate details. Regularly maintain blades by cleaning them with solvent and storing them properly. Dull blades can cause uneven cuts and damage wood. Sharpen or replace blades as needed to ensure optimal performance. Proper blade care extends their lifespan and enhances your scroll sawing experience.

Techniques for Achieving Intricate Details

Achieving intricate details requires precision and control. Use sharp, high-quality blades designed for fine cuts. Maintain consistent speed to avoid tearing wood. Stack cutting allows for multiple identical pieces, while spiral blades enable smooth, curved cuts. Practice techniques like pivoting and subtle angle adjustments for complex designs. Utilize downloadable PDF patterns with detailed templates to guide your work. Regularly inspect and adjust your blade tension for optimal performance. With patience and practice, you can master intricate scroll saw details, creating stunning and professional-looking projects.

Project Ideas for All Skill Levels

Explore creative projects, from simple ornaments to complex designs. Free PDF patterns offer a variety of ideas for beginners, intermediate, and advanced scroll saw enthusiasts.

Simple Projects for Beginners

Start your scroll saw journey with easy, fun projects like decorative ornaments, basic bird shapes, or simple wooden signs. These patterns are perfect for practicing blade control and technique.
Beginners can create charming items such as coasters, small animals, or intricate puzzles. Downloadable PDFs provide clear guides for precise cutting.
These simple designs build confidence and skill, allowing you to progress to more complex creations. Plus, they make great gifts or home decor items, offering a sense of accomplishment with minimal tools and materials required.

Intermediate Designs for Skill Development

Intermediate scroll saw projects offer a step up in complexity, refining your skills with intricate yet manageable designs. Patterns like layered coasters, simple intarsia, or small decorative boxes challenge precision and patience. These designs introduce techniques such as curved cuts, internal details, and symmetry. As you progress, you’ll enhance your blade control and confidence. Free PDF patterns provide_guidance for these projects, helping you master intermediate techniques while creating functional or decorative items that showcase your growing expertise.

Advanced Patterns for Experienced Craftsmen

Advanced scroll saw patterns cater to seasoned craftsmen, offering complex and intricate designs that push creativity and skill. From multi-layered intarsia to delicate fretwork, these patterns require precision and mastery. They often feature detailed curves, tight angles, and intricate connections, testing even the most experienced hands. Free PDF downloads provide sophisticated templates for creating stunning pieces like ornate clocks, 3D sculptures, or intricate puzzles. These designs challenge mastery, ensuring exceptional results for those ready to elevate their craft.

Thank you for exploring free scroll saw patterns! Continue discovering new designs, mastering tools, and crafting unique projects. Join the community to stay inspired and connected.

Expanding Your Pattern Collection

Enhance your creativity by exploring diverse scroll saw patterns from trusted sources. Websites like Scroll Saw Workshop, SunCatcherStudio, and 3axis.co offer extensive libraries of free PDF patterns. From intricate geometric designs to customizable templates, these resources cater to all skill levels. Regularly updating your collection ensures access to fresh ideas and inspiration. Visit these sites to download new patterns, expand your creative horizons, and elevate your scroll saw projects to the next level of artistry and precision.

Staying Inspired and Creative

Keep your scroll saw projects fresh by exploring a wide range of free PDF patterns. Websites like SunCatcherStudio and 3axis.co offer diverse designs, from geometric shapes to nature-inspired motifs. Engage with online communities to share ideas and discover new techniques. Customizable templates allow you to personalize your work, ensuring every project is unique. Regularly browsing these resources will spark creativity and keep your scroll saw projects exciting and innovative, helping you grow as a craftsperson.

Joining the Scroll Saw Community

Become part of a vibrant scroll saw community by connecting with enthusiasts online. Join forums, social media groups, and websites like SunCatcherStudio to share ideas and learn from others. These platforms offer free patterns, tips, and inspiration to enhance your crafting journey. Engage with fellow woodworkers, showcase your projects, and gain feedback to refine your skills. Active participation fosters creativity and helps you stay updated on the latest trends and techniques in scroll saw artistry.

newair ice maker manual

Welcome to the NewAir Ice Maker Manual! This guide provides essential information for safe and efficient operation. Discover key features, troubleshooting, and maintenance tips to maximize performance and longevity. Learn how to make the most of your NewAir Ice Maker with detailed instructions tailored for optimal use.

1.1 Overview of the NewAir Ice Maker Models

NewAir offers a range of ice maker models designed for convenience and performance. The NewAir 2.0 Premium Nugget Ice Maker produces up to 30 lbs of nugget ice daily, while the NewAir AI-100SS countertop model makes ice in just six minutes. These models cater to different needs, ensuring efficient ice production for home, office, or outdoor use, with features like portability and energy efficiency.

1.2 Importance of Reading the Manual

Reading the NewAir Ice Maker manual is essential for safe and effective use. It provides critical safety information, operational guidelines, and troubleshooting tips. Understanding the manual ensures proper installation, maintenance, and operation, preventing potential hazards. Failure to follow instructions may lead to unsafe conditions or machine malfunction. Take the time to review the manual thoroughly before using your NewAir Ice Maker to maximize performance and longevity.

Installation and Setup

Proper installation ensures optimal performance. Place the ice maker on a stable, level surface and ensure adequate ventilation. Plug into a grounded outlet and avoid direct sunlight or moisture exposure.

2.1 Unpacking and Placement Guidelines

Unpack your NewAir Ice Maker carefully, ensuring all components are included and undamaged. Place the unit on a level, stable surface, away from direct sunlight and moisture. Maintain at least 4 inches of clearance from walls for proper ventilation. Avoid placing near heat sources or flammable materials. Ensure the area is well-ventilated to prevent damage and ensure safe operation.

2.2 Leveling the Ice Maker for Proper Operation

Proper leveling is crucial for your NewAir Ice Maker to function correctly. Use the adjustable feet to ensure the unit is completely level on a firm surface. Check the surface with a spirit level to confirm balance. Improper leveling can lead to uneven ice production or machine strain. Always ensure the ice maker is stable and balanced before operation.

Operating the NewAir Ice Maker

Operating your NewAir Ice Maker is straightforward and efficient. Simply add water, select your preferred ice size, and let the machine do the work. Enjoy fresh nugget ice in minutes with its advanced design. Always refer to the control panel for settings and ensure proper water levels for optimal performance.

3.1 Understanding the Control Panel

The control panel on your NewAir Ice Maker is designed for easy navigation. It features intuitive buttons for selecting ice size, starting/stopping production, and monitoring water levels. LED indicators provide clear feedback on the machine’s status, such as when the ice basket is full or water is low. Familiarize yourself with these controls to optimize your ice-making experience and ensure smooth operation. Regular use will make it second nature to adjust settings effortlessly.

3.2 Ice Production Modes and Settings

Your NewAir Ice Maker offers multiple production modes to suit your needs. Choose from small, medium, or large ice sizes for different occasions. The machine also features a timer function to pause or schedule ice production. Adjust settings for water usage and ice thickness to customize output. Smart sensors detect water levels and ice basket capacity, ensuring efficient operation. Explore these modes and settings to tailor ice production to your preferences and save energy.

Maintenance and Cleaning

Regular cleaning and descaling are essential for optimal performance. Check and replace filters as needed to ensure water quality. Wipe down surfaces to prevent mold and mildew buildup. Descaling every 3-6 months prevents mineral deposits. Clean the ice bin and water reservoir frequently to maintain hygiene and efficiency. Follow manual guidelines for detailed cleaning instructions.

4.1 Cleaning the Interior and Exterior

Regularly clean the interior and exterior to maintain hygiene and performance. Use a mild detergent and soft cloth to wipe down surfaces. Avoid abrasive materials that may damage finishes. Descale the machine every 3-6 months to remove mineral buildup. Clean the ice bin and water reservoir frequently to prevent mold. Dry all surfaces thoroughly after cleaning to prevent water spots. Refer to the manual for specific cleaning solutions and procedures.

4.2 Replacing Parts and Filters

Regularly replace worn or damaged parts to ensure optimal performance. Use only original spare parts for compatibility and safety. Replace the water filter every 6 months to maintain water quality. Check the manual for specific replacement schedules and procedures. Always turn off and unplug the unit before performing any replacements. Keep extra filters and common parts on hand to avoid downtime and ensure continuous ice production.

Troubleshooting Common Issues

Troubleshoot common problems like ice production issues or error codes. Refer to the manual for diagnostic guidance and solutions to restore functionality. Ensure safety and efficiency by addressing issues promptly. Regular maintenance can prevent many common problems and extend the lifespan of your NewAir Ice Maker.

5.1 Diagnosing Ice Production Problems

Identify issues causing low or no ice production. Check water supply lines for blockages or kinks and ensure the filter is clean. Inspect the ice maker’s levelness, as improper alignment can disrupt functionality. Review error codes in the manual for specific solutions. Ensure the machine is properly powered and restarted after addressing potential issues. Regular checks can prevent unexpected shutdowns and maintain efficiency. Consult the manual for detailed diagnostic steps to resolve production problems effectively.

5.2 Solving Common Error Codes

Error codes on your NewAir Ice Maker indicate specific issues. Refer to the manual for code definitions to identify problems like water supply disruptions or sensor malfunctions. Common codes like E1 or E2 often relate to water flow or temperature sensors. Reset the machine by unplugging and replugging it after addressing the issue. If problems persist, contact customer support for professional assistance. Always consult the manual for precise solutions to ensure optimal performance and safety.

Safety Precautions

Ensure safe installation, operation, and maintenance of your NewAir Ice Maker. Avoid potential hazards by following manual guidelines and using original parts. Always keep the unit level and away from flammable materials to prevent accidents.

6;1 General Safety Guidelines

Always read the manual before use to ensure safe operation. Keep children away from the ice maker and avoid touching hot surfaces. Ensure proper installation and leveling to prevent accidents. Use original parts only and avoid flammable materials nearby. Regularly inspect for damage and follow maintenance tips to ensure safe, efficient performance. Your safety is a top priority when using the NewAir Ice Maker.

6.2 Avoiding Potential Hazards

Ensure the ice maker is placed on a stable, dry surface to prevent electrical issues. Avoid overloading the machine, as this can cause mechanical stress. Keep flammable materials away, and never operate the device near open flames. Use only genuine parts for repairs. Regularly inspect cords and components for damage. Always unplug the unit during cleaning or maintenance to prevent accidental start-ups.

Accessories and Optional Features

Explore recommended accessories like water filters, ice scoops, and storage bags to enhance your NewAir Ice Maker’s functionality. Optional features may include advanced control panels or Wi-Fi connectivity for smart operation, ensuring a seamless and efficient ice-making experience tailored to your needs. Upgrade your setup for optimal performance and convenience.

7.1 Recommended Accessories

Enhance your NewAir Ice Maker experience with essential accessories. A water filter ensures clean ice production, while an ice scoop simplifies serving. Durable storage bags keep ice fresh, and a cleaning kit maintains hygiene. These accessories optimize performance and longevity, ensuring your ice maker operates efficiently for years. Additionally, consider a drainage kit for easier water management and a protective cover to prevent dust buildup when not in use.

7.2 Upgrading Your Ice Maker

Upgrade your NewAir Ice Maker for enhanced performance. Consider adding a nugget ice upgrade kit for unique textures or a high-capacity ice bin for increased storage. Additionally, installing a smart module enables Wi-Fi connectivity for app control. Always use original NewAir parts to ensure compatibility and safety. Consult the manual for specific upgrade instructions and compatibility checks before making any modifications to your unit.

Energy Efficiency and Cost Savings

The NewAir Ice Maker is designed for energy efficiency, featuring an Energy Saver mode to reduce consumption. Regular maintenance and proper usage can further lower energy costs and prolong lifespan.

8.1 Energy Consumption Overview

The NewAir Ice Maker operates efficiently, typically consuming 120-150 kWh of energy per month. Its advanced design minimizes power usage while maintaining high ice production; By utilizing smart sensors and an optimized cooling system, the machine ensures reduced energy waste and lower utility bills. This makes it an eco-friendly choice for daily use.

8.2 Tips for Reducing Energy Use

To minimize energy consumption, clean the ice maker regularly and ensure proper ventilation. Adjust settings to avoid overproduction and use the correct ice size for your needs. Place the unit away from direct sunlight and heat sources to reduce cooling demand. Utilize energy-saving modes and ensure the machine is level for optimal performance. These practices help lower energy use while maintaining efficiency.

Customer Reviews and Feedback

The NewAir Ice Maker is a top-rated product, with users praising its efficiency and ease of use. Customers highlight its ability to produce high-quality ice quickly, making it a favorite for home and outdoor use. Many complement its sleek design and reliable performance, while some note the importance of regular maintenance for optimal functionality.

9.1 User Experiences with NewAir Ice Makers

Users praise the NewAir Ice Maker for its efficiency and ease of use. Many highlight its ability to produce high-quality nugget ice quickly, making it a favorite for home use. The compact design and portability are also commended, with several users appreciating its performance during outdoor gatherings. However, some note the importance of regular cleaning to maintain optimal functionality and ice quality over time.

9.2 Common Praises and Complaints

Users often praise the NewAir Ice Maker for its nugget ice quality and efficient production. Many appreciate its compact design and portability. However, some note that it can be noisy during operation. A few users mention the need for frequent cleaning to maintain performance. Overall, the product is well-regarded for its value and convenience, though minor maintenance requirements are a common point of feedback.

Warranty and Support

The NewAir Ice Maker is backed by a comprehensive warranty program. For details, contact customer support via phone or email. Ensure to register your product for extended coverage and prompt assistance with any issues.

10.1 Understanding the Warranty Terms

Your NewAir Ice Maker comes with a limited warranty covering defects in materials and workmanship. Duration varies by model, typically one to three years. Review the manual for specific terms. Coverage includes repairs or replacements at no cost. Register your product to activate warranty benefits. For details, visit the official NewAir website or contact customer support directly.

10.2 Contacting Customer Support

For assistance with your NewAir Ice Maker, contact our customer support team. Phone: 1-800-NEWAIR-1, Email: support@newair.com, or visit newair.com/support. Hours: Monday-Friday, 8 AM-5 PM PST. Ensure your product is registered for warranty benefits. Our team is ready to help with any questions or concerns.

Comparison with Other Ice Maker Brands

NewAir Ice Makers excel in efficiency and design compared to competitors, offering faster ice production and sleek, compact models. Premium nugget ice and user-friendly controls set them apart, making NewAir a top choice for home and commercial use.

11.1 Key Differences in Features

NewAir Ice Makers stand out with their portable design and rapid ice production, producing up to 30 lbs of nugget ice daily. Unlike competitors, they offer compact footprints and user-friendly controls. Other brands may lack the specialized nugget ice capability or require more space and time to operate. NewAir’s focus on energy efficiency and quiet operation further distinguishes them in the market.

11.2 Performance and Value Comparison

NewAir Ice Makers deliver outstanding performance with rapid ice production and high daily capacity. Compared to other brands, they offer superior value through energy efficiency and quiet operation. While competitors may match on price, NewAir excels in nugget ice quality and compact design. Their models often include advanced features like customizable settings, making them a top choice for both home and commercial use.

12.1 Final Tips for Optimal Use

To ensure your NewAir Ice Maker performs at its best, always follow the manual’s guidelines. Regularly clean the interior and exterior to prevent mineral buildup. Keep the unit level and on a stable surface. Use distilled water for ice production to enhance quality. Monitor ice levels and store excess in an insulated container. By adhering to these tips, you’ll enjoy consistent, high-quality ice production and extend the lifespan of your appliance.

12.2 Encouragement for Proper Maintenance

Regular maintenance is key to extending the lifespan of your NewAir Ice Maker. By cleaning the interior and exterior, checking filters, and ensuring proper leveling, you’ll prevent issues and ensure optimal performance. Consistent upkeep not only improves efficiency but also prevents costly repairs. Take pride in maintaining your appliance, and it will reward you with consistent, high-quality ice production for years to come.