fast manual cars

Fast manual cars deliver a uniquely engaging driving experience, blending driver skill with raw performance and a direct connection to the machine.

What Defines a “Fast” Manual Car?

Defining a “fast” manual car isn’t solely about top speed or straight-line acceleration. It’s a holistic assessment encompassing several key attributes. Responsiveness is crucial – how quickly the engine reacts to throttle inputs. A powerful engine, delivering substantial horsepower and torque, is fundamental, but equally important is how effectively that power is managed.

A well-matched gearbox with precise shifts and appropriate ratios allows the driver to exploit the engine’s capabilities. Beyond pure speed, a fast manual car exhibits exceptional handling, providing confidence-inspiring cornering ability and a connected feel. Braking performance is also vital, enabling quick and controlled deceleration. Ultimately, a fast manual car isn’t just quick; it’s engaging, rewarding, and inspires confidence in the driver’s abilities.

The Appeal of a Manual Transmission

Despite the rise of automatic transmissions, the manual gearbox retains a powerful appeal, particularly in performance cars. This stems from the enhanced driver engagement it provides – a direct connection to the mechanical workings of the vehicle. The driver is fully in control, dictating gear selection and feeling intimately connected to the engine’s power delivery.

Many enthusiasts believe manuals offer superior control, especially during spirited driving or track days. Rev-matching and precise shifting allow for optimal performance and a more immersive experience. Furthermore, manuals often result in a lower purchase price and, potentially, simpler mechanics. The sense of accomplishment derived from mastering a manual transmission, and the feeling of truly driving a car, remains a compelling draw for many automotive aficionados.

Historical Context of Fast Manual Cars

Fast manual cars have a rich history, evolving from raw muscle to refined performance, consistently demanding driver skill and offering pure driving pleasure.

The Golden Age: 1960s & 70s Muscle Cars

The 1960s and 70s represented a pivotal era for fast manual cars, largely defined by the American “muscle car” phenomenon. These vehicles prioritized powerful V8 engines and rear-wheel drive, offering exhilarating, if sometimes unruly, performance. Manual transmissions were the standard, demanding driver involvement and skill.

Cars like the Ford Mustang, Chevrolet Camaro, and Dodge Challenger became icons, offering a blend of affordability and speed. While not always focused on precise handling, these cars delivered straight-line acceleration and a visceral driving experience. The emphasis was on brute force and a connection between driver and machine. This period established a foundation for future performance cars, showcasing the appeal of a driver-focused experience.

The era’s limitations in tire technology and suspension design meant mastering these cars required considerable skill, further cementing the manual transmission’s role in the pursuit of speed.

The Rise of Japanese Performance: 1980s & 90s

The 1980s and 90s witnessed a significant shift in the landscape of fast manual cars, with Japanese manufacturers emerging as formidable competitors. Unlike the American muscle car approach, Japanese performance focused on sophisticated engineering, turbocharged engines, and refined handling. Manual transmissions remained central to this ethos, offering precise control.

Models like the Nissan Skyline GT-R, Toyota Supra, and Honda Integra Type R showcased advanced technology, including all-wheel drive and innovative suspension systems. These cars weren’t just about raw power; they emphasized balance, responsiveness, and driver engagement. The focus moved towards track performance and cornering ability.

This era redefined what a “fast” car could be, proving that precision and technology could rival – and often surpass – brute force. Japanese manufacturers established a new benchmark for performance and driver involvement.

The Modern Era: 2000s – Present

The 2000s brought a new wave of fast manual cars, blending traditional performance with cutting-edge technology. While automatic transmissions with paddle shifters gained popularity, manufacturers continued to offer manual options for enthusiasts who craved ultimate control. Cars like the BMW M3 (E46, E92) exemplified this, delivering a thrilling driving experience.

This period saw a resurgence of interest in lightweight sports cars, with models like the Porsche 911 offering exceptional performance with a manual gearbox. American manufacturers also joined the fray, with the Chevrolet Corvette (C6, C7) providing accessible performance.

However, the increasing complexity of modern vehicles and a shift in consumer preferences began to threaten the availability of manual transmissions, making each new fast manual car a cherished commodity.

Key Components for Speed & Control

Optimal speed and control in fast manual cars rely on a harmonious blend of powerful engines, precise gearboxes, and responsive handling systems.

Engine Specifications: Power & Torque

Engine specifications are paramount when discussing fast manual cars. Power, typically measured in horsepower (hp), dictates the vehicle’s acceleration capabilities – the ability to rapidly increase speed. However, it’s not solely about peak horsepower. Torque, measured in pound-feet (lb-ft), represents the rotational force, crucial for strong pull from lower RPMs and overall responsiveness.

A high-revving engine prioritizes horsepower, often found in sports cars demanding precise gear selection. Conversely, engines with substantial low-end torque excel in providing effortless acceleration and are well-suited for spirited driving. The ideal scenario often involves a broad torque curve, delivering usable power across a wide RPM range. Displacement, the total volume of the cylinders, also plays a significant role, generally correlating with potential power and torque output. Turbocharging and supercharging further amplify these figures, offering substantial performance gains.

Transmission Ratios & Gearboxes

Transmission ratios are critical to maximizing the potential of fast manual cars. These ratios determine how engine power is translated to the wheels, influencing acceleration, top speed, and overall drivability. Shorter ratios provide quicker acceleration but lower top speed, ideal for track use or spirited driving. Taller ratios prioritize fuel efficiency and higher top speeds, suitable for highway cruising.

The gearbox itself must be robust enough to handle the engine’s power and torque. Close-ratio gearboxes offer smaller steps between gears, keeping the engine within its optimal power band during shifts. Synchromesh technology is essential for smooth, quick gear changes. The quality of the shift linkage – whether cable or direct – significantly impacts the driving experience. A precise and tactile shift feel enhances driver engagement and control, vital for extracting maximum performance;

Suspension & Handling Systems

Suspension and handling are paramount in fast manual cars, translating power into controlled speed. A well-tuned suspension minimizes body roll, maximizes grip, and provides predictable handling characteristics. Common components include stiffer springs, adjustable dampers, and upgraded sway bars. These modifications reduce weight transfer during cornering, allowing for higher entry and exit speeds.

Geometry plays a crucial role; camber, caster, and toe adjustments optimize tire contact patch for improved grip. Limited-slip differentials (LSDs) distribute power effectively to the wheels, reducing wheelspin and enhancing traction, particularly during acceleration out of corners. Bushings – polyurethane or spherical – replace softer rubber components, providing a more direct feel and reducing suspension deflection. A balanced chassis is key, ensuring predictable and responsive handling at the limit.

Braking Systems: Stopping Power

Stopping power is as crucial as acceleration in fast manual cars. High-performance braking systems are essential for safely managing the increased speeds these vehicles achieve. Upgraded brake pads, offering higher friction coefficients and resistance to fade, are a common first step. Larger brake rotors increase thermal capacity, dissipating heat more effectively during repeated hard braking.

Stainless steel brake lines replace rubber hoses, minimizing expansion under pressure and providing a firmer pedal feel. Multi-piston calipers distribute clamping force more evenly across the rotor surface, improving stopping performance. Brake ducting channels cool air directly to the rotors, further reducing heat buildup. A properly maintained braking system, including fresh brake fluid, is vital for consistent performance and reliability. Anti-lock Braking Systems (ABS) enhance control during emergency stops.

Popular Fast Manual Cars – By Era

Throughout automotive history, certain fast manual cars have achieved iconic status, representing peak performance and driver engagement across different decades.

Classic Choices (Pre-2000)

Before the widespread adoption of advanced driver aids and dual-clutch transmissions, a select group of fast manual cars defined performance for enthusiasts. These vehicles prioritized a raw, connected driving experience, demanding skill and rewarding precision. The late 20th century saw a blossoming of accessible performance, offering thrilling capabilities without the complexities of modern technology.

These classics weren’t just about straight-line speed; they often featured balanced chassis and responsive steering, making them engaging on winding roads. Many have become highly collectible, representing a golden age of driver-focused automobiles. Their simplicity and mechanical purity continue to attract a devoted following, ensuring their legacy endures.

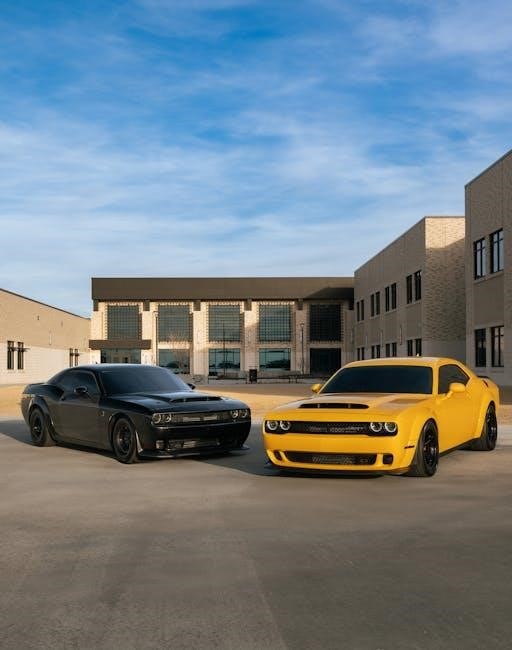
Ford Mustang (Fox Body & SN95)

The Ford Mustang, particularly the Fox Body (1979-1993) and SN95 (1994-2004) generations, represents attainable American muscle with a strong manual transmission following. The Fox Body, especially the 5.0L V8 models, offered a potent combination of power and affordability, becoming a favorite for modification and drag racing. Its lightweight construction and rear-wheel drive layout made it a capable performer.

The SN95 brought a more modern design and improved handling, continuing the Mustang’s tradition of V8 power and manual gearbox options. Both generations provided a platform for enthusiasts to build truly fast manual cars, and remain popular choices for restoration and performance upgrades today, embodying a classic American spirit.

Nissan Skyline GT-R (R32, R33, R34)

The Nissan Skyline GT-R, spanning the R32, R33, and R34 generations, cemented its legendary status as a technologically advanced and incredibly fast manual car. Renowned for its sophisticated all-wheel-drive system and robust RB-series engines, the GT-R dominated Japanese Touring Car Championship racing. The R32, often called “Godzilla,” initially shocked the automotive world with its performance.

Subsequent iterations, the R33 and R34, refined the formula, offering increased power and improved handling. The R34, in particular, gained international fame through appearances in films like “Fast & Furious.” These Skylines are highly sought after by collectors and enthusiasts, representing a pinnacle of Japanese engineering and a thrilling driving experience.

Honda Integra Type R

The Honda Integra Type R (ITR) stands as a benchmark for front-wheel-drive performance and a truly exceptional fast manual car. Released primarily for the Japanese domestic market, and later in limited numbers elsewhere, the ITR prioritized handling and driver engagement above all else. Its high-revving B-series engine, meticulously tuned suspension, and lightweight construction created a remarkably balanced and responsive machine.

The close-ratio 5-speed manual transmission further enhanced the driving experience, allowing for precise gear changes and optimal power delivery. The ITR’s reputation for razor-sharp handling and its ability to conquer winding roads quickly established it as a favorite among enthusiasts and track-day drivers. It remains a highly collectible and revered vehicle.

Modern Performance (2000 – Present)

The 21st century saw a continuation of fast manual cars, though increasingly overshadowed by automatic and dual-clutch transmissions. However, manufacturers continued to offer enthusiast-focused models with manual options, often prioritizing performance and driver involvement. These cars benefited from advancements in engine technology, chassis design, and electronic aids, resulting in impressive capabilities.

While overall manual transmission sales declined, the models that remained offered a compelling blend of modern performance and traditional driving engagement. Manufacturers like BMW, Porsche, and Chevrolet recognized the importance of catering to the enthusiast market, ensuring that the spirit of the fast manual car lived on, even amidst changing automotive trends.

BMW M3 (E46, E92, F80/F82)

The BMW M3, across its E46, E92, and F80/F82 generations, consistently represents a pinnacle of the fast manual car experience. The E46 M3 (2000-2006) with its naturally aspirated inline-six engine, offered a beautifully balanced chassis and precise manual gearbox. The E92 (2007-2013) introduced a V8 engine, increasing power and aural excitement, while retaining excellent manual transmission feel.

The F80/F82 (2014-2018) moved to a turbocharged inline-six, delivering even greater performance. Each generation’s manual option provided exceptional control and driver feedback, making them highly sought-after by enthusiasts. These M3s aren’t just about straight-line speed; they excel on track and winding roads, embodying BMW’s commitment to driving pleasure in a fast manual car.

Porsche 911 (Various Generations with Manual Options)

The Porsche 911 has long been synonymous with performance and driving purity, and its manual transmission options elevate that experience to another level. From the classic air-cooled 911s to the modern 991 and 992 generations, a manual gearbox has consistently been available for those seeking ultimate control. The precise shift action and rewarding feedback contribute to the 911’s iconic status as a fast manual car.

Each generation offers a unique blend of power and handling, but the manual transmission remains a constant, allowing drivers to fully engage with the car’s capabilities. Whether navigating a track or enjoying a spirited drive on the open road, the 911’s manual option delivers an unparalleled connection, solidifying its place among the greatest fast manual cars ever created.

Chevrolet Corvette (C6, C7 with Manual)

The Chevrolet Corvette, particularly the C6 and C7 generations, represents American muscle with a sophisticated edge, and the availability of a manual transmission adds a crucial layer of driver involvement. These Corvettes offer potent V8 engines paired with precise six-speed manual gearboxes, delivering exhilarating acceleration and a visceral driving experience. The C6 and C7 bridged the gap, offering modern performance with a traditional feel.

For enthusiasts seeking a fast manual car that’s both capable and relatively accessible, the Corvette is a compelling choice. Its balanced handling, powerful engine, and engaging manual transmission make it a standout performer on both the street and the track, cementing its reputation as a true American sports car icon.

Driving Techniques for Fast Manual Cars

Mastering a fast manual car requires refined skills – precise shifting, controlled launches, and understanding weight transfer for optimal speed and control.

Proper Shifting Techniques (Heel-Toe, Rev Matching)

Achieving seamless downshifts is crucial for maintaining momentum in a fast manual car. Rev matching, the art of blipping the throttle during downshifts, synchronizes engine speed with the lower gear, preventing jarring transitions and maintaining stability.

Heel-toe downshifting elevates this further, allowing simultaneous braking and throttle control. The heel pivots to apply brake pressure while the toe blips the throttle, creating incredibly smooth and rapid gear changes, especially during corner entry.

These techniques aren’t just about speed; they minimize stress on the drivetrain, improve lap times, and offer a more connected and rewarding driving experience. Practice is key to mastering these skills, building muscle memory for instinctive execution.

Launch Control & Acceleration

Maximizing acceleration in a fast manual car demands precise launch control. Unlike automatic systems, manual launches rely entirely on driver coordination – balancing throttle, clutch release, and minimizing wheelspin. A controlled burn-out can clean the tires, increasing grip.

The technique involves holding the car at the rev limiter with the clutch engaged, then rapidly releasing the clutch while applying full throttle. This requires finesse to avoid excessive wheelspin or stalling.

Short shifting – upshifting before reaching the engine’s peak power – can maintain momentum, especially on track. Mastering these techniques unlocks the full acceleration potential, transforming a quick car into a truly explosive performer.

Cornering & Weight Transfer

Effective cornering in a fast manual car hinges on understanding weight transfer. As you enter a turn, weight shifts to the front tires, increasing grip there while reducing it at the rear. Smooth steering inputs are crucial to manage this transfer effectively.

Heel-toe downshifting before the corner allows for smoother transitions and maintains engine braking, stabilizing the car. Trail braking – gently applying the brakes while turning – further controls weight transfer and maximizes cornering speed.

Maintaining throttle control throughout the corner is vital; too much throttle can induce oversteer, while lifting off abruptly can cause understeer. Mastering these techniques allows you to exploit the car’s handling limits with precision and confidence.

Maintenance & Modifications

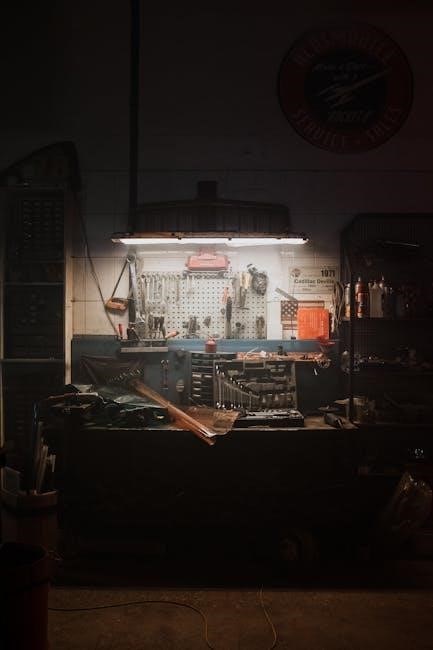
Regular upkeep and strategic modifications are essential for maximizing the performance and longevity of any fast manual transmission vehicle.

Regular Maintenance for Performance

Consistent maintenance is paramount for a fast manual car. This begins with frequent oil and filter changes, utilizing high-quality synthetic oil to protect the engine under stress. The transmission itself requires attention; fluid checks and replacements are crucial, typically every 30,000-60,000 miles, depending on driving style.

Don’t neglect the clutch! Inspect it for wear and tear, and address any slippage promptly. Brake fluid should be flushed regularly to maintain optimal stopping power. Cooling system maintenance – radiator flushes and hose inspections – prevents overheating during spirited driving. Finally, regularly check and adjust valve clearances, and inspect the drivetrain for any unusual noises or vibrations. Proactive maintenance prevents costly repairs and ensures peak performance.

Common Performance Modifications

Enhancing a fast manual car often involves strategic modifications. An aftermarket exhaust system, including headers and a cat-back setup, improves airflow and unlocks horsepower. Upgrading the intake system with a cold air intake or larger throttle body further boosts performance.

For increased engine responsiveness, consider an ECU tune, optimizing fuel and ignition maps. Suspension upgrades – coilovers, sway bars, and bushings – dramatically improve handling. A limited-slip differential enhances traction during cornering and acceleration. Clutch upgrades are essential for handling increased power. Finally, lightweight wheels and tires reduce unsprung weight, improving both acceleration and braking performance. Remember to research compatibility and professional installation is often recommended.

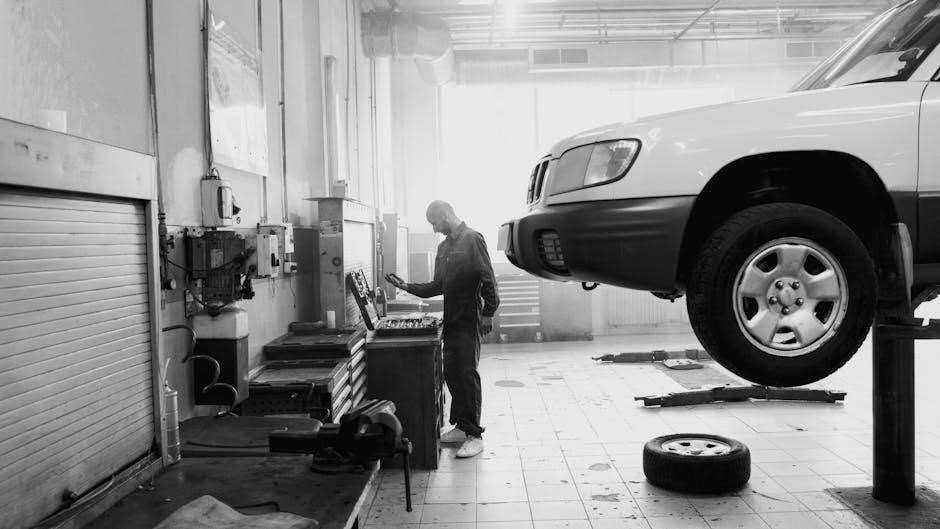
Potential Issues & Troubleshooting

Fast manual cars, especially modified ones, can present unique challenges. Clutch failure is common with aggressive driving, manifesting as slippage or difficulty engaging gears. Synchro wear in the transmission leads to grinding during shifts, requiring rebuild or replacement.

Engine issues stemming from increased stress include premature wear of pistons and bearings. Regularly check fluid levels – transmission, engine oil, and coolant – for leaks or contamination. Listen for unusual noises, like whining from the gearbox or knocking from the engine. Diagnostic tools can help pinpoint issues. Addressing problems promptly prevents further damage and maintains performance. Proper maintenance and a skilled mechanic are invaluable for long-term reliability.

The Future of Fast Manual Cars

Despite declining sales, a dedicated enthusiast base ensures fast manual cars will endure as a celebrated niche, preserving driving purity and skill.

Declining Sales & Shifting Preferences

The automotive landscape is undergoing a significant shift, and unfortunately for manual transmission enthusiasts, sales figures reflect a clear trend. Automatic transmissions, particularly those with advanced features like paddle shifters and sophisticated algorithms, are increasingly favored by the general public. This preference stems from a desire for convenience, ease of use, and, arguably, slightly quicker acceleration times in some applications.

Modern automatics often outperform manual gearboxes in objective tests, diminishing the performance advantage once solely held by skilled manual drivers. Furthermore, the growing popularity of electric vehicles, which inherently lack a traditional transmission, contributes to the decline. Younger generations, often learning to drive in automatic vehicles, may lack the experience or interest in mastering a manual transmission, further solidifying this shift in consumer preference.

The Enthusiast Community & Preservation

Despite declining sales, a dedicated and passionate enthusiast community continues to champion fast manual cars. Online forums, car clubs, and track days provide spaces for owners and aficionados to connect, share knowledge, and celebrate the unique driving experience a manual transmission offers. This community actively preserves these vehicles, restoring classic models and maintaining modern performance cars to ensure their longevity.

Preservation efforts extend beyond simply keeping cars running; they encompass teaching new generations the art of driving a manual. Workshops and mentorship programs aim to pass on skills like heel-toe downshifting and proper rev-matching. The enthusiast community understands the intrinsic value of driver engagement and actively works to keep the spirit of the manual alive, even as the broader market moves towards automation.

2007 honda shadow vt750c aero shop manual pdf

Article Plan: 2007 Honda Shadow VT750C Aero Shop Manual PDF

This guide details accessing and utilizing the 2007 Honda Shadow VT750C Aero’s shop manual, covering maintenance, repair, and troubleshooting procedures effectively.

The 2007 Honda Shadow VT750C Aero represents a popular choice for riders seeking a classic cruiser experience blended with Honda’s renowned reliability. This model year boasts a comfortable riding position, stylish aesthetics, and a dependable 745cc liquid-cooled V-twin engine. Understanding its mechanics is crucial for owners aiming to perform maintenance, repairs, or modifications. A comprehensive shop manual is therefore invaluable.

Whether you’re a seasoned mechanic or a DIY enthusiast, access to detailed instructions, diagrams, and specifications ensures tasks are completed safely and correctly. Proper maintenance extends the lifespan of this iconic motorcycle, preserving its performance and value.

II. Importance of a Shop Manual

A dedicated shop manual for the 2007 Honda Shadow VT750C Aero is far more than just a collection of instructions; it’s an essential tool for any owner. It provides detailed, step-by-step guidance for everything from routine maintenance like oil changes to complex repairs involving the engine or electrical system. Attempting repairs without a manual risks damaging components or, worse, compromising rider safety.

The manual offers precise torque specifications, wiring diagrams, and exploded views, ensuring accuracy. It empowers owners to understand their motorcycle’s inner workings, saving money on professional service and fostering a deeper connection with their machine.

III. Locating the 2007 VT750C Aero Shop Manual PDF

Finding a PDF version of the 2007 Honda Shadow VT750C Aero shop manual requires exploring several avenues. Official Honda resources, while potentially offering the most accurate version, may require a purchase or subscription. Numerous third-party online retailers specialize in motorcycle manuals, often providing downloadable PDFs. However, verifying authenticity is crucial with these sources.

Online forums and communities dedicated to the VT750C Aero are valuable resources; members frequently share links or offer copies. Exercise caution when downloading from unofficial sources to avoid malware or incomplete manuals.

III.A. Official Honda Resources

Honda’s official website is the primary source for authentic shop manuals. While a free PDF download isn’t always available, Honda often provides digital manuals for purchase, ensuring accuracy and completeness. Powersports dealerships can also order a physical copy or potentially provide access to digital versions. Honda’s official resources guarantee the manual is specifically tailored to the 2007 VT750C Aero, covering all aspects of maintenance and repair.

Checking Honda’s service publications section is a good starting point for locating the correct manual.

III.B. Third-Party Online Retailers

Numerous online retailers specialize in motorcycle service manuals, offering both physical copies and PDF downloads. Websites like eBay, Amazon, and specialized motorcycle parts retailers frequently list the 2007 Honda Shadow VT750C Aero shop manual. When purchasing from third-party sources, carefully verify the seller’s reputation and the manual’s condition. Ensure the PDF is a legitimate, complete version and not a low-quality scan.

Compare prices and shipping costs before making a purchase to secure the best deal.

III.C. Online Forums and Communities

Dedicated online forums and communities for Honda Shadow owners often serve as valuable resources for locating shop manuals. Members may share links to downloadable PDFs, offer advice on reputable sellers, or even facilitate group purchases to reduce costs. Websites like Shadowriders.net and various Honda motorcycle forums are excellent starting points.

However, exercise caution when downloading files from forums; verify their authenticity to avoid malware or incomplete manuals; Active participation in these communities can unlock access to helpful information.

IV. Understanding the Shop Manual’s Structure

The 2007 VT750C Aero shop manual is meticulously organized for efficient repair and maintenance. A comprehensive Table of Contents provides a clear overview of all covered systems. An extensive Index and robust Keyword Search functionality allow quick location of specific procedures or parts.

Detailed Diagrams and Illustrations are crucial for visualizing complex assemblies and understanding component relationships. Familiarizing yourself with this structure will significantly enhance your ability to navigate and utilize the manual effectively.

IV.A. Table of Contents Overview

The Table of Contents in the 2007 VT750C Aero shop manual serves as a roadmap to its extensive information. It logically categorizes sections, beginning with general information, then progressing through detailed breakdowns of the Engine and Drivetrain, Chassis, Suspension, and Electrical System.

Further sections cover routine Maintenance, detailed Troubleshooting guides, and specific component overviews. This structured approach allows users to quickly pinpoint relevant information for any repair or maintenance task.

IV.B. Index and Keyword Search Functionality

The 2007 VT750C Aero shop manual PDF’s index is crucial for rapid information retrieval. It lists topics alphabetically, referencing specific page numbers for quick access. A robust keyword search function, standard in most PDF readers, further enhances usability.

Users can input terms like “carburetor,” “brakes,” or “wiring” to instantly locate relevant sections. This functionality bypasses manual browsing, saving significant time during repairs or maintenance. Effective use of both the index and search features maximizes the manual’s value.

IV.C. Diagrams and Illustrations

The 2007 Honda Shadow VT750C Aero shop manual PDF heavily relies on detailed diagrams and illustrations to clarify complex procedures. These visuals depict component locations, assembly sequences, and internal mechanisms with precision. Exploded views are particularly helpful for understanding how parts fit together during reassembly.

Wiring diagrams are essential for electrical troubleshooting, while engine schematics illustrate fuel and ignition systems. High-quality illustrations minimize ambiguity, enabling even novice mechanics to confidently tackle repairs. These visuals are integral to successful maintenance.

V. Key Sections within the Shop Manual

The 2007 Honda Shadow VT750C Aero shop manual is logically organized into key sections for efficient repair and maintenance. A substantial portion focuses on the Engine and Drivetrain, detailing overhauls and adjustments. The Chassis and Suspension section covers steering, brakes, and fork maintenance.

Crucially, a dedicated Electrical System section provides wiring diagrams and troubleshooting guides. These sections are supplemented by detailed procedures for routine tasks, ensuring comprehensive coverage. Understanding this structure is vital for quickly locating relevant information.

V.A. Engine and Drivetrain

The Engine and Drivetrain section of the 2007 VT750C Aero manual provides exhaustive details for servicing the motorcycle’s core components. It covers complete engine removal, disassembly, and reassembly procedures, alongside valve adjustments and carburetor synchronization.

Detailed diagrams illustrate piston, cylinder, and crankshaft specifications. The manual also addresses the drivetrain, including clutch, transmission, and final drive maintenance. Torque specifications are clearly outlined for all related fasteners, ensuring proper assembly and preventing damage during repairs.

V.B. Chassis and Suspension

The 2007 VT750C Aero shop manual’s Chassis and Suspension section offers comprehensive guidance for maintaining the motorcycle’s structural integrity and ride quality. It details procedures for front fork disassembly, seal replacement, and oil level adjustments, alongside rear shock absorber service and replacement instructions.

Wheel bearing servicing, brake caliper mounting, and steering head bearing adjustment are thoroughly explained with detailed diagrams. The manual specifies torque values for all chassis and suspension fasteners, crucial for safe and reliable operation. It also covers frame inspection procedures.

V.C. Electrical System

The 2007 VT750C Aero shop manual dedicates a substantial section to the electrical system, vital for diagnosing and resolving issues. It provides detailed wiring diagrams, component locations, and testing procedures for the battery, charging system, starter, and ignition.

Troubleshooting guides assist in identifying faults within the lighting, instrumentation, and fuse boxes. The manual outlines procedures for replacing components like the voltage regulator, relays, and sensors. Understanding the wiring diagrams is key, and the manual’s illustrations aid in tracing circuits effectively for accurate repairs.

VI. Common Maintenance Procedures (Referenced in Manual)

The 2007 VT750C Aero shop manual thoroughly details routine maintenance tasks essential for longevity. These include step-by-step instructions for oil and filter changes, specifying oil types and capacities. Brake system maintenance, covering pad replacement and fluid flushing, is also comprehensively addressed.

Tire changes, balancing, and chain adjustments are clearly outlined, alongside valve clearance checks and adjustments. The manual emphasizes proper torque specifications for all fasteners, ensuring safe and reliable operation. Following these procedures, as guided by the manual, maintains optimal performance.

VI.A. Oil Changes and Filter Replacements

The shop manual provides detailed instructions for oil changes on the 2007 VT750C Aero, specifying the recommended oil type (typically 20W-40 or 20W-50) and capacity (approximately 1.6 quarts with filter). It illustrates the location of the oil drain plug and filter, emphasizing proper tightening torque to prevent leaks.

The manual guides filter removal and installation, recommending pre-lubricating the new filter gasket. It stresses the importance of disposing of used oil responsibly. Regular oil and filter changes, following the manual’s schedule, are crucial for engine health.

VI.B. Brake System Maintenance

The 2007 VT750C Aero shop manual details brake pad inspection and replacement procedures, including specific torque specifications for caliper mounting bolts and brake line banjo bolts. It illustrates how to check brake fluid levels and bleed the brake system to remove air bubbles, ensuring optimal braking performance.

The manual also covers rotor inspection for wear or damage, advising on replacement intervals. Proper brake maintenance, guided by the manual, is vital for rider safety and preventing brake failure. It emphasizes using the correct DOT brake fluid.

VI.C. Tire Changes and Balancing

The 2007 Honda Shadow VT750C Aero shop manual provides step-by-step instructions for tire removal and installation, specifying correct tire pressures for optimal handling and wear. It details the process of checking wheel bearing play and ensuring proper wheel alignment.

Crucially, the manual outlines dynamic wheel balancing procedures, minimizing vibrations and extending tire life. It also includes torque specifications for axle nuts and wheel mounting hardware. Following these guidelines ensures safe and stable operation, preventing potential hazards related to improper tire maintenance.

VII. Troubleshooting Common Issues (Using the Manual)

The 2007 Honda Shadow VT750C Aero shop manual is invaluable for diagnosing and resolving frequent problems. It offers detailed flowcharts and diagnostic procedures for issues like starting difficulties, often linked to fuel delivery or ignition system faults.

The manual assists in pinpointing fuel system problems – clogged injectors or a failing fuel pump – and electrical faults, utilizing wiring diagrams for accurate tracing. It provides specific troubleshooting steps, referencing component testing procedures and acceptable performance values, enabling effective repairs and minimizing downtime.

VII.A. Starting Problems

The shop manual provides systematic troubleshooting for starting issues on the 2007 VT750C Aero. It guides users through checking the battery, starter motor, and charging system, detailing voltage and amperage specifications.

Fuel delivery is a key focus, with procedures for inspecting the fuel pump, filter, and carburetor (if applicable). Ignition system checks, including spark plug condition and coil testing, are also covered. The manual’s diagnostic flowcharts help isolate the root cause, whether it’s a low battery, faulty starter, or fuel starvation, ensuring efficient resolution.

VII.B. Fuel System Issues

The 2007 VT750C Aero shop manual offers detailed guidance for diagnosing fuel system problems. It covers fuel pump operation, including pressure testing procedures and troubleshooting steps for a non-functioning pump.

Carburetor cleaning and adjustment (if equipped) are thoroughly explained, with diagrams illustrating disassembly and reassembly. Fuel filter replacement instructions are included, alongside checks for clogged fuel lines and a faulty fuel petcock. The manual assists in identifying issues like fuel leaks or inconsistent fuel delivery, ensuring optimal engine performance and preventing further damage.

VII.C. Electrical Faults

The 2007 VT750C Aero shop manual provides comprehensive electrical troubleshooting procedures. It details how to use a multimeter to test voltage, continuity, and resistance within the bike’s wiring harness.

Specific guidance is given for diagnosing issues with the charging system (stator, regulator/rectifier, battery), ignition system (coils, spark plugs, CDI unit), and lighting components. Wiring diagrams are essential for tracing circuits and identifying short circuits or open connections. The manual aids in resolving problems like a dead battery, non-starting engine, or malfunctioning lights, ensuring safe operation.

VIII. Safety Precautions When Using the Manual

The 2007 Honda Shadow VT750C Aero shop manual emphasizes safety throughout all repair procedures. Always disconnect the battery’s negative terminal before working on the electrical system to prevent shorts.

Wear appropriate personal protective equipment (PPE), including safety glasses and gloves. Support the motorcycle securely on a stand to prevent it from falling. Be cautious when handling flammable fluids like gasoline and oil, and work in a well-ventilated area. Follow torque specifications precisely to avoid damaging components. Prioritize safety to prevent injury during maintenance and repair.

IX. Tools Required for Maintenance & Repair (Manual Reference)

The 2007 Honda Shadow VT750C Aero shop manual details a comprehensive tool list for effective maintenance. Essential tools include metric socket sets, wrenches, screwdrivers (Phillips and flathead), and torque wrenches for precise tightening. Specialized tools like a chain breaker, valve adjustment tools, and a carburetor synchronizer are often required for specific tasks;

Diagnostic tools, such as a multimeter, are crucial for electrical system work. A motorcycle lift or stand is highly recommended for safe and convenient access. Refer to the manual for specific tool sizes and types needed for each procedure.

X. Interpreting Torque Specifications

The 2007 Honda Shadow VT750C Aero shop manual emphasizes precise torque specifications for all fasteners. Ignoring these values can lead to component failure or unsafe riding conditions. Torque specs are typically listed in Newton-meters (Nm) or foot-pounds (ft-lbs). Always use a calibrated torque wrench to achieve the correct tightness.

The manual often provides different torque values based on fastener size, material, and lubrication. Understanding these nuances is critical. Over-tightening can strip threads, while under-tightening can cause loosening during operation.

XI. Understanding Wiring Diagrams

The 2007 Honda Shadow VT750C Aero shop manual features detailed wiring diagrams essential for electrical system diagnosis and repair. These diagrams illustrate the connections between components, using symbols to represent switches, relays, sensors, and the ECU. Learning to decipher these symbols is crucial.

Trace circuits carefully, paying attention to wire colors and connector locations. The manual often includes separate diagrams for different systems (lighting, ignition, charging). Always disconnect the battery before working on electrical components to prevent shorts and damage.

XII. Using Exploded View Diagrams

The 2007 Honda Shadow VT750C Aero shop manual utilizes exploded view diagrams to visually represent component assemblies. These diagrams are invaluable when disassembling and reassembling parts, showcasing the order and orientation of each item. They clearly illustrate how components fit together, including washers, seals, and fasteners.

Refer to the parts list accompanying each diagram to identify specific components by their part numbers. Careful study of these diagrams minimizes errors during reassembly and ensures proper functionality. Always use the correct torque specifications when tightening fasteners.

XIII. Identifying Parts Using the Manual

The 2007 Honda Shadow VT750C Aero shop manual features detailed parts catalogs crucial for accurate identification. Each component is assigned a unique part number, enabling precise ordering of replacements. Diagrams accompany these lists, visually linking part numbers to their physical location on the motorcycle.

When ordering parts, always double-check the part number against the manual to avoid errors. Utilize online Honda parts finders, cross-referencing with the manual’s information for confirmation. Accurate part identification streamlines repairs and ensures compatibility.

XIV. Modifying Your VT750C Aero (With Manual Guidance)

The 2007 Honda Shadow VT750C Aero shop manual provides a foundation for informed modifications. While not detailing aftermarket parts directly, it offers crucial baseline data – torque specs, wiring diagrams, and component layouts – essential for successful customization.

Understand that modifications can impact warranty and reliability. The manual aids in assessing compatibility and potential consequences. Always prioritize safety and consult experienced mechanics before undertaking significant alterations. Proper documentation, referencing the manual, is vital for future maintenance and resale.

XV. Legal Considerations Regarding Manual Use

Utilizing the 2007 Honda Shadow VT750C Aero shop manual carries certain legal implications. The manual is intended as a guide for qualified individuals; improper repairs could lead to injury or damage, potentially resulting in liability.

Copyright restrictions apply to the manual itself – unauthorized reproduction or distribution is prohibited. Modifications performed incorrectly may violate safety regulations or emissions standards. Always adhere to local laws and regulations when servicing your motorcycle, and prioritize professional assistance when unsure.

XVI. Differences Between Aero Models (Manual Specifics)

While the core 2007 Honda Shadow VT750C Aero shop manual covers the base model, subtle variations exist across Aero sub-models. Pay close attention to specific sections relating to features like windshields, saddlebags, or passenger backrests, as procedures may differ.

Certain years saw minor component updates; the manual may not reflect every change. Cross-reference with parts diagrams to confirm compatibility. Always prioritize information pertaining to your exact model year and configuration for accurate repairs and maintenance.

XVII. Updating Your Knowledge – Later Model Manuals

Though focused on the 2007 VT750C Aero, consulting later model shop manuals can offer valuable insights. Honda often implements incremental improvements, and these manuals may detail revised procedures or address recurring issues discovered post-2007;

Be cautious – not all changes are backward compatible. Focus on sections detailing component updates or improved troubleshooting techniques. Supplementing your 2007 manual with later editions expands your knowledge base, enhancing your ability to diagnose and resolve complex problems effectively.

XVIII. Digital vs. Physical Manuals – Pros and Cons

The 2007 VT750C Aero shop manual presents a choice: digital PDF or physical book. Digital manuals offer portability, searchability, and zoom functionality – ideal for on-the-go reference. However, they require a device and can be vulnerable to data loss.

Physical manuals are durable, require no power, and offer a tactile experience. Yet, they are bulkier, harder to search, and susceptible to damage. Consider your work style and environment when choosing; backing up a digital copy is always recommended.

XIX. Common PDF Reader Issues & Solutions

Accessing the 2007 VT750C Aero shop manual PDF can sometimes present challenges. Common issues include slow loading, rendering errors, or inability to search. Ensure you have the latest PDF reader version (Adobe Acrobat Reader is recommended).

If problems persist, try a different PDF reader, clear your browser cache, or download the manual again. Corrupted files can cause errors; verifying the file’s authenticity is crucial. Regularly updating your software ensures optimal performance and compatibility.

XX. Backing Up Your Shop Manual PDF

Protecting your investment in the 2007 VT750C Aero shop manual PDF is vital. Data loss can occur due to hardware failure or accidental deletion. Regularly back up the file to multiple locations – an external hard drive, cloud storage (Google Drive, Dropbox), and a USB drive are excellent options.

Consider creating multiple backups and storing them offsite for disaster recovery. This ensures access to crucial repair information even in unforeseen circumstances, safeguarding your motorcycle maintenance efforts.

XXI. Verifying the Authenticity of a PDF Manual

Ensuring the 2007 VT750C Aero shop manual PDF is genuine is crucial for accurate repairs. Beware of corrupted or incomplete files from unofficial sources. Compare the PDF’s file size and page count with known legitimate versions.

Look for official Honda branding and copyright information within the document. Check for clear diagrams and legible text – signs of a professionally produced manual. If discrepancies exist, seek a verified source to avoid potentially damaging errors during maintenance or repair procedures.

XXII. Utilizing the Manual for Restoration Projects

A 2007 VT750C Aero shop manual PDF is invaluable for motorcycle restoration. It provides detailed exploded views, aiding in parts identification and correct reassembly. Torque specifications ensure proper fastener tightening, preventing damage during rebuilds.

Wiring diagrams are essential for restoring the electrical system. The manual guides you through disassembly, cleaning, and reconditioning components. Accurate procedures minimize errors and maintain originality, resulting in a faithful restoration of your classic Honda Shadow Aero.

XXIII. Resources for Additional VT750C Aero Information

Beyond the shop manual, numerous resources support VT750C Aero owners. Online forums and communities, like those dedicated to Honda Shadows, offer troubleshooting advice and shared experiences. YouTube channels provide visual guides for maintenance and repairs, complementing the manual’s instructions.

Official Honda websites may host parts diagrams and updates. Retailers specializing in motorcycle parts offer extensive catalogs. Exploring these resources alongside your shop manual PDF enhances your understanding and capabilities for maintaining and modifying your Aero.

XXIV. Conclusion: Maximizing Your Shop Manual’s Value

The 2007 Honda Shadow VT750C Aero shop manual PDF is an invaluable asset for owners. Mastering its structure, diagrams, and torque specifications empowers confident maintenance and repair. Supplementing the manual with online resources and community knowledge further expands your skillset.

Regularly backing up your digital copy ensures accessibility. Authenticating your PDF prevents using inaccurate information. Ultimately, diligent use of this manual unlocks the full potential of your VT750C Aero, ensuring years of reliable enjoyment and personalized customization.

black and decker bread machine manual

Welcome! This guide unlocks the potential of your Black and Decker bread machine, offering fresh-baked goodness; Explore diverse recipes and settings for delightful results, consistently.

Understanding Your Bread Machine’s Features

Your Black and Decker bread machine boasts versatile functionality! Explore pre-programmed settings for white, whole wheat, and even sweet breads. Adjust crust color to your preference – light, medium, or dark. Utilize the delay timer for freshly baked bread in the morning. The keep-warm function maintains optimal temperature post-baking. A viewing window allows monitoring, while the automatic shut-off ensures safety.

Components and Parts Identification

Familiarize yourself! Key parts include the bread pan, kneading paddle, control panel, housing, and viewing window – essential for successful baking experiences.

Bread Pan and Kneading Paddle

The bread pan is non-stick, ensuring easy loaf removal after baking; always ensure it’s securely locked into place. The kneading paddle, crucial for dough development, mixes and kneads ingredients effectively. Remove it before the baking cycle to avoid marks on your bread. Regularly inspect both for wear, and hand wash gently with warm, soapy water – avoid abrasive cleaners to preserve the non-stick coating and paddle’s integrity.

Control Panel Overview

The control panel features buttons for cycle selection (Basic, Whole Wheat, Sweet, etc.), crust control (Light, Medium, Dark), and loaf size (1lb, 1.5lb, 2lb). A digital display shows cycle time remaining. The ‘Start/Stop’ button initiates or pauses operation. Familiarize yourself with each function for optimal bread-making; refer to the recipe guide for appropriate settings for each bread type.

Getting Started: First-Time Use

Before baking, thoroughly clean the pan and paddle. Run a test cycle without ingredients to burn off any manufacturing residue and ensure optimal performance.

Initial Setup and Cleaning

Unboxing and Preparation: Carefully remove your Black and Decker bread machine and all components. Before the first use, wipe down the exterior with a damp cloth. Crucially, wash the bread pan and kneading paddle with warm, soapy water. Ensure all traces of soap are rinsed away and thoroughly dry both items. This initial cleaning removes any potential residue from the manufacturing process, guaranteeing a pristine baking experience. A clean machine is a happy machine!

Running a Test Cycle

Confirming Functionality: To ensure optimal performance, run a test cycle before baking your first loaf. Add one cup of water to the bread pan, but no dough ingredients. Select the ‘Basic’ setting and a medium crust color. This cycle verifies the heating element, paddle rotation, and overall machine operation. Observe for any unusual noises or issues. This proactive step guarantees a successful baking journey!

Basic Bread Recipe – White Bread

Simple & Delicious: This classic white bread recipe is perfect for beginners, yielding a soft, flavorful loaf with minimal effort and readily available ingredients.

Ingredient Measurements and Order

Precision is Key: For optimal results, carefully measure all ingredients using liquid and dry measuring cups. Generally, add liquids first – water, milk, or oil – followed by sugar, salt, and finally, flour. Create a small well in the flour and add the yeast on top, ensuring it doesn’t directly contact the liquid. This prevents premature activation. The order matters for proper mixing and rising!

Step-by-Step Instructions for White Bread

Let’s Bake! Select the ‘Basic’ or ‘White Bread’ setting on your machine. Add ingredients in the order specified – liquids, then dry, with yeast last. Secure the bread pan and ensure the kneading paddle is properly attached. Press ‘Start’ and let the machine work its magic! A beep will signal completion. Carefully remove the loaf and enjoy fresh bread.

Advanced Bread Recipes

Expand Your Baking! Discover exciting variations like whole wheat, cinnamon raisin, and other sweet breads, utilizing unique ingredients and customized settings for delicious results.

Whole Wheat Bread Variations

Explore Nutritious Options! Experiment with 100% whole wheat for a hearty loaf, or blend it with white flour for a lighter texture. Add honey or molasses for sweetness, and consider incorporating seeds like flax or sunflower. Adjust liquid levels carefully, as whole wheat absorbs more moisture. Different brands of whole wheat flour yield varying results, so experimentation is key to achieving your perfect loaf. Remember to select the appropriate bread cycle on your Black and Decker machine for optimal rising and baking.

Sweet Bread Recipes (Cinnamon Raisin, etc.)

Indulge Your Sweet Tooth! For cinnamon raisin bread, gently fold in cinnamon-sugar and raisins during the dough cycle. Other variations include chocolate chip, cranberry walnut, or even pumpkin spice. Reduce yeast slightly when adding sugar. Ensure ingredients are well combined, but avoid overmixing. Utilize the “Sweet” or “Dessert” cycle on your Black and Decker machine for best results, and monitor crust color closely to prevent burning.

Using Different Settings

Customize Your Bake! Explore settings like crust control, loaf size, and specialized cycles—sweet, whole wheat, or rapid bake—for perfect bread every time.

Crust Color Control

Achieve Your Ideal Crust! Your Black and Decker bread machine offers adjustable crust settings – typically Light, Medium, and Dark. Selecting a darker setting extends baking time, resulting in a richer, more deeply browned crust. Conversely, a lighter setting produces a paler, softer crust. Experiment to discover your preferred level of crispness and color, tailoring each loaf to your exact taste preferences for a truly personalized baking experience.

Loaf Size Selection

Bake for Any Gathering! Many Black and Decker bread machines feature loaf size options – usually 1.5lb, 2lb, or 2.5lb. Choosing the correct size ensures optimal ingredient proportions and baking times. A smaller loaf is perfect for individuals or small families, while a larger loaf suits bigger households or entertaining guests. Always refer to your recipe for recommended loaf size guidance.

Troubleshooting Common Issues

Don’t despair! This section addresses frequent problems like rising failures or stuck paddles, providing solutions for consistently perfect loaves every time you bake.

Bread Not Rising Properly

Insufficient yeast is a primary culprit; ensure it’s fresh and measured accurately. Old yeast loses potency. Incorrect liquid temperature impacts activation – lukewarm is ideal. Too much salt inhibits yeast growth, while too little results in a flat loaf.

Ambient temperature matters; cold rooms slow rising. Expired ingredients can also contribute. Double-check measurements and consider a yeast proofing test before starting a new cycle.

Paddle Stuck in Bread

Damp dough is a common cause; reduce liquid slightly in future batches. Large ingredient pieces can wedge around the paddle. Ensure ingredients are properly measured and added in the correct order, as specified in your recipe.

Allow the loaf to cool completely before attempting removal. Gently loosen the paddle with a non-abrasive tool if needed, avoiding damage to the non-stick coating.

Cleaning and Maintenance

Regular cleaning ensures optimal performance and longevity. Wipe the exterior with a damp cloth and always thoroughly clean the bread pan and kneading paddle after each use.

Cleaning the Bread Pan and Paddle

After each baking cycle, promptly remove the bread pan and kneading paddle. Wash them with warm, soapy water, ensuring all dough residue is eliminated. For stubborn bits, soak them beforehand.
The pan and paddle are often non-stick coated; avoid abrasive cleaners or scouring pads to prevent damage. Thoroughly dry both components before reassembling and storing, preventing mold or odors. Dishwasher use may be possible – consult your model’s specific instructions.

Exterior Cleaning and Care

To maintain your Black and Decker bread machine’s appearance, wipe the exterior with a damp cloth regularly. Avoid harsh chemicals or abrasive cleaners, as they can damage the finish. For stubborn stains, a mild dish soap solution can be used, followed by a clean, damp wipe. Ensure the machine is unplugged and cool before cleaning. Never immerse the machine in water.

Understanding Error Codes

Decoding alerts is key! Your Black and Decker machine uses codes to signal issues. Refer to the manual for specific meanings and troubleshooting steps.

Decoding Common Error Messages

Error 1: Often indicates a power interruption during the cycle. Restart the machine, ensuring a stable power source. Error 2: Suggests the kneading blade is obstructed; carefully remove the bread pan and check for any blockages. Error 3: Typically means the unit is overheating – allow it to cool completely before resuming. Error 4: Signals a sensor issue; contact customer support for assistance. Always consult your manual for detailed explanations specific to your model.

What to Do When an Error Occurs

First, don’t panic! Unplug the bread machine immediately. Second, consult the error code list in your manual to identify the problem. Third, attempt simple fixes like re-seating the bread pan or restarting the cycle. If the error persists, avoid forcing operation. Finally, contact Black and Decker customer support for professional guidance and potential repair options.

Recipe Customization

Get creative! Enhance your loaves with fruits, nuts, or seeds. Adjust liquid levels carefully for desired texture, always following recipe guidelines for best results.

Adding Fruits, Nuts, and Seeds

Boost flavor and texture! Add up to 1.5 cups of fruits (dried is best), nuts, or seeds to your bread machine. Introduce these ingredients during the second kneading cycle, signaled by the machine’s beep. This prevents them from being crushed during initial mixing.

Ensure even distribution by gently pressing them into the dough. Consider chopping larger items for consistent results. Experiment with combinations – cranberries and walnuts, or sunflower seeds and raisins – to discover your favorites!

Adjusting Liquid Levels

Achieve perfect dough consistency! Liquid adjustments are crucial, especially with varying flour types or humidity. If the dough seems too dry, add liquid, one tablespoon at a time, until it forms a cohesive ball. Conversely, if it’s too sticky, add flour, also one tablespoon at a time.

Observe the dough during kneading; it should be slightly tacky but not overly wet. Accurate measurements are key for optimal bread texture and rise.

Gluten-Free Baking

Explore gluten-free options! Utilize specialized blends for best results, as gluten-free flours behave differently, requiring adjustments to liquid and settings.

Using Gluten-Free Flour Blends

Selecting the Right Blend: Gluten-free baking demands specific flour combinations. Pre-made blends often contain rice flour, tapioca starch, and potato starch, mimicking wheat’s texture. Experiment with different brands; results vary! Ensure your blend includes xanthan gum, crucial for binding, as gluten is absent.

Adjusting Liquids: Gluten-free flours absorb liquids differently. You may need to increase liquid slightly – start with an extra tablespoon and observe the dough consistency. A wetter dough is generally preferable for gluten-free loaves.

Specific Gluten-Free Recipe Considerations

Yeast Activation: Gluten-free doughs often benefit from proofing the yeast separately. Combine yeast with warm water and a touch of sugar; ensure it foams before adding to the machine. This verifies yeast viability.

Dough Consistency: Gluten-free doughs are typically stickier. Don’t add extra flour to compensate; trust the process! A slightly tacky dough yields a softer loaf. Monitor closely during the kneading cycle.

Safety Precautions

Important: Always unplug the machine before cleaning. Avoid immersing the appliance in water. Ensure proper ventilation during operation for safe baking experiences.

Electrical Safety Guidelines

Caution: To prevent electrical shock, never operate the bread machine with a damaged cord or plug. Do not use an extension cord unless absolutely necessary, and ensure it’s appropriately rated for the appliance’s wattage. Always unplug the machine from the outlet when not in use and before cleaning.

Avoid operating the bread machine in a damp environment or near water sources. If the appliance falls into water, do not attempt to retrieve it – immediately unplug it from the power source. Regular inspection of the power cord is crucial for safe operation.

Operating Safety Tips

Important: Never open the lid during the bread-making cycle, as hot steam may escape, causing burns. Always use oven mitts when handling the hot bread pan and kneading paddle after baking. Ensure the machine is placed on a stable, heat-resistant surface away from flammable materials.

Do not immerse the appliance body in water or any other liquid. Allow the machine to cool completely before cleaning or storing. Supervise children when the bread machine is in operation to prevent accidental contact with hot surfaces.

Warranty Information

Protect your investment! Register your Black and Decker bread machine for warranty coverage. Contact customer support for assistance with claims or questions.

Registering Your Product

Secure your benefits! Registering your Black and Decker bread machine online is quick and easy. Visit the official Black and Decker website and locate the product registration section. You’ll need your model number and purchase date. Registration confirms your ownership and activates your warranty, ensuring access to support and potential updates. Keep your proof of purchase safe, as it may be required for warranty claims. Don’t delay – register today for peace of mind!

Contacting Customer Support

Need assistance? Black and Decker provides multiple avenues for customer support. Visit their website for FAQs, troubleshooting guides, and live chat options. Alternatively, you can reach them via phone – find the number on their website or in your manual. Email support is also available. Be prepared to provide your model number and a detailed description of your issue for efficient assistance. Prompt support ensures a delightful baking experience!

Frequently Asked Questions (FAQ)

Common queries answered! Discover solutions to typical issues, recipe adjustments, and machine operation. Find helpful tips for perfect loaves, every time, easily.

Common User Queries Addressed

Q: Why isn’t my bread rising? Ensure yeast is fresh and properly measured. Check room temperature; it needs warmth. Q: Paddle stuck? Let cool completely before removal. Q: Can I pause the cycle? Some models allow pausing, consult your manual. Q: What crust setting should I use? Experiment to find your preference! Q: Can I use whole wheat flour? Yes, adjust liquids accordingly for best results.

middle school science bowl questions pdf

Article Plan: Middle School Science Bowl Questions PDF

This guide details accessing and utilizing PDF question sets for middle school Science Bowl preparation, covering resources like the DOE website and regional archives.

The Middle School Science Bowl is a nationally recognized academic competition where students demonstrate expertise in science, technology, engineering, and mathematics (STEM). Participating teams face off in a fast-paced, quiz-bowl format, answering questions spanning diverse scientific disciplines.

Success in the Science Bowl requires diligent preparation, and a crucial component of that preparation is access to practice materials. Specifically, past Science Bowl question sets, often available as PDFs, provide invaluable insight into the competition’s style and content. These PDFs aren’t just collections of questions; they represent a window into the types of challenges students will encounter, allowing them to hone their recall speed and strategic thinking.

This article will guide you through locating and effectively utilizing these PDF resources to maximize your team’s performance.

What is the Science Bowl?

The Science Bowl is a highly competitive, team-based academic event focused on STEM subjects. Middle school teams compete by rapidly answering questions covering biology, chemistry, physics, earth science, space science, and mathematics. Questions are typically short answer or multiple choice, demanding both knowledge recall and quick thinking.

The format mirrors a quiz show, with teams buzzing in to answer. Correct answers earn points, and the team with the highest score at the end wins. Understanding the question format is key, and studying past Science Bowl question PDFs is the best way to familiarize yourself with it.

These PDFs showcase the level of detail and the phrasing used in official questions, providing a realistic practice experience. Mastering this format is crucial for success.

The Importance of Practice Materials

Consistent practice with authentic materials is paramount for Science Bowl success. Simply knowing the science isn’t enough; students must learn to apply that knowledge under pressure and in a specific question format. Science Bowl question PDFs provide this crucial practice, exposing students to the types of questions asked and the speed required for answering.

These PDFs aren’t just about content review; they’re about building reflexes, improving teamwork, and developing a strategy for buzzing in. Analyzing past questions reveals common themes and question styles.

Regularly working through these PDFs builds confidence and reduces anxiety during the actual competition, transforming knowledge into a competitive advantage.

Locating Science Bowl Question PDFs

Finding relevant PDFs requires knowing where to look. The Department of Energy (DOE) Science Bowl website is a primary source, offering sample question sets, including “Set 4 Round 1” available as a PDF. National Science Bowl archives contain past regional and national competition questions, often downloadable in PDF format.

Regional Science Bowl websites frequently post question sets from previous events – the “2019 Regional Science Bowl Round 1” is an example. Beyond official sources, websites like Free For Kids offer numerous multiple-choice quizzes, many available as PDFs.

Exploring resources like academic bowl archives (bowenpeters.com) and sites compiling trivia questions can also yield valuable practice material.

Official Science Bowl Resources

The most reliable source for authentic Science Bowl questions is the official Department of Energy (DOE) Science Bowl website. This platform provides sample question sets specifically designed for middle school competitions, like “DOE Middle School Science Bowl Sample Questions- Set 4 Round 1,” readily available in PDF format.

The National Science Bowl archives are another crucial resource, housing past competition materials. These archives offer a wealth of questions from regional and national events, often downloadable as PDFs.

Accessing these official resources ensures students practice with questions mirroring the actual competition format and difficulty, maximizing their preparation effectiveness. Utilizing these PDFs is a cornerstone of successful Science Bowl training.

Department of Energy (DOE) Science Bowl Website

The DOE Science Bowl website (science.energy.gov) is the primary hub for official practice materials. It hosts numerous downloadable PDF question sets tailored for middle school students, including complete rounds and sample questions. Specifically, “Department of Energy sample Science Bowl questions for middle schoolers Set 4 Round 1” is a valuable resource.

These PDFs are categorized and easily accessible, allowing teams to focus on specific subject areas or practice complete mock competitions. The website also provides information about competition rules and formats, enhancing understanding.

Regularly checking the DOE website for updates is recommended, as new question sets and resources are often added; This ensures students have access to the most current and relevant practice materials available.

National Science Bowl Archives

The National Science Bowl archives represent a treasure trove of past competition questions available in PDF format. While primarily focused on high school events, many regional middle school Science Bowl sets are archived and accessible, offering a diverse range of practice material.

These archived PDFs provide invaluable insight into the style and difficulty of questions used in actual competitions. Examining older sets helps students identify common themes and question types, improving their preparedness.

Accessing these archives often requires some searching, but the effort is worthwhile. The 2016 National Science Bowl ー Middle School Regional Events Page 1 ROUND 6A is a good starting point. Utilizing these resources alongside current sets provides a comprehensive study experience.

Regional Science Bowl Question Sets

Regional Science Bowl question sets, often available as PDFs, are crucial for targeted practice. These sets reflect the specific content and difficulty level encountered at regional competitions, making them highly relevant for preparation. They often differ slightly in focus from national-level questions.

Locating these PDFs can involve contacting regional coordinators or searching online archives. The 2019 Regional Science Bowl Round 1 PDF is a prime example of accessible material. These sets typically include toss-up and bonus questions, mirroring the competition format.

Analyzing regional sets allows teams to identify local strengths and weaknesses in knowledge areas. Consistent practice with these PDFs significantly boosts confidence and improves performance during the actual regional event.

Types of Questions Found in PDFs

Science Bowl question PDFs predominantly feature three question types: short answer, multiple choice, and true/false. However, the competition heavily emphasizes short answer questions, requiring precise recall and articulation of scientific concepts. These often demand specific terminology.

Short answer questions, like “What is the term for chemicals that transmit impulses…?”, test direct knowledge. Multiple choice questions are less frequent but assess understanding through elimination. True/false questions are rare, focusing on fundamental principles.

PDFs typically present questions alongside their corresponding answers or scoring guidelines. This allows for self-assessment and identification of areas needing improvement. Familiarity with these formats is key to success.

Short Answer Questions

Short answer questions are the cornerstone of the Middle School Science Bowl, dominating the PDF practice materials. These questions demand precise, concise responses – often a single word or short phrase. Expect questions like, “What is the term for chemicals used to transmit impulses from one neuron to another?” with the answer being “Neurotransmitters.”

Accuracy is paramount; spelling counts, and partial credit is rarely awarded. PDFs provide these questions to build rapid recall and scientific vocabulary. Mastering this format requires diligent study and practice.

Effective preparation involves not just knowing the answer, but also formulating it quickly and correctly under pressure. Reviewing answer keys and understanding the reasoning behind correct responses is crucial for improvement.

Multiple Choice Questions

While short answer questions are prevalent, multiple-choice questions also appear within Science Bowl PDF practice sets. These questions test a broader understanding of concepts, requiring students to differentiate between plausible but incorrect answers. They often assess the ability to apply knowledge to novel scenarios.

PDFs containing multiple-choice questions are valuable for identifying knowledge gaps and refining analytical skills. Practice involves not only selecting the correct answer but also understanding why the other options are incorrect. This deeper level of comprehension is essential for success.

Resources like Free For Kids offer numerous multiple-choice quizzes in PDF format, providing ample practice opportunities. Strategic guessing, when necessary, can be a viable tactic, but a strong foundation of knowledge is always preferable.

True/False Questions

Though less common than short answer or multiple choice, True/False questions can appear within Science Bowl practice PDFs, particularly in introductory or review materials. These questions assess fundamental understanding and the ability to identify accurate statements of scientific principles.

The simplicity of True/False questions can be deceptive; careful consideration is crucial. Students must evaluate the entire statement for accuracy – a single incorrect detail renders the whole statement false. This demands precise knowledge and attention to detail.

Utilizing these questions for quick knowledge checks is beneficial. They are excellent for reinforcing core concepts and identifying areas needing further study. While not a primary focus, recognizing True/False question patterns within PDFs enhances overall preparation.

Question Categories & Topics

Science Bowl PDFs comprehensively cover a broad spectrum of scientific disciplines, mirroring the competition’s structure. Expect questions spanning Life Science, Physical Science, Earth & Space Science, and Mathematics/Energy. A strong foundation across these areas is vital for success.

Life Science questions frequently involve biology, anatomy, and ecology, potentially asking about neurotransmitters or cellular processes. Physical Science delves into chemistry, physics, and materials science, like identifying filament materials in light bulbs.

Earth & Space Science explores geology, astronomy, and meteorology, while Math & Energy questions integrate mathematical principles with energy concepts. PDFs often categorize questions by topic, allowing focused study. Mastering these categories is key to effective preparation.

Life Science Questions

Life Science questions within Science Bowl PDFs often center on biological processes, anatomical structures, and ecological relationships. Expect inquiries ranging from cellular functions to complex organismal systems. A core understanding of genetics, evolution, and physiology is crucial.

Sample questions frequently test knowledge of key terms, such as “neurotransmitters” – chemicals transmitting impulses between neurons. PDFs may present short answer prompts requiring precise definitions or identification of biological components.

Questions can also explore plant biology, animal behavior, and human health. Preparation should include reviewing major organ systems, biological classifications, and fundamental ecological principles. Successfully answering these questions demands a robust grasp of life science fundamentals.

Physical Science Questions

Physical Science questions in Science Bowl PDFs commonly assess understanding of chemistry, physics, and material science principles. Expect questions covering topics like atomic structure, chemical reactions, motion, energy, and states of matter. A strong foundation in these areas is essential for success.

Frequently, questions involve identifying materials and their properties. For example, PDFs may ask about the “metal used as the filament in modern incandescent light bulbs” – tungsten.

Short answer questions often require applying formulas or explaining physical phenomena. Preparation should include reviewing concepts like Newton’s laws, the periodic table, and basic electrical circuits. Mastering these fundamentals will significantly improve performance on physical science questions.

Earth & Space Science Questions

Earth & Space Science questions within Science Bowl PDFs span geology, meteorology, astronomy, and oceanography. Students should be prepared to answer questions about plate tectonics, weather patterns, the solar system, and Earth’s composition. A broad understanding of these interconnected fields is crucial.

Expect questions requiring knowledge of planetary characteristics, geological formations, and atmospheric processes. For instance, questions might focus on identifying different rock types or explaining the causes of seasons.

PDFs often present scenarios requiring application of scientific principles to real-world Earth and space phenomena. Reviewing key concepts like the rock cycle, the water cycle, and the phases of the moon will prove invaluable during competition.

Math & Energy Questions

Science Bowl PDFs frequently incorporate mathematical calculations related to scientific concepts, particularly within the realm of energy. Students should be comfortable with unit conversions, basic algebra, and scientific notation. Expect problems involving kinetic and potential energy, power, and efficiency.

Energy-focused questions cover various forms – mechanical, thermal, electrical, and chemical – and their transformations. Understanding concepts like conservation of energy and the laws of thermodynamics is essential. Questions may involve calculating energy transfer in different systems.

These questions often require applying mathematical principles to solve energy-related problems. Practicing with sample PDFs will help students build confidence and speed in tackling these quantitative challenges during the competition.

Analyzing Sample Question Sets

Careful examination of past Science Bowl question sets, available as PDFs, is crucial for effective preparation. Begin by noting the question formats – short answer, multiple choice, or true/false – and the depth of knowledge required. Pay attention to the phrasing of questions; Science Bowl often uses precise language.

Analyze the distribution of questions across different scientific disciplines. Identify areas of strength and weakness to focus study efforts. The 2019 Regional Science Bowl Round 1 PDF provides a concrete example for this analysis.

Deconstruct how answers are derived, even for seemingly simple questions. Understanding the reasoning behind correct answers is as important as memorizing facts. This analytical approach maximizes learning from each PDF.

2019 Regional Science Bowl ー Round 1 Example

The 2019 Regional Science Bowl Round 1 PDF offers valuable insight into the competition’s style and difficulty. This set, designed for middle school students, features a “Toss-Up” question format where teams compete for initial points. An example question asks for the term describing chemicals transmitting impulses between neurons – the answer being “Neurotransmitters.”

Following each Toss-Up is a Bonus question, testing deeper understanding of the same topic. This structure mirrors the actual Science Bowl format, providing realistic practice. Analyzing these questions reveals a focus on core scientific concepts and precise terminology.

Studying this round helps familiarize students with the question types and expected answer precision. It’s a practical starting point for understanding the level of detail required for success.

2016 National Science Bowl ー Middle School Regional Events

The 2016 National Science Bowl – Middle School Regional Events PDF provides another excellent example of competition-level questioning. Round 6A features a short answer question in Physical Science, specifically asking about the filament material used in incandescent light bulbs. The correct answer is, of course, a metal.

These PDFs are crucial for understanding the breadth of topics covered and the expected depth of knowledge. The questions aren’t simply recall-based; they require students to apply scientific principles.

Analyzing these past papers allows teams to identify their strengths and weaknesses, focusing study efforts accordingly. The format closely replicates the actual competition, offering valuable practice under pressure.

Neurotransmitter Questions (Life Science)

Life Science questions, particularly those concerning neurotransmitters, frequently appear in Science Bowl PDFs. A 2019 Regional Science Bowl Round 1 toss-up directly asked for the term describing chemicals transmitting impulses between neurons. The answer, naturally, is neurotransmitters.

These questions highlight the importance of understanding fundamental biological processes. Bonus questions often build upon this core knowledge, requiring students to elaborate on related concepts.

Practicing with these PDFs allows students to become familiar with the specific terminology used in the competition. Recognizing the question type and quickly recalling the correct answer is key to success. Mastering these concepts builds a strong foundation in Life Science.

Filament Material Questions (Physical Science)

Physical Science questions within Science Bowl PDFs often delve into material properties and applications. A 2016 National Science Bowl question specifically asked about the metal used as the filament in incandescent light bulbs. The correct response is tungsten.

These questions test a student’s understanding of everyday technologies and the scientific principles behind them. Knowing why tungsten is suitable – its high melting point and resistance – demonstrates a deeper comprehension.

Reviewing past question sets exposes students to the level of detail expected. Practicing with these PDFs helps students recall specific material properties and their relevance to practical applications. This focused preparation is crucial for excelling in the Physical Science category.

Utilizing Question PDFs for Study

Science Bowl question PDFs are invaluable study tools, extending beyond simple memorization. Students can create study guides by categorizing questions by topic – Life Science, Physical Science, etc. – and identifying areas needing improvement.

Forming practice teams allows for simulated competition, enhancing recall speed and teamwork. Simulating competition conditions – timed rounds, buzzer systems – builds crucial test-taking skills.

Regularly reviewing past PDFs reinforces concepts and exposes students to the question format. Don’t just answer; analyze why an answer is correct. This active learning approach maximizes the benefit of these resources, leading to greater confidence and success in the Science Bowl.

Creating Study Guides

Effective study guides, built from Science Bowl question PDFs, are essential for success. Begin by categorizing questions – Life Science (neurotransmitters), Physical Science (filament materials), Earth & Space Science, and Math & Energy.

For each category, note frequently appearing concepts and challenging areas; Create concise summaries of key facts and formulas. Include both correct answers and common misconceptions.

Organize guides by difficulty level, starting with foundational knowledge and progressing to more complex topics. Utilize flashcards for quick recall of definitions and equations. Regularly update guides with new questions encountered during practice, ensuring a dynamic and comprehensive resource.

Forming Practice Teams

Utilizing Science Bowl question PDFs is significantly enhanced through team practice. Assemble a team with diverse strengths – some excel in Life Science, others in Physical Science, and so on.

Assign roles during practice rounds: a buzzer person, a question reader, and answer verifiers. Rotate roles to develop versatility.

Simulate competition conditions by using a timer and enforcing Science Bowl rules. Analyze performance after each round, identifying areas for improvement. Focus on quick recall and collaborative problem-solving.

Review missed questions together, discussing the correct answers and underlying concepts. Encourage constructive feedback and peer teaching, leveraging the PDF resources for deeper understanding.

Simulating Competition Conditions

To truly prepare with Science Bowl question PDFs, replicate the competition environment. This means strict adherence to timing rules – quick recall is crucial. Designate a moderator to read questions clearly and consistently, mirroring actual events.

Implement the buzzer system, even if improvised. Practice quick reactions and strategic buzzing. Utilize the PDF question sets for full rounds, including toss-ups and bonus questions.

Enforce penalties for incorrect answers to build discipline. Record scores and track team progress over time. Analyze performance, focusing on areas where the team struggles.

Create a distraction-free zone during practice to mimic the competition hall. This builds focus and reduces anxiety, maximizing the effectiveness of your PDF-based study sessions.

Additional Online Resources for Practice

Beyond dedicated Science Bowl PDFs, several websites offer valuable practice material. Jeopardy! Kids Tournament archives provide accessible questions, building quick-recall skills. Fun Trivia for Kids offers a broad range of topics, enhancing general knowledge.

Science Kids Quizzes are topic-specific, ideal for targeted review. Braingle and Sploofus provide leveled quizzes, adapting to skill levels. Free Rice gamifies learning, donating rice with correct answers.

Funology presents trivia and unusual facts, broadening scientific curiosity. Free For Kids offers numerous multiple-choice quizzes, often available as PDF downloads. While not specifically Science Bowl formatted, these resources supplement PDF practice.

Remember to cross-reference information and focus on core science concepts when utilizing these supplementary materials.

Jeopardy! Kids Tournament Archives

The Jeopardy! Kids Tournament archives represent a surprisingly effective resource for Science Bowl preparation. These archived games, accessible online, feature questions geared towards a younger audience, making them less daunting than official Science Bowl materials initially.

The question format, while different, still emphasizes quick recall and broad scientific knowledge. Focusing on earlier rounds can be particularly beneficial, as the difficulty gradually increases.

This archive, found at bowenpeters.com, provides a wealth of practice opportunities. While not specifically PDF-based, transcribing questions for study or using them for live practice rounds can significantly improve response times and content mastery.

Consider it a stepping stone to more challenging Science Bowl PDF questions, building confidence and foundational knowledge.

Fun Trivia for Kids

Fun Trivia for Kids offers a vast collection of quizzes covering a wide range of scientific topics, providing supplemental practice alongside dedicated Science Bowl PDF materials. While the question style differs from the rapid-fire format of competition, it reinforces core concepts and expands general knowledge.

The site’s strength lies in its breadth of categories, allowing students to focus on weaker areas or explore subjects beyond the typical Science Bowl curriculum. This can be particularly helpful for building a well-rounded understanding of science.

Though not directly in PDF format, questions can be easily adapted for study guides or practice sessions. It’s a valuable resource for casual review and identifying knowledge gaps before tackling more intense PDF-based practice sets.

Remember to prioritize official resources, but Fun Trivia offers a fun and accessible way to reinforce learning.

Science Kids Quizzes

Science Kids Quizzes provides a structured approach to reviewing scientific concepts, offering quizzes neatly arranged by topic – a useful complement to broader Science Bowl PDF practice. This organization allows students to pinpoint specific areas needing improvement, enhancing focused study.

The quizzes cover fundamental principles relevant to middle school Science Bowl categories, including biology, chemistry, physics, and earth science. While the difficulty level may be slightly below competition standards, it’s excellent for building a solid foundation.

Although not directly offered as downloadable PDFs, the online format is easily accessible and allows for immediate feedback. Students can quickly identify incorrect answers and revisit related material in their PDF study sets.

Consider using these quizzes for initial assessment and then progressing to more challenging PDF-based questions.

Braingle & Sploofus Quizzes

Braingle and Sploofus offer leveled quizzes, providing a scalable challenge for Science Bowl aspirants utilizing PDF practice materials. Sploofus, specifically, requires a free account, but unlocks a range of science-based questions suitable for middle school students.

These platforms aren’t solely focused on science, but their quiz categories include substantial science content. This broader scope can be beneficial for developing general knowledge, a valuable asset in the competition.

The quizzes can supplement focused study with PDF question sets by offering a different question format and testing recall in a less structured environment. They’re good for quick review sessions.

While not providing direct PDF downloads, the online accessibility allows for convenient practice. Use these quizzes to reinforce concepts learned from official Science Bowl PDFs.

Free Rice & Funology Resources

Free Rice presents a unique study method: answering questions donates rice to the World Food Programme. While not directly offering PDF question sets, it’s a valuable supplementary resource for reinforcing science knowledge.

Funology provides trivia and strange facts, offering a lighter approach to learning. Though not specifically tailored to Science Bowl, it broadens general knowledge, which is helpful alongside focused PDF study.

These resources complement dedicated PDF practice by offering varied question styles and a less formal learning environment. They’re excellent for quick review sessions or breaks from intensive PDF-based preparation.

Both platforms are easily accessible online, making them convenient for students. Use them to solidify understanding of concepts encountered in official Science Bowl PDF materials and build overall scientific literacy.

Mastering the Science Bowl with PDFs

Utilizing PDF question sets is crucial for Science Bowl success. Official resources from the DOE and regional archives provide authentic practice material, mirroring competition formats.

Consistent study, employing techniques like creating study guides and forming practice teams, maximizes the benefits of these PDFs. Simulating competition conditions further refines skills.

Supplementing PDF practice with online resources – like those found on Fun Trivia or Science Kids – broadens knowledge and reinforces concepts.

Mastering the Science Bowl isn’t just about memorization; it’s about applying knowledge quickly and accurately. PDFs offer the foundation, but dedicated practice and strategic learning are key to achieving peak performance and excelling in this challenging academic competition.

canon in c piano sheet pdf

Canon in C sheet music PDF for practice and performance, appreciating its elegant simplicity mixed with complexity. Its widespread popularity ensures availability in diverse formats, making it accessible to all.

What is the Canon in C?

The Canon in C is one of Johann Pachelbel’s most celebrated compositions, known for its timeless melody and harmonic depth. Often performed as a piano solo, it is celebrated for its elegant structure and emotional resonance. The composition revolves around a repeating bass line, harmonically enriched with counterpoint, creating a< i> sense of balance and warmth.

Its distinctive melody and harmonies have made it a favorite among pianists and music enthusiasts. This piece, typically written in 3/4 time, features a flowing sixteenth-note pattern, adding complexity to its seemingly simple framework. The Canon in C is often associated with classical music education, offering pianists a chance to explore intricate harmonic analysis and melodic development.

Available in various formats, including piano sheet music PDF, the piece is widely accessible for practice and performance. Its adaptability allows for numerous variations and arrangements, making it a versatile piece for different settings.

The Historical Background of the Canon

The Canon in C is a composition by Johann Pachelbel, a prominent Baroque composer known for his contributions to music theory and composition. While often confused with his more famous “Canon and Gigue in D major,” the “Canon in C” holds its own significance in the realm of classical music. Composed during the late Baroque period, around the late 17th century, this piece exemplifies the era’s preference for counterpoint and complex harmonies.

Originally written for three violins and a continuo, the Canon in C has since been adapted for various instruments, including solo piano. This adaptation, available in piano sheet music PDF formats, allows pianists to explore the piece’s intricate melodies and harmonies. The creation of piano versions required meticulous arranging to preserve the original structure and essence of the composition.

The piece’s enduring popularity can be attributed to its timeless appeal and accessibility. Its use in weddings and popular culture highlights its universal appeal, likely due to its melodic simplicity and emotional resonance. This adaptability has contributed to its lasting legacy, making it a staple in classical music education and performance.

Canon in C for Piano

The Canon in C is a beloved piece for pianists, offering a timeless classic to explore. Originally composed by Johann Pachelbel for three violins and continuo, the adaptation for solo piano allows musicians to experience its intricate melodies and harmonies in a fresh light. The piece’s graceful counterpoint and rich harmonies make it a staple in piano repertoire, suitable for both casual practice and formal performances.

Available in piano sheet music PDF formats, the Canon in C is accessible to pianists of all skill levels. Its structure encourages creative interpretation, allowing performers to highlight its melodic beauty while showcasing technical precision. The piece’s popularity stems from its universal appeal, often featured in weddings and popular media, cementing its place in classical and contemporary culture.

Whether for practice or performance, the Canon in C remains a cherished composition in piano music. Its enduring legacy ensures it will continue to inspire pianists and audiences alike for generations to come.

.Our.Favorite.Favorites

When it comes to the “Canon in C piano sheet PDF,” several versions stand out as favorites among pianists. Johann Pachelbel’s timeless composition, originally scored for strings, has been masterfully arranged for solo piano, offering a rich tapestry of counterpoint and harmony. The digital format of piano sheet music, particularly PDF, provides unparalleled convenience, allowing pianists to access and print the score instantly, whether for practice or performance.

Among the available PDF versions, certain editions are particularly cherished for their clarity and artistic interpretation. Some arrangements adapt the piece to varying skill levels, making it accessible to both beginners and advanced players. Websites like IMSLP and SheetMusicPlus are reliable sources for high-quality PDF scores, ensuring that pianists can find editions that suit their preferences and needs.

These PDF versions often enhance the piece with unique arrangements, such as extended harmonies or contemporary twists, while maintaining the essence of the original composition. The digital format also offers practical benefits, such as the ability to adjust the score size or easily transpose keys, further aiding in mastering the piece.

_PIANO (_.SOLO_

The “Canon in C” has long been a cornerstone of classical music, and its adaptation for piano solo offers a unique opportunity for pianists to engage with this timeless piece; The piano solo version allows for a deeply personal interpretation, enabling musicians to convey the piece’s emotional depth and complexity through the keyboard. This version is particularly cherished for its ability to highlight the nuanced interplay between melody and harmony, which can sometimes be overshadowed in orchestral arrangements.

Digital formats like PDF have revolutionized access to sheet music, providing pianists with convenient and versatile tools for learning and performing. The PDF format offers several advantages: easy sharing, portability, and the flexibility to adjust the viewing size or transpose keys as needed. This accessibility has made the “Canon in C” more approachable than ever, with resources available for pianists of all skill levels.

The piano solo arrangement of the “Canon in C” requires a strong grasp of polyphony, as the piano must simultaneously carry both melodic and harmonic elements. This challenge, while daunting, also presents an exciting opportunity for musicians to develop their technical and interpretative skills. The piece’s foundation in the ostinato pattern provides a structure for exploration, allowing pianists to experiment with dynamics and articulation to create a truly unique performance.

For those embarking on learning the “Canon in C,” it is advisable to begin with simpler arrangements, gradually progressing to more complex versions as their skills develop. Understanding the piece’s structural elements, such as the recurring bass line and its harmonic variations, is crucial for a meaningful interpretation. This journey into the “Canon in C” not only honours the work of Johann Pachelbel but also fosters a deeper appreciation for the piano’s expressive capabilities.

The Popularity of the Canon in C

The “Canon in C” by Johann Pachelbel has become one of the most iconic and universally beloved compositions in classical music. Its enduring appeal lies in its simple yet profound melodic structure, combined with the timeless beauty of its harmonic progression. This piece is frequently performed in weddings,часто played in movies and TV shows, and even adapted in popular music, making it a cultural staple across generations.

The widespread availability of the “Canon in C” piano sheet music in PDF format has further contributed to its popularity. This digital format allows easy access, sharing, and printing, making it accessible to pianists of all skill levels. Whether performed as a solo or arranged for other instruments, the “Canon in C” remains a versatile piece that resonates deeply with audiences worldwide.

Its universal appeal extends across cultures and languages, as its memorable bassline and melodic phrasing create a sense of familiarity and emotional connection. Musicians and listeners alike find comfort in its predictability and delight in its subtle variations, ensuring its place as a cherished in both classical and contemporary music.

Understanding the Musical Structure

The Canon in C’ is built on its signature bassline and harmonious variations. Its melody weaves over a repetitive bass pattern, creating a captivating interplay. The piece’s musical structure features intricate chord progressions, adding depth and emotional appeal. Exploring the Canon in C piano sheet music reveals how these elements come together, offering insight into Pachelbel’s genius and the timeless charm of this classical gem.

The Melody of the Canon

The melody of the Canon in C is one of its most distinctive and enchanting features. Its simplicity and elegance make it universally appealing, while its structure ensures it remains deeply. The piece is built around a repeating bassline, over which multiple melodic variations unfold, creating a sense of both familiarity and novelty. The melody itself is serene, often described as timeless, with aplaintes that evoke a sense of timeless beauty and emotional resonance.

The interplay between the bassline and the melody is central to the piece’s charm. As the bassline progresses, the melody weaves in and out, creating a dialogue that feels organic and natural. This fluid interplay is a hallmark of Pachelbel’s compositional style, blending technical sophistication with accessible beauty.

The melody’s structure is inherently flexible, allowing for countless interpretations and arrangements. While its foundation is rooted in traditional baroque counterpoint, its simplicity allows pianists to bring their own interpretation to the piece. Whether played as a solo piano piece or arranged for other instruments, the melody retains its core appeal.

For those studying the Canon in C piano sheet music, the melody serves as a gateway to understanding the piece’s deeper complexities. Its structure encourages exploration of rhythm, phrasing, and dynamics, making it an ideal study for pianists of all levels. The melody’s enduring popularity lies in its ability to transcend time, connecting listeners across generations and musical preferences.

Harmonic Analysis

Understanding the harmonic structure of Johann Pachelbel’s Canon in C provides valuable insights into its timeless appeal. The piece is renowned for its intricate interplay between melody and harmony, which contributes to its emotional depth and complexity. At its core, the Canon employs a repeating bassline that serves as the foundation for a series of ascending melodic variations, creating a sense of continuity and progression.

The harmonic analysis of the Canon in C reveals its reliance on tonal harmony, with a focus on consonant intervals and functional chord progressions. Pachelbel’s use of counterpoint allows the melody and bassline to interlock seamlessly, creating a rich tapestry of sound. The piece is built on a series of I, IV, V, and vii° chords, which provide a sense of resolution and movement, guiding the listener through its evolving structure.

What sets the Canon apart is its cyclical nature. The bassline repeats, undergoing harmonic transformations while the melodic voices introduce new variations. This cyclical form is a hallmark of the piece, contributing to its hypnotic and meditative quality. The interplay between the bassline and the upper voices creates a sense of dialogue, enhancing the harmonic complexity without overwhelming the listener.

For pianists studying the Canon in C sheet music, the harmonic structure offers endless opportunities for interpretation. The interplay between voices allows for dynamic and expressive playing, making the piece a favorite among performers. The piece’s harmonic simplicity belies its complexity, making it both accessible and challenging, a truly masterful composition that continues to captivate musicians and audiences alike.

.pem Choi

While the term “.pem Choi” might seem obscure or possibly misspelled, it’s essential to focus on the topic at hand: the Canon in C Piano Sheet PDF. This piece of music, known for its enduring popularity, is widely available in PDF format, offering convenience and flexibility for musicians; PDFs provide several advantages, such as easy printing and sharing, making them ideal for practice and performance. To access these PDFs, musicians often turn to reputable sources like music stores or trusted websites where accuracy and quality are guaranteed. Additionally, exploring different editions or arrangements of the Canon in C in PDF format can offer fresh insights and new dimensions to the composition, enhancing the learning and playing experience.

Piano-sheet-music

Piano sheet music for the Canon in C is a universally sought-after resource for musicians and enthusiasts. This composition, attributed to Johann Pachelbel, remains one of the most iconic and widely performed works in classical music. The Canon in C is often interpreted as a piano solo, allowing pianists to explore its intricate harmonies and melodic beauty with precision and expression. The availability of piano sheet music in PDF format has made it easier than ever for musicians to access and study this timeless piece. PDF formats ensure clarity and convenience, as they allow seamless printing and sharing. Additionally, pianists can find various editions of the Canon in C sheet music, each offering unique interpretative insights. Whether you are a beginner or a seasoned performer, the Canon in C piano sheet music PDF serves as a valuable tool for mastering this beloved composition. Its simple yet profound structure makes it accessible to all, while its harmonic richness provides endless opportunities for artistic expression. Whether practiced for personal enjoyment or prepared for public performance, the Canon in C remains a cornerstone of piano repertoire, cherished by audiences and musicians alike.

Mastering the Structure for Performances

Mastering the structure of the Canon in C for performance requires a deep understanding of its musical components and technical challenges. This piece, often performed as a piano solo, demands precision in phrasing, tempo, and articulation to convey its emotional depth. Practicing the piece in sections helps build familiarity with its repetitive yet evolving harmonic structure, ensuring smooth transitions between parts. Paying attention to the tempo markings and dynamic nuances is crucial for capturing the intended musicality.

Performers should focus on developing finger dexterity and control, as the Canon in C requires seamless legato passages and articulated rhythms. Studying the sheet music in detail reveals subtle variations in dynamics and phrasing, allowing for a more expressive interpretation. Additionally, understanding the historical context of the piece can enhance its performance, as it reflects Baroque-era compositional techniques. Regular practice, combined with a thorough analysis of the score, ensures a polished and confident execution of this timeless work. By mastering its structure, pianists can deliver a captivating performance that honors the beauty of theCanon in C. Patient practice and attention to detail are key to unlocking its full potential on the keyboard.

Canon in C Sheet Music Explained

Delve into Pachelbel’s Canon in C with its piano sheet music PDF, offering clear notation for practice and performance. The layout highlights the piece’s elegant harmonic progressions and melodic flow, perfect for piano solos. The PDF format provides portability and customization, allowing for personalized annotations and dynamic interpretation. This resource is essential for mastering the Canon in C as a standalone piano piece and understanding its musical intricacies.

Chaconne in C Major

Although the title “Canon in C” is often used interchangeably with “Chaconne in C Major,” they are distinct compositions by Johann Pachelbel. The Chaconne in C Major is a standalone piece that shares similar melodic and harmonic characteristics with the Canon, but it is more elaborate in structure. This piece is often included in the same collections as the Canon, making it a popular choice for piano solo performances. The sheet music for the Chaconne in C Major is widely available in PDF format, allowing pianists to explore its intricate variations and rich harmonies. The composition begins with a bold statement in C major, followed by a series of basso ostinato patterns that create a hypnotic effect. Pianists appreciate the balance between technical complexity and emotional depth in this piece, which makes it a favorite for both practice and public performances. Its structure, including repeated bass patterns and evolving upper melodies, provides a foundation for creative interpretation. Whether for personal study or public display, the Chaconne in C Major remains a staple of classical piano repertoire, celebrated for its timeless beauty and intricate musical design.

Practicing the Canon in C

Mastery of the Canon in C requires a strategic approach to practice. Start by understanding the piece’s structure, focusing on the interplay between melody and harmony. Break the music into sections, practicing hands separately to build foundational skills before integrating them. Pay attention to tempo and dynamics, avoiding rushing; instead, emphasize a steady, expressive rhythm with clear articulation. To ensure accuracy,repeat challenging passages until they are perfected. Additionally, explore the piece’s phrasing, allowing your interpretation to convey its emotional depth. Utilize the wealth of resources available, such as detailed Piano-sheet-music PDFs and Canon tutorials online. Regular practice and patience are essential, as developing the necessary technical and interpretive skills takes time. Finally, seek feedback through recordings or lessons to refine your approach and enhance your performance. Consistency is key, as it fosters gradual improvement and confidence in your playing.

Variations and Arrangements

“Canon in C” has inspired countless variations and arrangements across genres, showcasing its versatility. From classical orchestrations to jazz improvisations, composers and performers have reimagined Pachelbel’s masterpiece. For instance, some artists fuse the melody with electronic beats, creating modern hybrids while preserving the original’s essence. Pianists often explore dynamic contrasts and tempo deviations, offering fresh perspectives. Additionally, educational arrangements simplify the piece for students, ensuring accessibility while maintaining its melodic integrity. Musicians like Billy Tombaugh and Jacques Loussier have reinterpreted the Canon, blending it with swing and bossa nova rhythms. The availability of Canon in C piano sheet music PDF allows enthusiasts to experiment freely, adapting the piece to their style. These creative reinterpretations highlight the Canon’s enduring appeal and adaptability, ensuring its relevance across generations and musical tastes. Whether as a gentle lullaby or an energetic dance, the Canon in C continues to evolve, proving its timeless charm.

badger 500-1 garbage disposal manual

Badger 500-1 Garbage Disposal Manual: A Comprehensive Guide

Welcome! This manual details the Badger 500-1, offering guidance on installation, operation, maintenance, and troubleshooting. Explore parts lists and warranty details for optimal performance.

Congratulations on selecting the InSinkErator Badger 500-1 garbage disposal! This manual is your comprehensive resource, designed to ensure years of reliable performance. We celebrate your choice and are committed to providing a smooth experience. Before you begin, carefully review this guide for safety precautions, installation steps, and operational instructions. Familiarize yourself with the parts diagram to understand your disposal’s components. Proper use and maintenance, as outlined here, will maximize its lifespan and efficiency.

Unboxing and Initial Inspection

Upon receiving your Badger 500-1, carefully inspect the packaging for any signs of damage during transit. Before discarding, verify all components are present: the disposal unit, stopper, sink flange, fiber gasket, mounting ring assembly, and emergency wrench. Compare the contents against the parts list within this manual. Report any missing or damaged parts immediately to your retailer. Retain the packaging for potential returns or warranty claims; A thorough initial inspection ensures a hassle-free setup.

Safety Precautions

Important! Disconnect power before installation or maintenance. Never insert hands into the disposal. Use caution when handling the grinding components – they are sharp! Ensure proper grounding to prevent electrical shock. Keep children and pets away during operation. Avoid disposing of flammable liquids or hazardous materials. Follow all plumbing codes during installation. This disposal is designed for normal household food waste only. Ignoring these precautions could result in injury or damage.

General Safety Rules

Read Carefully! Always turn off the power switch before reaching into the disposal chamber. Never use your hands to retrieve objects from the unit; use tongs or pliers. Avoid overloading the disposal with excessive food waste. Do not operate the disposal without a properly installed splash guard. Ensure the disposal is securely mounted to the sink. Supervise children when the disposal is in use. Proper usage prevents jams and ensures safe operation.

Electrical Safety

Crucial Precautions! The Badger 500-1 requires a properly grounded 120V electrical outlet. Never attempt to repair the electrical components yourself; contact a qualified electrician. Avoid using extension cords. Ensure the power cord is not damaged or frayed; Disconnect power before any maintenance or part replacement. Improper electrical connection can cause shock or fire hazards. Follow all local electrical codes for safe installation.

Understanding Your Badger 500-1

Get Acquainted! The Badger 500-1 is a continuous feed disposal featuring a durable 1/2 HP Dura-Drive motor and galvanized steel grinding components. Its compact design fits easily under most sinks. This model efficiently handles food waste, reducing drain clogs. Familiarize yourself with its key features for optimal performance and longevity. Explore the parts diagram for easy identification of components.

Key Features & Specifications

Core Attributes! The Badger 500-1 boasts a powerful 1/2 horsepower Dura-Drive induction motor, ensuring robust grinding. It features galvanized steel grinding elements for efficient waste reduction. Designed for continuous feed operation, it handles substantial food scraps. Its compact size maximizes under-sink space. Expect reliable performance and ease of use with this essential kitchen appliance, built for everyday demands.

Motor Specifications (1/2 HP Dura-Drive)

Powerhouse Performance! The Badger 500-1 utilizes a durable 1/2 horsepower Dura-Drive induction motor, renowned for its quiet operation and longevity. This motor delivers consistent power for tackling various food waste types. Its robust construction minimizes wear and tear, ensuring years of reliable service. The Dura-Drive design contributes to the disposal’s overall efficiency and dependable performance, making it a kitchen staple.

Grinding Components (Galvanized Steel)

Built to Last! The Badger 500-1 features robust grinding components crafted from galvanized steel. This material provides exceptional durability and resistance to corrosion, ensuring long-lasting performance. These components effectively pulverize food waste, preventing clogs and maintaining optimal disposal function. Galvanized steel’s strength handles everyday use, offering reliable grinding power for a consistently clean kitchen experience.

Parts Diagram & Identification

Essential Overview! This section provides a detailed diagram identifying key Badger 500-1 components. Familiarize yourself with parts like the stopper, sink flange, fiber gasket, mounting ring assembly, and the disposal unit itself. Understanding these elements is crucial for installation, maintenance, and future part replacements. Refer to the diagram closely when performing any work on your disposal, ensuring correct identification and assembly.

A – Stopper/B – Sink Flange/C – Fiber Gasket

Key Components Explained! Part A, the stopper, prevents debris from entering the disposal. Part B, the sink flange, creates a watertight seal within the sink opening. Crucially, Part C, the fiber gasket, ensures this seal remains effective, preventing leaks. Proper installation of these three components is vital for a functional and leak-free disposal system. Inspect each part for damage before assembly.

D – Mounting Ring Assembly

Secure Installation is Key! The Mounting Ring Assembly (Part D) is critical for firmly attaching the disposal unit to the sink. It comprises several interlocking pieces designed to distribute weight evenly and prevent movement during operation; Ensure all components are correctly aligned and tightened according to the installation guide. A properly secured mounting ring minimizes vibration and potential leaks, guaranteeing long-term reliability.

E – Disposal Unit

The Heart of the System! The Disposal Unit (Part E) houses the powerful 1/2 HP Dura-Drive motor and galvanized steel grinding components. This is where food waste is efficiently broken down. Carefully inspect the unit for any shipping damage before installation. The compact design maximizes under-sink space while delivering robust performance. Proper connection to plumbing and electrical systems, as detailed in this manual, is essential for safe and effective operation.

Installation Guide

Ready to Install? This section provides a step-by-step guide for installing your Badger 500-1. First, gather the necessary tools – screwdriver, pliers, and potentially a basin wrench. Next, carefully follow the plumbing connection instructions, ensuring a watertight seal. Finally, connect the unit to a dedicated electrical circuit, adhering to all electrical safety precautions. Incorrect installation can void the warranty and pose safety risks.

Tools Required

Essential Tools for Installation: You’ll need a screwdriver – both Phillips and flathead – for securing mounting hardware. Pliers are crucial for tightening plumbing connections. A basin wrench facilitates access in tight spaces under the sink. Safety glasses are recommended to protect your eyes. Additionally, a multimeter can verify proper electrical grounding. Ensure all tools are in good working condition before beginning the installation process for a safe and efficient setup.

Plumbing Connections

Connecting to Your Drain: Begin by disconnecting the existing drainpipe. Attach the sink flange, ensuring the fiber gasket creates a watertight seal. Secure the mounting ring assembly tightly. Connect the discharge tube to the drainpipe using the provided elbow kit (73130), verifying a secure fit. Use plumber’s putty for added sealing if necessary. Double-check all connections to prevent leaks before operating the disposal unit.

Electrical Connection

Important Safety First! Disconnect power at the breaker before any electrical work. The Badger 500-1 requires a dedicated 120V, 15-amp circuit. Connect the disposal’s black wire to the hot wire, white to neutral, and green (or bare copper) to ground. Ensure all connections are secure within the junction box. Re-establish power at the breaker and test the unit. Never alter the plug.

Operating Instructions

Start with Cold Water! Run a steady stream of cold water into the disposal before and during operation. Feed food waste in gradually, avoiding large quantities; The Badger 500-1 is a continuous feed model, allowing ongoing waste introduction. Avoid fibrous materials and bones. Turn off water after grinding ceases. Proper usage extends disposal life and prevents jams.

Proper Usage of the Disposal

Always run cold water during operation – before, during, and after grinding. Introduce food waste slowly and steadily. The Badger 500-1’s continuous feed design allows for ongoing use. Avoid overloading; small batches are best. Never use harsh chemicals or flammable liquids. Turn off the disposal and water when finished. This ensures efficient grinding and prolongs the unit’s lifespan.

What Can and Cannot Be Disposed Of

Acceptable items include small food scraps, fruit peels, and soft food waste. Avoid fibrous materials like celery, onion skins, and potato peels. Never dispose of bones, coffee grounds, eggshells, grease, or non-food items like glass or metal. These can damage the grinding components or cause jams. Proper disposal protects your Badger 500-1 and ensures optimal performance, preventing costly repairs.

Troubleshooting Common Issues

Humming but no grinding? The unit may be jammed – use the emergency wrench! Leaking? Check the sink flange and mounting assembly for tightness, ensuring the fiber gasket is properly seated. Jammed disposal? Turn off power, then use the wrench to manually rotate the impeller. Avoid forcing it. If issues persist, consult the warranty information or contact technical support for assistance.

Disposal is Humming But Not Grinding

A humming sound indicates the motor is running, but the grinding components aren’t turning. This usually means a jam! Immediately turn off the power at the circuit breaker. Insert the 4577 emergency wrench into the bottom of the disposal and gently rotate it back and forth to dislodge any obstructions. Never use your hand!

Disposal is Leaking

If you notice leaking, first, ensure the power is OFF at the breaker. Check the sink flange and mounting assembly for tightness. A loose connection is a common cause. Inspect the fiber gasket (C) for damage or improper seating – replace if necessary. Also, verify the dishwasher drain hose connection is secure to prevent backflow and leaks.

Disposal is Jammed

A jammed disposal usually indicates an obstruction. Immediately turn OFF the power at the circuit breaker! Use the emergency wrench (4577) – insert it into the bottom center of the disposal and manually rotate the impeller to dislodge the blockage. Never use your hand! Avoid hard or fibrous materials. After clearing, run cold water and briefly activate the disposal.

Maintenance & Cleaning

Regular cleaning keeps your Badger 500-1 functioning optimally. Grind ice cubes and citrus peels periodically to freshen and sharpen the grinding components; Avoid harsh chemicals; use mild soap and water. Flush with cold water after each use. Preventative maintenance includes avoiding fibrous foods and ensuring proper installation of the splash guard. A clean disposal equals longevity!

Regular Cleaning Procedures

Maintain a fresh disposal with simple routines. After each use, flush with cold water for at least 30 seconds. Weekly, grind ice cubes and citrus peels to dislodge buildup and deodorize. Avoid abrasive cleaners; mild dish soap is sufficient. Inspect the rubber splash guard for damage and clean thoroughly. Consistent cleaning prevents jams and extends the life of your Badger 500-1.

Preventative Maintenance Tips

Proactive care ensures lasting performance. Avoid fibrous foods like celery and onion skins, which can wrap around components. Never pour grease or oil down the disposal. Regularly check the mounting assembly for tightness. Utilize the emergency wrench periodically to ensure free rotation. Following these simple steps will minimize repairs and maximize the lifespan of your Badger 500-1.

Replacing Parts

Maintaining your Badger 500-1 is straightforward! Commonly replaced items include the emergency wrench (4577), elbow kit (73130), and backup screw (74999). Parts Town offers a comprehensive selection. Always disconnect power before any repair. Refer to the parts diagram for correct identification. Ensure proper installation for optimal function and safety. Replacement ensures continued, reliable operation of your disposal unit.

Emergency Wrench (4577) – Usage & Replacement

The InSinkErator 4577 emergency wrench is crucial for manual grinding chamber rotation. Insert fully into the bottom of the disposal to free jams. Never use pliers! To replace, simply disconnect power and remove the old wrench; Insert the new 4577 wrench, ensuring a secure fit. Keep this wrench accessible – it’s vital for quick, safe troubleshooting and maintenance.

Elbow Kit (73130) – Replacement Instructions

Replacing the 73130 Elbow Kit ensures proper drainage and prevents leaks. Begin by disconnecting power and plumbing. Loosen the old elbow and mounting assembly. Install the new elbow, ensuring a tight connection to the disposal outlet and drainpipe. Secure with the provided bolts, tightening evenly. Reconnect plumbing and power, testing for leaks. A properly installed elbow kit guarantees efficient waste disposal and a watertight seal.

Backup Screw (74999) – Replacement Instructions

The 74999 Backup Screw secures the mounting assembly, preventing accidental disposal unit detachment. Disconnect power before starting. Locate the access port on the disposal’s underside. Using a screwdriver, carefully remove the old screw. Insert the new 74999 Backup Screw and tighten firmly, but avoid over-tightening. This crucial step ensures the disposal remains securely mounted to the sink flange, enhancing safety and preventing potential issues.

Available Replacement Parts

Maintaining your Badger 500-1 is easy with readily available replacement parts! Commonly replaced items include the 4577 Emergency Wrench, 73130 Elbow Kit (available in 2-bolt configurations), and the crucial 74999 Backup Screw. Parts Town offers a comprehensive inventory of InSinkErator components. Ensure optimal performance and longevity by replacing worn parts promptly. A full parts list is available for easy identification and ordering, guaranteeing a seamless repair process.

List of Commonly Replaced Parts

For your Badger 500-1, several parts experience wear and require occasional replacement. These include the InSinkErator 4577 Emergency Wrench – essential for manual operation. The 73130 Elbow Kit, often needing replacement due to leaks, is available in 2-bolt versions. Don’t forget the 74999 Backup Screw, vital for secure mounting. Regularly inspecting these components ensures continued, reliable disposal performance and prevents potential issues.

Where to Purchase Parts (Parts Town)

Parts Town stands as a premier supplier for InSinkErator Badger 500-1 replacement parts. They boast an extensive in-stock inventory, ensuring quick access to components like wrenches, elbow kits, and backup screws. Their website, PartsTown.com, offers detailed diagrams and easy ordering. Benefit from their commercial-grade support and fast shipping, guaranteeing minimal downtime for your disposal unit. Parts Town simplifies maintaining your Badger 500-1’s optimal functionality.

Warranty Information

Your InSinkErator Badger 500-1 garbage disposal is protected by a limited warranty. This coverage typically includes defects in materials and workmanship for a specified period from the date of purchase. Review your original purchase documentation for precise terms, conditions, and claim procedures. Warranty coverage may vary based on usage and proper installation. Register your product online to streamline any potential warranty service requests.

Technical Support & Contact Information

For assistance with your Badger 500-1, contact InSinkErator’s dedicated support team. Visit Parts Town for readily available parts and troubleshooting resources. You can find detailed FAQs and instructional videos online. For direct support, call their helpline or submit a request through their website. Ensure your model number is available when contacting support for efficient assistance with any concerns or questions.

Disposal Unit Dimensions

The Badger 500-1 boasts a compact design for easy installation. Its overall height is approximately 8 inches, with a diameter of around 5.5 inches. The outlet diameter measures 1.5 inches, ensuring compatibility with standard plumbing. These dimensions make it suitable for most kitchen sink configurations, maximizing space while delivering powerful performance. Precise measurements are crucial for a seamless fit.

Continuous Feed Operation

The Badger 500-1 utilizes a continuous feed system. This allows you to add food waste while the disposal is running, enhancing efficiency. Simply turn on the cold water tap and then activate the disposal. Continue feeding waste gradually, avoiding large quantities at once. This method ensures consistent grinding and prevents overloading, maximizing the unit’s lifespan and performance.

Galvanized Steel Grinding Elements Details

The Badger 500-1 features durable galvanized steel grinding elements. These components are engineered for robust performance, effectively pulverizing food waste. Galvanized steel offers excellent resistance to corrosion, ensuring longevity even with frequent use. The design incorporates strategically positioned lugs to capture and break down materials efficiently. Regular use and proper maintenance will maximize the lifespan of these essential grinding components.

Stainless Steel Components Overview

While the grinding elements are galvanized steel, the Badger 500-1 incorporates stainless steel in key areas. This includes certain internal components designed for enhanced durability and hygiene. Stainless steel resists staining and corrosion, contributing to a longer product life. Its smooth surface also minimizes food particle buildup, simplifying cleaning. These stainless steel parts complement the robust galvanized steel grinding system.

Compact Design Advantages

The Badger 500-1 boasts a space-saving design, ideal for kitchens with limited under-sink space. Despite its powerful 1/2 horsepower Dura-Drive motor, its compact build doesn’t compromise performance. This efficient design simplifies installation, even in tight quarters. The smaller footprint allows for more storage beneath the sink, maximizing kitchen utility without sacrificing disposal capability.

Badger 5 vs. Badger 1 Comparison

Both the Badger 5 and Badger 1 offer reliable garbage disposal, but key differences exist. The Badger 5, like the 500-1, generally features a more robust 1/2 HP motor compared to the Badger 1’s smaller motor. While both utilize galvanized steel grinding components, the Badger 5 often handles larger volumes and tougher food waste more efficiently. Consider disposal needs when choosing between these models.

Understanding the Parts List

The Badger 500-1 parts list is crucial for maintenance and repairs. Key components include the stopper, sink flange, fiber gasket, mounting ring assembly, and the disposal unit itself. Commonly replaced parts, readily available through retailers like Parts Town, encompass the emergency wrench (4577), elbow kit (73130), and backup screw (74999); Familiarity with these parts streamlines troubleshooting and ensures longevity.

Motor Housing Details

The Badger 500-1 boasts a robust motor housing, protecting its 1/2 HP Dura-Drive induction motor. This design prioritizes quiet operation and durability. The compact construction maximizes space under the sink without compromising power. Stainless steel components enhance longevity, resisting corrosion. Understanding the housing’s role is vital for proper maintenance and ensuring the motor’s continued, efficient performance.

nzxt h5 flow manual

Welcome to the NZXT H5 Flow manual, your comprehensive guide to understanding and utilizing this mid-tower PC case. Designed for optimal airflow and style, the H5 Flow offers a perfect blend of performance and aesthetics, making it a favorite among PC builders. This manual provides detailed instructions, specifications, and troubleshooting tips to help you make the most of your build experience.

Overview of the NZXT H5 Flow Case

The NZXT H5 Flow is a compact mid-tower PC case designed for optimal airflow and versatility. Constructed with steel and tempered glass, it features a sleek design with a side window for showcasing components. The case supports one 3.5″ bay, two 2.5″ bays, and offers seven expansion slots. Pre-installed fans enhance airflow, while the anti-dust filter ensures clean cooling. With a focus on both style and performance, the H5 Flow is ideal for gaming, content creation, or everyday use, providing ample space for high-end GPUs and CPU coolers.

Importance of the Manual for PC Builders

The NZXT H5 Flow manual is an essential resource for PC builders, providing detailed guidance for installation, optimization, and troubleshooting. It ensures a smooth building experience, whether you’re a novice or an experienced builder. The manual covers component compatibility, cable management, and airflow optimization, helping you maximize the case’s potential. By following the instructions, you can achieve optimal performance, aesthetics, and durability for your PC build. This guide is indispensable for anyone aiming to create a high-performance, visually appealing system with the H5 Flow.

Key Features and Specifications

The NZXT H5 Flow is a mid-tower case with steel and tempered glass construction, offering one 3.5 bay, two 2.5 bays, and seven expansion slots. It features a tempered glass side panel, anti-dust filter, and supports up to 165mm CPU coolers. Pre-installed fans enhance airflow, and the case is designed for optimal cooling and component compatibility, making it ideal for both air and liquid cooling setups.

Design and Build Quality

The NZXT H5 Flow features a robust steel frame and tempered glass side panels, ensuring durability and a sleek aesthetic. Its compact mid-tower design maximizes internal space while maintaining a clean exterior. The case includes a side window for showcasing components and pre-installed cable management solutions for a tidy build. Built with high-quality materials, the H5 Flow offers excellent airflow and structural integrity, making it a reliable choice for PC enthusiasts seeking both performance and style.

Storage Options and Expansion Slots

The NZXT H5 Flow offers versatile storage solutions with one 3.5-inch bay and two 2.5-inch bays, ideal for HDDs and SSDs. It lacks 5.25-inch bays but provides ample space for modern storage needs. With seven expansion slots, the case supports multiple GPUs, expansion cards, and other upgrades, ensuring flexibility for both gaming and professional setups. This design allows users to configure their system according to specific requirements, making it a versatile choice for various PC builds.

Cooling Support and Airflow Features

The NZXT H5 Flow is designed with excellent cooling support, featuring pre-installed fans for optimal airflow. It supports up to 280mm radiators and includes six fan mounts, allowing for customizable cooling solutions. The case also features dust filters and cable management options to ensure unobstructed airflow. These features make it ideal for both air and liquid cooling setups, providing efficient thermal management for high-performance PC builds.

Installation Guide

The NZXT H5 Flow manual provides a detailed installation guide, covering case preparation, GPU and storage installation, cable management, and fan support for a seamless build experience.

Case Preparation and Unpacking

Begin by carefully unpacking the NZXT H5 Flow case from its box, ensuring all components are included and undamaged. The case comes with pre-installed standoffs, saving you time during setup. Remove the tempered glass panels and dust filters for cleaning and preparation. Inspect the case for any shipping damage and verify all accessories, such as screws and cable ties, are present. Before starting your build, ground yourself to prevent static damage to components. Refer to the manual for specific screw types and installation guidelines to ensure a smooth process.

Motherboard Installation and Standoffs

Start by preparing the NZXT H5 Flow case for motherboard installation. The case comes with pre-installed standoffs, eliminating the need for manual installation. Align your motherboard with the standoffs, ensuring proper fitment. Secure the motherboard using the provided M3 screws, tightening them evenly to avoid warping. Connect essential cables like the power button, reset switch, and USB ports to the motherboard. Double-check cable routing for optimal airflow and accessibility. Ground yourself to prevent static damage during installation. Refer to the manual for specific screw locations and torque guidelines to ensure a stable and secure setup.

Storage Drive Installation

The NZXT H5 Flow supports one 3.5″ bay and two 2.5″ bays for storage drives. For 3.5″ drives, remove the bay from the case, align the drive with the screw holes, and secure it using the provided screws. For 2.5″ drives, simply attach them to the bay using the included screws. Ensure proper alignment and tighten firmly. Connect SATA cables to your motherboard and power supply. Organize cables neatly for optimal airflow. Refer to the manual for specific bay locations and installation tips to ensure a clean and functional setup.

GPU and Expansion Card Installation

Install your GPU and expansion cards securely into the NZXT H5 Flow’s seven available PCIe slots. Remove the rear PCIe slot covers corresponding to your card’s length. Carefully align the GPU with the PCIe slot, ensuring the gold contacts match up. Gently push the card into the slot until it clicks. Secure it with screws to prevent movement. Connect power cables from your PSU to the GPU, ensuring proper cable management. For additional expansion cards, repeat the process using the remaining slots. This setup supports high-end GPUs and ensures stable performance.

Cooling System Installation

Begin by preparing the case for your cooling system. The NZXT H5 Flow supports both air and liquid cooling solutions. For radiators, install up to a 280mm radiator in the top or front of the case. Secure the radiator using the provided screws and ensure proper alignment. Pre-installed fans simplify airflow setup, but additional fans can be mounted on the case’s fan brackets. Use the anti-dust filters to maintain cleanliness. Connect your cooling components to the appropriate headers on your motherboard or controller. This setup ensures optimal thermal performance and quiet operation.

Cable Management Best Practices

Effective cable management is crucial for a clean and efficient build. Route cables behind the motherboard tray using the built-in cable channels and tie points. Secure cables with zip ties or Velcro straps to keep them organized. Plug in essential cables first, such as the CPU power and storage drives, to minimize clutter. Use the case’s pre-drilled holes to guide cables neatly. Store excess cable lengths behind the tray or in designated compartments. This ensures better airflow, reduces dust buildup, and enhances the overall aesthetic of your build. Proper cable management also improves system performance and accessibility.

Cable Connections and RGB Lighting

The NZXT H5 Flow supports 5V ARGB lighting, compatible with most motherboards. Use the included 5V ARGB adapter for seamless RGB integration. Control lighting and fans via motherboard software or NZXT CAM for a synchronized experience. Ensure proper connections to avoid damage and optimize visual effects. This setup enhances aesthetics while maintaining system performance and customization.

Understanding RGB Controller Compatibility

The NZXT H5 Flow is equipped with a 5V ARGB adapter, ensuring compatibility with most modern motherboards. For optimal control, connect the RGB components to a 5V addressable RGB header, avoiding 12V headers to prevent damage. The H5 Flow can be controlled through motherboard software like MSI Dragon Center or via NZXT CAM if using an N7 series motherboard. An NZXT RGB Controller is required for CAM control without an N7 board. This setup allows synchronized lighting and fan control, enhancing customization and system aesthetics seamlessly.

Connecting Fans and RGB Components

To connect fans and RGB components in the NZXT H5 Flow, start by identifying the 5V ARGB adapter included with the case. This adapter allows you to plug the RGB components into a 5V addressable RGB header on your motherboard. Ensure compatibility by avoiding 12V headers to prevent damage. Fans can be connected to the motherboard or an NZXT RGB and Fan Controller for centralized control. Use the provided cables to secure connections, and refer to the motherboard manual for specific header locations. Proper setup ensures synchronized lighting and optimal fan performance.

Software Control for Lighting and Fans

The NZXT H5 Flow allows for precise software control of lighting and fans, enhancing customization. Using MSI Dragon Center or NZXT CAM, users can adjust fan curves and synchronize RGB lighting. For motherboards without NZXT support, third-party software may be necessary. This setup ensures optimal cooling and aesthetic synchronization, making it ideal for tailored PC builds.

Thermal Management and Airflow

The NZXT H5 Flow excels in thermal management with optimal airflow design, pre-installed fans, and dust filters, ensuring efficient cooling for all components.

Optimizing Case Fans for Better Cooling

Optimize your NZXT H5 Flow’s cooling performance by strategically placing case fans to enhance airflow. Use the pre-installed fans and consider adding up to seven additional fans for improved circulation. Ensure proper fan curve configuration in your motherboard software for dynamic cooling. For liquid cooling setups, install radiators up to 360mm to maximize heat dissipation. Maintain a balanced intake and exhaust configuration to prevent dead zones, ensuring efficient cooling for all components. Regularly clean dust filters to sustain optimal airflow and system performance.

Using Radiators for Liquid Cooling

The NZXT H5 Flow supports radiators up to 360mm, making it ideal for liquid cooling setups. Install radiators in the top or front of the case for optimal heat dissipation. Ensure the radiator is securely fastened and aligned with case fan mounts. The case accommodates both 120mm and 140mm fan radiators, providing flexibility for custom loops or AIO coolers. Proper tubing management is essential to maintain airflow and aesthetics. Refer to the manual for specific installation guidelines and compatibility checks to ensure a seamless cooling solution for your build.

Maximizing Airflow with Proper Component Placement

Maximizing airflow in the NZXT H5 Flow requires strategic component placement. Position the GPU and CPU cooler to allow cool air to flow freely through the case. Ensure the radiator is installed in a location that promotes unobstructed airflow, such as the top or front. Keep cables organized to avoid blocking fan intakes or exhaust paths. Use the case’s cable management features to maintain a clean build, which enhances airflow efficiency. Proper placement ensures optimal cooling performance and maintains a sleek, functional design.

Warranty and Support

NZXT offers a limited warranty covering repairs or replacements for defective H5 Flow cases. Contact NZXT support for assistance with warranty claims or product-related inquiries.

Understanding the NZXT Warranty Policy

NZXT’s warranty for the H5 Flow case covers defects in materials and workmanship. The policy allows for repair or replacement of faulty products at NZXT’s discretion. It does not cover incidental or consequential damages, such as those from improper installation or third-party components. Warranty claims must be submitted through NZXT’s customer support, with proof of purchase and detailed issue descriptions. Ensure compliance with all terms to maintain warranty validity and receive timely assistance.

Contacting Customer Support

For assistance with the NZXT H5 Flow, contact customer support through the official NZXT website. Submit a support ticket with detailed information about your issue, including proof of purchase and product serial number. Ensure you describe the problem clearly to expedite resolution. Response times may vary, but NZXT aims to address inquiries promptly. Additionally, refer to the manual or online resources for troubleshooting before reaching out, as many common issues can be resolved independently.

Accessories and Compatibility

Explore recommended accessories like RGB controllers, additional fans, and compatible components to enhance your H5 Flow setup. Ensure all parts are compatible with the case’s specifications for optimal performance.

Recommended Accessories for the H5 Flow

Enhance your H5 Flow experience with compatible accessories like NZXT RGB controllers for synchronized lighting, additional Aer fans for improved airflow, or high-quality SSDs to maximize storage potential. Consider investing in cable management tools for a cleaner build. For liquid cooling enthusiasts, radiators or AIO coolers are excellent additions. Ensure all components align with the case’s specifications for optimal performance and aesthetics. These accessories will help you unlock the full potential of your H5 Flow build.

Ensuring Component Compatibility

When building with the NZXT H5 Flow, compatibility is key. The case supports up to 165mm CPU coolers and 408mm GPUs, ensuring flexibility for high-end components. It features one 3.5″ bay, two 2.5″ bays, and seven expansion slots, catering to various storage and GPU setups. Always verify your motherboard’s RGB header compatibility, as the H5 Flow’s RGB lighting works with 5V ARGB systems. Check NZXT’s official specifications to ensure all components, including radiators and fans, fit seamlessly for optimal performance and aesthetics.

Troubleshooting Common Issues

Addressing RGB lighting problems, cooling inefficiencies, and cable management challenges ensures optimal performance. Refer to the manual for diagnostic steps and solutions to resolve these issues effectively.

Resolving RGB Lighting Problems

Experiencing issues with RGB lighting on your NZXT H5 Flow? Ensure the 5V ARGB adapter is correctly connected to a compatible motherboard header. Avoid 12V headers to prevent damage. Verify that the RGB controller is properly linked to the lighting components. If using NZXT CAM, check that your motherboard supports CAM integration or consider an NZXT RGB Controller for seamless control. Refer to the manual for specific wiring diagrams and troubleshooting steps to restore vibrant lighting functionality.

Fixing Cooling and Airflow Issues

Encounter cooling or airflow problems with your NZXT H5 Flow? Ensure all case fans are correctly installed and configured for optimal airflow. Clean dust filters regularly to maintain proper air circulation. Verify that radiators are mounted in well-ventilated areas, and consider using high-quality fans for better heat dissipation. Check for obstructions caused by improperly placed components and ensure cables are managed to allow unimpeded airflow. Refer to the manual for recommended fan configurations and radiator installation guidelines to enhance cooling efficiency and system performance.

Addressing Cable Management Challenges

Effective cable management is crucial for both aesthetics and functionality in your NZXT H5 Flow build. Use cable ties or Velcro straps to secure loose wires, ensuring they don’t obstruct airflow or interfere with components. Route cables behind the motherboard tray to keep the interior clean. For RGB lighting, connect components to the included 5V ARGB adapter and ensure compatibility with your motherboard’s RGB headers. Regularly test connections and refer to the manual for specific cable routing recommendations to maintain optimal performance and a sleek appearance.

User Guides and Resources

Access the official NZXT H5 Flow manual online for detailed installation guides, exploded diagrams, and troubleshooting tips. Additional tutorials and FAQs are available on NZXT’s website.

Downloading the Official Manual

The NZXT H5 Flow manual is readily available for download on NZXT’s official website and platforms like ManualsLib. Simply navigate to the support section, select your product, and download the PDF manual. This document covers installation instructions, component diagrams, and troubleshooting tips. It’s free and easily accessible, ensuring you have all the information needed for a smooth building experience. Refer to it for detailed guides on case preparation, component installation, and optimal setup configurations.

Additional Online Resources and Tutorials

Beyond the official manual, NZXT offers extensive online resources to enhance your H5 Flow experience. Visit NZXT’s website for detailed guides, FAQs, and troubleshooting tips. YouTube tutorials provide step-by-step build videos, while forums like Reddit and PC building communities share user experiences and tips. Additionally, NZXT’s support page offers downloadable manuals in multiple languages. These resources ensure you can address any challenge and optimize your build, whether you’re a novice or an experienced builder, maximizing the H5 Flow’s potential.

Conclusion

The NZXT H5 Flow manual provides essential guidance for a seamless building experience, ensuring optimal performance and customization. Build confidently with this comprehensive resource, unlocking your PC’s full potential.

Final Tips for Building with the H5 Flow

For a successful build, plan carefully and organize components beforehand. Use high-quality cables and ties for clean cable management, enhancing airflow and aesthetics. Ensure proper cooling by installing fans in optimal positions and considering liquid cooling options. Double-check compatibility of all parts before installation to avoid issues. Refer to the manual for specific guidance on RGB lighting and fan control. Finally, test all systems before closing the case to ensure everything functions perfectly. Happy building with your NZXT H5 Flow!

Maximizing the Potential of Your NZXT H5 Flow

To unlock the full potential of your NZXT H5 Flow, focus on optimizing airflow and cooling efficiency. Utilize the case’s robust fan support and radiator compatibility for superior thermal management. Ensure proper cable management to maintain clean aesthetics and unobstructed airflow. Explore the RGB lighting features to personalize your build’s visual appeal. Consider upgrading with compatible accessories like NZXT’s RGB controllers for enhanced customization. By leveraging these features, you can create a high-performance, visually stunning PC that meets your gaming and productivity needs.

spade & co health smartwatch 3 manual pdf download

The Spade & Co Health Smartwatch 3 is a cutting-edge wearable device offering advanced health monitoring, customizable faces, and voice assistant functionality, with the user manual providing essential guidance for setup and troubleshooting․

1․1 Overview of the Smartwatch and Its Features

The Spade & Co Health Smartwatch 3 is a versatile wearable device designed for fitness and daily use․ It features advanced health monitoring, including heart rate, sleep, and activity tracking; Users can customize watch faces to suit their style and enjoy built-in Alexa for voice commands․ The smartwatch supports Bluetooth connectivity for seamless pairing with Android and iOS devices․ With a long-lasting battery life of up to 10 days, it’s ideal for continuous wear․ Additionally, its waterproof design makes it suitable for swimming and outdoor activities․ The device also includes GPS tracking via smartphone connection, ensuring accurate fitness monitoring on the go․

1․2 Importance of the User Manual for Optimal Usage

The user manual is essential for unlocking the full potential of the Spade & Co Health Smartwatch 3․ It provides detailed guidance on initial setup, feature customization, and troubleshooting common issues․ By following the manual, users can ensure proper device pairing, understand health monitoring functions, and optimize battery life․ The manual also explains how to access advanced features like Alexa integration and customizable watch faces; Additionally, it offers maintenance tips to prolong the smartwatch’s lifespan․ Referencing the manual ensures users can resolve connectivity problems and perform software updates effectively, making it a vital resource for seamless and efficient usage․

How to Download the Spade & Co Health Smartwatch 3 Manual PDF

Visit the official Spade & Co website or support page to download the Health Smartwatch 3 manual PDF for free, ensuring access to setup guides and troubleshooting tips․

2․1 Sources for Downloading the Official Manual

The official Spade & Co Health Smartwatch 3 manual can be downloaded from the Spade & Co website or their dedicated support page․ Additionally, third-party sites like RadiationCity offer direct links to the PDF․ Ensure you verify the authenticity of the source to avoid downloading unauthorized versions․ The manual is typically available for free and provides comprehensive guidance for setup, features, and troubleshooting․ Always prefer official channels to ensure you receive the most accurate and up-to-date information for your device․

2․2 Step-by-Step Guide to Accessing the PDF

To access the Spade & Co Health Smartwatch 3 manual PDF, visit the official Spade & Co website and navigate to the “Support” section; Click on “Downloads” or “Manuals,” then select your device model․ Verify the source to ensure authenticity․ If unavailable, check authorized third-party sites like RadiationCity, which often host official manuals․ Use the site’s search bar with keywords like “Spade & Co Health Smartwatch 3 manual PDF” to locate the file quickly․ Download and save the PDF for easy reference, ensuring you have the latest version for accurate guidance․

Initial Setup and Pairing of the Smartwatch

Start by fully charging the Spade & Co Health Smartwatch 3 using the included cable․ Download and install the Spade Help app on your smartphone․ Pair the smartwatch with your device via Bluetooth, following in-app instructions for a seamless connection․ Ensure the watch is turned on and in pairing mode for successful synchronization․ This setup allows you to unlock all features and customize settings for optimal performance․

3․1 Pairing the Smartwatch with Android Devices

To pair the Spade & Co Health Smartwatch 3 with an Android device, ensure the watch is fully charged and turned on․ Download and install the Spade Help app from the Google Play Store․ Open the app and follow the on-screen instructions to enable Bluetooth on your Android device․ Once Bluetooth is activated, select the smartwatch from the list of available devices․ Confirm the pairing request on both the watch and your phone․ The app will guide you through syncing and setting up features like notifications and health tracking․ Keep the devices close during pairing to ensure a stable connection․

3․2 Pairing the Smartwatch with iOS Devices

To pair the Spade & Co Health Smartwatch 3 with an iOS device, start by ensuring the watch is fully charged and powered on․ Download the Spade Help app from the Apple App Store․ Open the app and follow the prompts to enable Bluetooth on your iPhone․ Once Bluetooth is activated, select the smartwatch from the list of available devices․ Confirm the pairing request on both the watch and your iPhone․ The app will guide you through syncing and setting up features like notifications and health tracking․ Ensure both devices remain close during pairing to establish a stable connection․

3․3 Charging the Smartwatch for the First Time

Before using your Spade & Co Health Smartwatch 3, charge it using the included USB charging cable․ Connect the cable to a power source and align the watch’s charging pins with the dock․ Ensure the watch is turned on during the first charge to activate the battery․ Charging typically takes 2-3 hours for a full charge․ Avoid charging on surfaces sensitive to heat, such as wood․ Once charged, the watch will automatically turn on and be ready for pairing․ For detailed charging instructions, refer to the Spade & Co Health Smartwatch 3 manual PDF․

Key Features of the Spade & Co Health Smartwatch 3

The Spade & Co Health Smartwatch 3 offers advanced health monitoring, customizable watch faces, and built-in Alexa for voice commands, enhancing your fitness and daily routines seamlessly․

4․1 Health Monitoring Features (Heart Rate, Sleep, Activity Tracking)

The Spade & Co Health Smartwatch 3 excels in health monitoring, offering continuous heart rate tracking, sleep quality analysis, and detailed activity tracking․ These features help users monitor their daily health metrics efficiently, providing insights into their well-being․ The smartwatch ensures accurate data collection, enabling users to set fitness goals and track progress․ With these tools, users can maintain a healthier lifestyle, supported by real-time feedback and comprehensive reports․ The manual provides guidance on optimizing these features for personalized health management․

4․2 Customizable Watch Faces and Personalization Options

The Spade & Co Health Smartwatch 3 offers extensive customization options, allowing users to personalize their experience․ Choose from a variety of pre-installed watch faces or download additional designs from the app store․ Users can also set custom photos as watch faces, adding a personal touch․ The manual provides step-by-step guidance on how to change or customize watch faces, ensuring a seamless experience․ With these features, the smartwatch adapts to individual preferences, making it both functional and stylish․ Personalization options enhance user satisfaction, allowing the device to match their unique lifestyle and aesthetic choices․

4․3 Built-in Alexa and Voice Assistant Functionality

The Spade & Co Health Smartwatch 3 features built-in Alexa and voice assistant capabilities, enabling hands-free control and seamless integration with your daily routine․ Users can activate Alexa directly from the watch to set reminders, track fitness goals, or receive updates․ The voice assistant functionality also supports other compatible services, enhancing convenience․ To use these features, ensure your smartwatch is connected to a smartphone with an active internet connection․ The manual provides detailed instructions on how to enable and customize voice assistant settings, allowing you to maximize the smartwatch’s functionality and enjoy a more intuitive user experience․

Troubleshooting Common Issues

The Spade & Co Health Smartwatch 3 manual provides solutions for common issues like connectivity problems, battery life concerns, and software glitches, ensuring optimal performance and user satisfaction․

5․1 Resolving Connectivity Problems

Connectivity issues with the Spade & Co Health Smartwatch 3 can often be resolved by restarting the device or ensuring Bluetooth is enabled on both the watch and paired smartphone․ If the watch disconnects frequently, check that it is within range of the phone and that no interference is caused by other devices․ Additionally, ensure the watch’s software is up to date, as outdated firmware can lead to connectivity problems․ If issues persist, resetting the watch to factory settings may be necessary․ Refer to the manual for detailed steps to troubleshoot and restore a stable connection․

5․2 Fixing Battery Life Issues

If the Spade & Co Health Smartwatch 3 experiences shortened battery life, ensure it is charged on a heat-resistant surface and avoid overcharging․ Disable unnecessary features like GPS and Bluetooth when not in use to conserve power․ Lowering screen brightness and enabling power-saving mode can also extend battery life․ If issues persist, restart the watch or reset it to factory settings․ Ensure the software is updated, as newer versions often optimize battery performance․ For severe problems, contact Spade & Co support for further assistance or potential battery replacement․ Proper charging habits and settings adjustments can help maintain the advertised 10-day battery life․

5․3 Resetting the Smartwatch to Factory Settings

To reset the Spade & Co Health Smartwatch 3 to factory settings, first ensure the device is fully charged․ Open the Settings menu on the watch, scroll to the “System” or “About” section, and select “Reset” or “Factory Reset․” Confirm the action by following the on-screen prompts․ This process will erase all data, restoring the watch to its original state․ After resetting, pair the smartwatch with your phone again and download the latest software updates to ensure optimal performance․ Note that resetting will not affect the hardware but will remove all personalized settings and data․ Always back up important data before performing a factory reset․

Accessories and Compatibility

The Spade & Co Health Smartwatch 3 supports a variety of compatible bands, straps, and charging cables, ensuring seamless integration with both Android and iOS devices for enhanced functionality․

6․1 Compatible Bands and Straps for the Smartwatch

The Spade & Co Health Smartwatch 3 offers a wide range of compatible bands and straps, including silicone, leather, and metal options, to suit various styles and preferences․ These accessories are designed to be interchangeable, allowing users to customize their smartwatch effortlessly․ The bands are available in different sizes and colors, ensuring a perfect fit for all wrist sizes․ For optimal compatibility, it is recommended to purchase bands specifically designed for the Health Smartwatch 3․ Users can find these accessories on the official Spade & Co website or through authorized retailers․ Regularly updating the manual can provide additional details on band compatibility and replacement procedures․

6․2 Recommended Charging Cables and Adapters

For the Spade & Co Health Smartwatch 3, it is essential to use compatible charging cables and adapters to ensure safe and efficient charging․ The official charging cable provided with the smartwatch is recommended, as it is specifically designed for optimal performance․ Avoid using damaged or third-party cables that may cause charging issues or safety hazards․ Additionally, ensure the adapter meets the required power specifications to prevent overheating․ For best results, charge the smartwatch on a heat-resistant surface and avoid overcharging․ Always refer to the user manual for detailed charging guidelines and recommendations․

Software Updates and Maintenance

Regular software updates ensure optimal performance and security for the Spade & Co Health Smartwatch 3․ Manual updates can be initiated via the companion app, while enabling automatic updates guarantees the latest features and fixes․ Always keep the smartwatch charged during updates to avoid interruptions․

7․1 How to Manually Update the Smartwatch Software

To manually update the Spade & Co Health Smartwatch 3 software, open the Spade Help app on your paired smartphone․ Navigate to the Settings section, then select Device Information or Software Update․ If an update is available, tap Download and Install․ Ensure the smartwatch is sufficiently charged and remains near the phone during the process; The update will transfer to the watch and install automatically․ Refer to the user manual PDF for detailed steps and troubleshooting tips to ensure a smooth update experience․

7․2 Enabling Automatic Software Updates

To enable automatic software updates for the Spade & Co Health Smartwatch 3, open the Spade Help app on your smartphone․ Navigate to the Settings menu, then select Software Update․ Toggle on the option for Auto-Update․ Ensure your smartwatch is connected to Wi-Fi and has sufficient battery life․ The device will automatically download and install updates when available․ Keep the watch near your phone during this process; Refer to the user manual PDF for additional details on managing software updates seamlessly․

Legal Information and Warranty Details

The Spade & Co Health Smartwatch 3 is warranted against defects for a specified period․ Ensure compliance with safety standards and review legal disclaimers in the manual․

8․1 Understanding the Warranty Terms and Conditions

The Spade & Co Health Smartwatch 3 warranty typically covers manufacturing defects for a specified period, often one year from purchase․ The manual outlines what is covered, such as repairs or replacements for faulty components, and what is excluded, like damage from misuse or normal wear․ To ensure coverage, users must register the device and retain proof of purchase․ Warranty claims can usually be filed through the official support channel․ Always review the terms carefully to understand your rights and obligations as a consumer․

8․2 Compliance with Safety and Regulatory Standards

The Spade & Co Health Smartwatch 3 adheres to international safety and regulatory standards, ensuring safe and reliable performance․ The device meets FCC and CE certification requirements, guaranteeing electromagnetic compatibility and user safety․ The manual emphasizes avoiding charging on heat-sensitive surfaces, like wood, to prevent damage; Compliance with these standards ensures the smartwatch operates within acceptable radiation and electrical safety limits․ Users are encouraged to follow guidelines for proper usage to maintain safety and functionality․ This compliance underscores Spade & Co’s commitment to delivering a secure and high-quality wearable device for health and fitness tracking․

Customer Support and Resources

For assistance, contact the Spade & Co Support Team at support@spadeandco․com․ Additional resources include tutorial videos and guides available on the official website, ensuring comprehensive support for users․

9;1 Contacting Spade & Co Support Team

For any inquiries or issues, users can directly contact the Spade & Co Support Team via email at support@spadeandco․com․ The team provides assistance with troubleshooting, setup, and feature usage․ Additionally, the official website offers tutorial videos and guides to help users maximize their smartwatch experience․ Whether you need help with pairing, software updates, or customizing watch faces, the support team is available to ensure a seamless experience․ Visit the Spade & Co website for more resources and support options․

9․2 Additional Tutorial Videos and Guides

Spade & Co provides comprehensive tutorial videos and guides to help users master the Health Smartwatch 3․ These resources are available on their official website and YouTube channel, covering topics like initial setup, feature customization, and troubleshooting․ A detailed setup video can be found at https://www․youtube․com/watch?v=k9dkLJWbVLk․ Additionally, the user manual PDF offers step-by-step instructions for optimizing your smartwatch experience․ Whether you’re customizing watch faces or enabling advanced health features, these guides ensure you make the most of your device․ Visit the Spade & Co website for easy access to all tutorial materials․

The Spade & Co Health Smartwatch 3 is your ultimate companion, blending style with advanced health features․ Download the manual and guides to unlock its full potential and enhance your fitness journey with ease․

10․1 Final Tips for Maximizing Smartwatch Potential

To maximize your Spade & Co Health Smartwatch 3 experience, ensure regular software updates, explore customizable watch faces, and utilize built-in health monitoring features․ Enable automatic updates for seamless performance and keep the device charged to avoid interruptions․ Refer to the manual for troubleshooting and optimal setup․ By following these tips, you can unlock the full potential of your smartwatch and enhance your fitness and daily routines with ease and efficiency․

indesit washing machine manual pdf

Welcome to the Indesit Washing Machine Manual PDF, your comprehensive guide to understanding and optimizing your appliance. This document covers installation, operation, maintenance, and troubleshooting, ensuring efficient use of your washer. Discover key features, eco-friendly technologies, and expert tips for long-lasting performance.

1.1 Importance of the Manual for Users

The Indesit washing machine manual is essential for users to understand proper installation, operation, and maintenance. It provides clear guidelines for optimizing wash cycles, troubleshooting common issues, and ensuring safety. By following the manual, users can extend the appliance’s lifespan, prevent errors, and make informed decisions for efficient and eco-friendly laundry practices.

1.2 Overview of Indesit Washing Machine Models

Indesit offers a wide range of washing machine models, including freestanding and built-in options, with capacities from 7 to 10 kg. Designed for convenience, they feature classic styles in white, black, and grey. Slim models cater to narrower spaces, while advanced technologies like PushWash and Rapid Option enhance efficiency. Each model is tailored to meet diverse household needs, ensuring optimal performance and durability.

Installation and Setup Instructions

Place the washing machine on a flat, sturdy floor, ensuring it doesn’t touch walls or furniture. Unpack and inspect for damage before installation to ensure proper setup.

2.1 Location and Placement Requirements

Ensure the washing machine is placed on a flat, sturdy floor to prevent vibration and noise. Maintain clearance from walls and furniture to allow proper ventilation and access. Avoid placing it near direct sunlight or water sources. Check for any damage after unpacking before final placement to ensure safe and optimal operation.

2.2 Leveling the Washing Machine

Proper leveling ensures stable operation and reduces vibration. Use the adjustable feet to align the machine evenly. Check with a spirit level and adjust until the machine is perfectly horizontal. Ensure all four feet touch the floor firmly. Tighten the locking nuts after adjustment to maintain stability and prevent movement during use.

Understanding the Control Panel

The control panel features intuitive buttons and indicators for selecting wash cycles, temperature, and additional options. Use the delay timer and special functions like PushWash for tailored washing experiences.

3.1 Description of Buttons and Indicators

The control panel includes buttons for cycle selection, temperature adjustment, and special options like delay start. Indicators display active settings, cycle progress, and error codes. The delay timer button allows scheduling wash cycles up to 9 hours in advance, with LED lights confirming your selections. Additional buttons enable features like PushWash for quick cycles and options for delicate fabrics or heavy stains, ensuring precise control over your washing process.

3.2 Navigating Wash Cycles and Options

Your Indesit washing machine offers a variety of wash cycles, from standard options like cotton, synthetics, and delicates to specialized modes such as wool and rapid wash. Use the control panel to select cycles based on fabric type or soil level. Special features like PushWash and Rapid Option allow quick adjustments, while options like Extra Wash and Mix Coloured 40 provide customization for specific needs.

Wash Cycles and Programs

Indesit washing machines offer diverse wash cycles, including standard options for cotton, synthetics, and delicates, as well as specialized modes like wool and rapid wash for convenience.

4.1 Standard Wash Cycles

Indesit washing machines feature a variety of standard wash cycles designed for different fabric types. These include cycles for cotton, synthetics, delicates, and wool, ensuring optimal cleaning for everyday laundry. Each cycle offers customizable temperature and spin speed settings, allowing users to tailor washes to specific needs. These cycles are energy-efficient and designed to protect fabrics while maintaining cleaning performance, making them ideal for regular use and extending garment life.

4.2 Specialized Wash Options

Indesit washing machines offer advanced specialized wash options for specific needs. The PushWash feature automatically selects optimal settings for quick cycles, while the Rapid Option enables fast washing with effective results. Additional options like Extra Wash and Mix Coloured 40 cater to tough stains and color protection, respectively. These specialized modes enhance efficiency and fabric care, providing tailored solutions for diverse laundry requirements and ensuring superior cleaning outcomes with minimal effort.

Maintenance and Care

Regular maintenance ensures optimal performance. Clean the filter and drain pump, run the auto-cleaning cycle, and check hoses for damage. Proper care extends machine lifespan and efficiency.

5.1 Cleaning the Filter and Drain Pump

Regularly cleaning the filter and drain pump is essential for maintaining your Indesit washing machine’s performance. Locate the filter at the bottom of the machine and remove it to clean debris. The drain pump filter should also be checked and cleared of blockages. Cleaning these components prevents poor drainage and ensures efficient washing cycles. Perform this maintenance every 1-2 months or when error codes indicate a blockage. For optimal results, run the auto-cleaning cycle with detergent or specialized additives to further sanitize internal parts.

5.2 Running the Auto-Cleaning Cycle

The auto-cleaning cycle on your Indesit washing machine is designed to maintain its performance by removing detergent residue and odors. Run this cycle without any laundry in the drum. For optimal results, use a small amount of detergent or specialized cleaning additives. This cycle helps prevent bacterial growth and ensures efficient washing. It is recommended to run the auto-cleaning cycle every 1-2 months to keep your machine in top condition.

5.3 Checking and Replacing Hoses

Regularly inspect the inlet and drain hoses for signs of wear, cracks, or leaks. Ensure they are securely connected to prevent water damage. Replace hoses every 5 years or if damage is detected. Use genuine Indesit parts for compatibility and safety. Proper hose maintenance ensures efficient water flow and prevents operational issues, extending the lifespan of your washing machine.

Troubleshooting Common Issues

This section helps resolve frequent problems like error codes, leaks, or unusual noises. Follow step-by-step solutions to address issues efficiently and ensure smooth machine operation.

6.1 Identifying Error Codes

Indesit washing machines display error codes like E01, E02, or E03 to indicate specific issues. These codes help diagnose problems such as drainage faults, sensor malfunctions, or imbalanced loads. Refer to the manual for a detailed list of codes and their meanings. Understanding these codes allows you to address issues promptly, ensuring efficient troubleshooting and maintaining optimal performance. Always consult the manual for accurate solutions.

6.2 Resolving Common Operational Problems

Common issues like drainage faults or imbalanced loads can be resolved by checking the drain pump filter or redistributing laundry. Resetting the machine by unplugging it may fix sensor-related errors. Regularly cleaning the filter and ensuring the machine is level can prevent many problems. Always refer to the manual for specific solutions to maintain optimal performance and extend the lifespan of your Indesit washing machine.

Downloading the Indesit Washing Machine Manual PDF

The Indesit washing machine manual is available for free download as a PDF or TXT file from official sources or third-party websites, ensuring easy access to guidance.

7.1 Official Sources for Manual Download

The official Indesit website provides direct access to washing machine manuals, allowing users to download PDF guides specific to their model. Additionally, trusted platforms like ManualsLib and WasherManual.com offer verified Indesit manuals. These sources ensure authenticity and ease of access, providing detailed instructions for installation, operation, and maintenance. Downloading from official sources guarantees error-free and up-to-date information tailored to your appliance.

7.2 Third-Party Websites for Manual Access

Besides official sources, third-party websites like ManualsLib, WasherManual.com, and ManualsOnline offer Indesit washing machine manuals. These platforms provide easy access to PDF guides for various models. While convenient, ensure the authenticity of the manual by verifying the source. Third-party sites often host user-contributed content, which may vary in accuracy. Always cross-check with official documentation for reliability and completeness;

Safety Precautions and Warnings

Always follow safety guidelines to avoid accidents. Keep children away from the machine, ensure proper installation, and avoid overloading. Never insert flammable materials or unplug while in use.

8.1 General Safety Guidelines

Ensure the washing machine is installed on a stable, level surface away from walls and furniture. Keep children away from the appliance and avoid overloading. Never insert flammable materials or unplug the machine while it is in operation. Regularly inspect hoses and connections for damage. Always follow the recommended detergent usage and avoid using the machine for unauthorized purposes. Ensure proper ventilation in the room to prevent moisture buildup.

8.2 Electrical Safety Considerations

Ensure the washing machine is connected to a grounded power outlet with a suitable voltage rating. Avoid using extension cords or damaged power cords. Keep the area around the machine dry to prevent electrical hazards. Never modify the plug or use damaged cords. Ensure children do not tamper with the power button. Always unplug the machine during maintenance or repairs. Regularly inspect electrical connections for wear and tear. Adhere to local electrical safety regulations for optimal protection.

Special Features of Indesit Washing Machines

Indesit washing machines offer innovative features like PushWash Technology for optimal cycle selection, Rapid Option for quick washing, and Woolmark certification for delicate fabrics. Energy-efficient designs and advanced sensors ensure superior performance while minimizing resource use.

9.1 PushWash Technology

PushWash Technology by Indesit automatically selects the optimal wash program for your load, saving time and effort. It ensures efficient cleaning while maintaining fabric care, adapting to soil levels and fabric types. This feature is designed to simplify your washing experience, providing excellent results with minimal user input. It’s a smart solution for busy households seeking convenience and reliability.

9.2 Rapid Option for Quick Washing

The Rapid Option enables fast washing cycles, ideal for urgent needs. It delivers efficient cleaning in less time without compromising on performance. Perfect for busy schedules, this feature ensures your clothes are washed quickly while maintaining quality. It’s a convenient solution for those seeking swift results, making it a standout feature in Indesit washing machines.

Brand Story and Reliability

Indesit, originating as Merloni Elettrodomestici SpA, became a global leader in home appliances by the 1980s. Known for durability, Indesit offers a 1-year warranty and eco-friendly designs, ensuring long-term reliability and sustainability.

10.1 History of Indesit Company

Indesit, originally Merloni Elettrodomestici SpA, was founded in 1975 and renamed Indesit Company S.p.A in 2005. By the 1980s, it became a global leader in home appliances, known for reliability and innovation. Headquartered in Fabriano, Italy, Indesit produces high-quality washing machines and other appliances, emphasizing durability and sustainability. Its commitment to excellence has made it a trusted brand worldwide, with a strong focus on eco-friendly technologies and customer satisfaction.

10.2 Warranty and Durability Information

Indesit washing machines come with a 1-year warranty for registered purchases, ensuring coverage for parts and labor. Built for longevity, they typically last 7-8 years with proper care. The brand emphasizes durability and sustainability, with a 90% recycling rate for materials. This commitment to quality and environmental responsibility makes Indesit a reliable choice for long-term use and eco-conscious consumers.

Environmental Benefits

Indesit washing machines offer eco-friendly design, minimizing water and energy consumption while utilizing 90% recyclable materials, promoting sustainability and reducing environmental impact effectively.

11.1 Water and Energy Efficiency

Indesit washing machines feature advanced technologies like Water Balance Plus, which optimizes water levels based on load size, reducing consumption. Energy-efficient cycles and eco-friendly designs minimize power use while maintaining performance. These innovations help users save resources and lower utility bills, promoting sustainability without compromising cleaning effectiveness.

11.2 Recycling and Sustainability

Indesit washing machines are designed with sustainability in mind, featuring a 90% recycling rate for materials. Eco-friendly technologies reduce environmental impact, while energy-efficient designs promote greener laundry practices. Indesit’s commitment to sustainability ensures that their appliances not only perform well but also contribute to a healthier planet by minimizing waste and resource consumption.

Model-Specific Guides

Indesit provides detailed guides for each washing machine model, ensuring users can access tailored instructions for installation, operation, and troubleshooting specific to their appliance, optimizing performance.

12.1 Popular Models and Their Manuals

Indesit offers manuals for popular models like IWC6105, WIDL 106, and WIB 111, providing detailed guides for installation, operation, and troubleshooting. These resources help users optimize their washing machine’s performance, understand specific features, and resolve common issues. Manuals are available in PDF format, ensuring easy access to instructions tailored to each model’s unique functions and requirements.

12.2 How to Identify Your Model Number

To identify your Indesit washing machine model number, locate the serial number plate, typically found on the rear or inside the door. The model number is usually a combination of letters and numbers, such as IWC6105 or WIDL 106. This identifier ensures you access the correct manual for your specific appliance, providing accurate instructions and troubleshooting guidance tailored to your machine.

User Tips and Tricks

Optimize performance by using PushWash and Rapid Option for efficient cycles. Regularly clean filters and run auto-cleaning cycles. Use recommended detergent doses and avoid overloading. Refer to the manual for personalized settings to enhance results and prolong machine lifespan.

13.1 Optimizing Wash Performance

Enhance your washing results by utilizing Indesit’s advanced features like PushWash Technology for optimal cycle selection and Rapid Option for quicker washes. Use the Water Balance Plus to save resources by adjusting water levels. Regularly clean filters and run auto-cleaning cycles to maintain efficiency. For best results, use recommended detergent amounts and avoid overloading the drum. These practices ensure superior cleaning while extending machine longevity;

13.2 Avoiding Common Mistakes

Avoid overloading the drum, as this reduces wash efficiency and may damage clothes. Use the correct detergent dosage to prevent residue buildup. Always check pockets for coins or sharp objects to avoid machine damage. Never ignore error codes; consult the manual for solutions. Regularly clean filters and ensure proper ventilation to maintain performance and longevity of your Indesit washing machine.

Customer Support and Service

Indesit offers dedicated customer support through their official website and authorized service centers. Contact their team for troubleshooting, maintenance, and repair services to ensure optimal performance of your appliance.

14.1 Contacting Indesit Customer Service

For assistance, visit the official Indesit website and use the contact form or call their support team. You can also email them directly for inquiries or troubleshooting. The customer service team is available to address issues, provide maintenance tips, and guide you through repairs. Additionally, the website offers FAQs and downloadable resources to help resolve common problems independently.

14.2 Finding Authorized Service Centers

To locate an authorized Indesit service center, visit their official website and use the “Find a Service Center” tool. Enter your location or model number for nearby options. Authorized centers ensure genuine parts and warranty-compliant repairs. You can also check the manual or contact customer support for recommendations. This guarantees reliable service and maintains your appliance’s performance and longevity.

The Indesit Washing Machine Manual PDF is an essential resource for optimal appliance use, ensuring longevity and efficiency. Refer to it regularly for troubleshooting, maintenance, and feature guidance to enhance your experience and extend the life of your washer.

15.1 Summary of Key Points

The Indesit Washing Machine Manual PDF provides a comprehensive guide for users, covering installation, operation, and maintenance. It highlights key features like PushWash and Rapid Option, while emphasizing eco-friendly technologies and energy efficiency. Regular maintenance, such as cleaning filters and checking hoses, ensures optimal performance. Troubleshooting tips and error codes help resolve common issues. The manual also outlines safety precautions and warranty details, ensuring longevity and reliability of your Indesit washer.

15.2 Final Tips for Long-Term Usage

Regularly clean the filter and drain pump to maintain efficiency. Run the auto-cleaning cycle periodically to keep internal parts in good condition. Use the right detergent quantity and avoid overloading the machine. Check hoses for damage and ensure proper installation. Keep the gasket clean to prevent mold. Refer to the manual for personalized settings and explore eco-mode for energy savings. Proper care ensures years of reliable performance.

kiss the sky pdf

Kiss the Sky by Becca and Krista Ritchie is a captivating novel blending romance, ambition, and vulnerability․ It follows Loren Hale and Lily Calloway’s turbulent journey through fame, addiction, and familial pressures, offering a raw, emotional exploration of their complex relationship․ The book, part of the Addicted Series, has gained popularity for its intense storytelling and character depth․ Available in PDF and EPUB formats, it provides readers with a convenient way to experience this compelling tale of love, growth, and redemption․

1․1 Overview of the Book

Kiss the Sky by Becca and Krista Ritchie is a compelling novel that delves into the lives of Loren Hale and Lily Calloway, two characters navigating the challenges of fame, addiction, and familial pressures․ Set against the backdrop of reality television, the book explores their complex relationship and personal growth․ The story blends romance, ambition, and vulnerability, offering a raw and emotional journey․ Part of the Addicted Series, it has garnered attention for its intense storytelling and character depth, making it a favorite among readers who enjoy dramatic and thought-provoking narratives․

1․2 Authors and Publication Details

Kiss the Sky is co-authored by Becca Ritchie and Krista Ritchie, sisters known for their collaborative storytelling․ Published in 2014 by K․B․ Ritchie, the novel is part of the Addicted Series, which has gained a dedicated fan base․ The book is available in both digital and print formats, including a special edition with bonus material․ The Ritchie sisters’ teamwork brings depth and complexity to the narrative, making Kiss the Sky a standout in contemporary romance and new adult fiction․ Their writing style and character development have been widely praised by readers and critics alike․

1․3 Genre and Target Audience

Kiss the Sky falls under the genres of contemporary romance and new adult fiction, with elements of drama and emotional depth․ The novel appeals primarily to young adult readers who enjoy complex, character-driven stories․ Fans of romance, particularly those interested in themes of ambition, addiction, and familial pressures, will find the book engaging․ The Ritchie sisters’ vivid storytelling and relatable characters make it a favorite among readers seeking emotional connections and realistic portrayals of relationships․ The book’s mature themes and intense narrative also attract readers who appreciate deeper, thought-provoking fiction․

Plot and Storyline

Kiss the Sky follows Loren Hale and Lily Calloway as they navigate fame, addiction, and familial pressures, exploring their complex relationship and personal growth amidst intense conflicts and challenges․

2․1 Setting and Background

Kiss the Sky is set against the backdrop of reality television and the high-stakes entertainment industry, where ambition and fame collide with personal struggles․ The story unfolds in a world of glittering opportunities and hidden dangers, where characters like Loren Hale and Lily Calloway must navigate the pressures of their rising careers․ The setting is both glamorous and treacherous, reflecting the cutthroat nature of the industry while also exploring the intimate, emotional journeys of its characters․ This backdrop serves as a catalyst for their growth, relationships, and ultimate self-discovery․

2․2 Main Characters: Loren Hale and Lily Calloway

Loren Hale and Lily Calloway are the central figures in Kiss the Sky, each bringing unique complexity to the story․ Loren, often portrayed as enigmatic and guarded, struggles with inner demons while navigating his rising fame․ Lily, on the other hand, is depicted as strong-willed and resilient, facing her own challenges with determination․ Their dynamic relationship drives the narrative, exploring themes of vulnerability, ambition, and redemption․ Together, they embody the book’s core themes, making their journey both compelling and emotionally resonant for readers․

2․3 Key Events and Conflicts

The narrative of Kiss the Sky revolves around the intricate relationship between Loren Hale and Lily Calloway, marked by intense emotional highs and lows․ Central conflicts arise from their struggles with fame, addiction, and personal insecurities․ Loren’s enigmatic nature clashes with Lily’s resilience, creating a volatile yet captivating dynamic․ Key events include their initial confrontations, the challenges of navigating their careers, and the eventual realization of their deep connection․ These conflicts drive the story’s emotional depth, culminating in a climax that tests their relationship and leads to profound personal growth for both characters․

Themes and Messages

Kiss the Sky explores themes of ambition, fame, addiction, and familial pressures, delving into vulnerability and personal growth through its complex characters and emotional storytelling․

3․1 Ambition and Fame

Kiss the Sky delves into the allure and pitfalls of ambition and fame, set against the backdrop of reality television․ Loren Hale and Lily Calloway, as rising stars, navigate the glittering yet treacherous world of celebrity, where success often comes at a cost․ Their journeys highlight the relentless pursuit of fame, the pressures it imposes, and the personal sacrifices required to stay atop․ The novel portrays the dual nature of ambition—its ability to inspire greatness while also leading to destructive choices, offering a raw look at the highs and lows of life in the spotlight․

3․2 Addiction and Recovery

Kiss the Sky offers a raw and realistic portrayal of addiction and recovery, exploring the emotional and psychological challenges faced by its characters․ Loren Hale’s struggle with addiction is a central theme, highlighting the destructive power of substance abuse and the difficult journey toward sobriety․ The novel delves into the complexities of recovery, emphasizing the importance of support, self-awareness, and resilience․ Through Lily Calloway’s unwavering support, the story underscores the role of relationships in overcoming addiction․ Becca and Krista Ritchie handle the subject with sensitivity, creating a narrative that resonates deeply with readers grappling with similar struggles․

3․3 Familial Pressures and Relationships

Kiss the Sky delves into the intricate dynamics of familial pressures and their impact on relationships․ Loren Hale and Lily Calloway navigate the weight of expectations from their families, which shapes their identities and decisions․ The novel explores how family legacies, wealth, and status influence their personal growth and interactions․ Becca and Krista Ritchie vividly portray the tension between loyalty to family and individual desires, creating a relatable and emotionally charged narrative․ These familial pressures not only test their relationship but also drive their character development, highlighting the struggle for independence and self-discovery․

3․4 Vulnerability and Growth

Kiss the Sky masterfully explores the themes of vulnerability and growth through its characters’ emotional journeys․ Loren Hale and Lily Calloway confront their inner demons, revealing raw, unguarded sides that highlight their humanity․ Their relationship becomes a catalyst for mutual growth, as they learn to embrace their vulnerabilities and support each other’s evolution․ The novel shows how facing fears and insecurities can lead to profound personal transformation, emphasizing the importance of openness and trust in overcoming adversity․ This emotional depth resonates deeply, making their development feel authentic and relatable to readers․

Character Development

Kiss the Sky excels in portraying complex, dynamic characters․ Loren Hale and Lily Calloway’s journeys are marked by emotional depth, showcasing their struggles, growth, and evolving relationship dynamics․

4․1 Loren Hale: Complexity and Depth

Loren Hale is a multifaceted character whose journey in Kiss the Sky showcases his ambition, confidence, and hidden vulnerabilities․ As a rising star in reality television, Loren embodies charm and charisma, yet his struggles with addiction and inner demons reveal a deeper, more relatable side․ His relationship with Lily Calloway highlights his growth, as he learns to confront his flaws and embrace genuine connections․ Through his complexities, Loren becomes a compelling figure, illustrating the challenges of fame and the power of personal redemption․

4․2 Lily Calloway: Strength and Resilience

Lily Calloway emerges as a central character in Kiss the Sky, showcasing her strength and resilience․ As a Princeton graduate and fashion designer, Lily exudes control and intelligence, yet her journey reveals vulnerabilities․ Her determination to save her fashion line and navigate a complex relationship with Connor Cobalt highlights her resourcefulness․ Despite challenges, Lily’s resilience shines through, as she confronts her flaws and grows emotionally․ Her character embodies the struggle between maintaining a perfect facade and embracing true connections, making her a relatable and inspiring figure in the story․

4․3 Supporting Characters and Their Roles

The supporting characters in Kiss the Sky play pivotal roles in shaping the narrative and deepening the emotional landscape․ Connor Cobalt, Rose Calloway’s rival-turned-partner, brings confidence and intensity, challenging her to confront her vulnerabilities․ Other characters, such as family members and friends, add layers of complexity, offering support and creating tension․ Their interactions with Loren and Lily reveal the broader dynamics of ambition, love, and redemption․ These characters not only enhance the story but also provide insight into the protagonists’ growth, making the world of Kiss the Sky rich and multifaceted․

Writing Style and Narrative

Becca and Krista Ritchie’s collaboration in Kiss the Sky delivers a compelling narrative with deep emotional exploration․ Their writing style balances intense storytelling with rich character dynamics, creating an immersive experience․

5․1 Collaboration Between Becca and Krista Ritchie

Becca and Krista Ritchie’s collaboration in Kiss the Sky showcases their seamless teamwork, blending their unique writing styles to create a captivating narrative․ Their joint effort brings depth to the story, with complementary perspectives that enhance character development and plot progression․ The sisters’ ability to integrate their ideas flawlessly results in a cohesive and engaging tale․ Their collaboration not only highlights their individual strengths but also amplifies the emotional resonance of the story, making Kiss the Sky a standout novel in the Addicted Series․

5․2 Narrative Techniques and Storytelling

The Ritchie sisters employ a dynamic narrative style in Kiss the Sky, blending dual perspectives to offer a rich, immersive experience․ The story unfolds through alternating viewpoints, providing insight into the characters’ inner worlds and emotional struggles․ Their use of vivid descriptions and realistic dialogue enhances the storytelling, making the characters’ journeys feel authentic and relatable․ The narrative’s pacing balances intense drama with moments of tenderness, creating a compelling rhythm that keeps readers engaged․ This approach ensures a deep emotional connection, making the story both captivating and memorable․

5․3 Emotional Depth and Character Dynamics

Kiss the Sky excels in its portrayal of emotional depth, with characters navigating complex vulnerabilities and growth․ Loren Hale and Lily Calloway’s relationship is layered, showcasing their struggles with addiction, fame, and personal demons․ The authors skillfully explore their inner turmoil, creating relatable and human characters․ Supporting characters add richness to the narrative, highlighting themes of loyalty, redemption, and love․ The emotional dynamics are raw and authentic, drawing readers into the characters’ journeys․ This depth fosters a strong connection, making the story resonate long after the final page․

Cultural and Social Impact

Kiss the Sky has resonated widely, sparking discussions on fame, addiction, and relationships․ Its popularity has influenced young adult literature, fostering a dedicated fan community and debates․

6․1 Popularity and Reception

Kiss the Sky has garnered significant attention, particularly among young adult readers, as part of the Addicted Series․ Its compelling narrative and complex characters, such as Loren Hale and Lily Calloway, have resonated deeply, fostering a dedicated fan base․ The book’s exploration of fame, addiction, and relationships has sparked widespread discussions online, with many praising its emotional depth․ Available in both PDF and print formats, it remains accessible across various platforms like OverDrive and Perlego․ Readers have expressed strong emotional connections, highlighting its impact as a thought-provoking and engaging read․

6․2 Influence on Young Adult Literature

Kiss the Sky has left a notable mark on young adult literature, particularly in the romance and drama genres․ Its raw portrayal of complex relationships, ambition, and personal struggles resonates deeply with readers, setting a new standard for emotional storytelling․ The book’s success has inspired authors to explore darker, more realistic themes, contributing to the evolution of YA fiction․ Its influence is evident in the growing popularity of character-driven narratives and its ability to spark meaningful discussions among readers and writers alike, solidifying its place as a impactful work in contemporary young adult literature․

6․3 Fan Community and Discussions

Kiss the Sky has fostered a vibrant fan community, with readers actively discussing its themes, characters, and emotional depth․ Online forums, social media, and fan sites are filled with analyses of Loren and Lily’s relationship, as well as debates about the book’s portrayal of ambition and addiction․ Fans often share fan art, fan fiction, and personal reflections, showcasing the novel’s impact․ The story’s relatable struggles and complex characters have created a loyal following, making it a popular topic in young adult literature circles and sparking meaningful conversations about identity, growth, and resilience․

Availability and Formats

Kiss the Sky is available in PDF and EPUB formats for easy download․ Readers can access it via platforms like Z-Library, OverDrive, or purchase print editions with bonus material included․

7․1 PDF and EPUB Downloads

Kiss the Sky is readily available in PDF and EPUB formats, ensuring accessibility for various readers․ The book can be downloaded from platforms like Z-Library, OverDrive, and the authors’ official website․ For the best reading experience, use apps like Adobe Acrobat, Apple Books, or Google Play Books․ These formats allow readers to enjoy the story on multiple devices, making it convenient to read anytime, anywhere․ Always ensure to download from trusted sources to avoid security risks․

7․2 Print Edition and Special Bonus Material

The print edition of Kiss the Sky offers readers a tangible way to experience the story, with special bonus material that enhances the reading experience․ This edition includes exclusive content such as deleted scenes, character insights, and behind-the-scenes notes from the authors․ Fans of the series will appreciate the additional depth provided by these extras․ The print version is available for purchase on major online retailers and bookstores, making it a must-have for collectors and enthusiasts of Becca and Krista Ritchie’s work․

7․3 Reading Platforms and Recommendations

Kiss the Sky PDF can be easily accessed on various reading platforms, ensuring a seamless experience for readers․ Popular apps like Adobe Acrobat Reader, Apple Books, and Google Play Books are highly recommended for their user-friendly interfaces and compatibility with both mobile and tablet devices․ Additionally, platforms like Libby and Perlego offer convenient access to the book through libraries and subscription services․ For the best reading experience, ensure your device is updated with the latest software to avoid any compatibility issues․ This versatility makes Kiss the Sky accessible to a wide audience, catering to different reading preferences․

Reviews and Ratings

Kiss the Sky has garnered critical acclaim and reader praise for its emotional depth and character dynamics, with many appreciating the collaboration between Becca and Krista Ritchie․

8․1 Critical Acclaim and Praise

Kiss the Sky has received widespread critical acclaim for its raw emotional depth and compelling character dynamics․ Reviewers praise the Ritchie sisters’ collaboration, highlighting their ability to craft a story that resonates deeply with readers․ The novel’s exploration of complex themes such as ambition, addiction, and familial pressures has been lauded for its authenticity and sensitivity․ Fans and critics alike applaud the book’s ability to evoke strong emotions, making it a standout in the young adult genre․ Its success has also been amplified by its popularity on platforms like TikTok, further cementing its place as a modern literary favorite․

8․2 Reader Feedback and Opinions

Readers have expressed strong emotions about Kiss the Sky, with many praising its emotional depth and character development․ Fans highlight the book’s ability to evoke intense feelings, resonating deeply with its audience․ Some readers describe it as a rollercoaster of emotions, while others appreciate its raw honesty․ The novel has also sparked discussions online, particularly on platforms like TikTok, where it has gained a dedicated fan base․ While opinions are divided, the book’s impact on readers is undeniable, making it a memorable read for many who appreciate complex storytelling and relatable characters․

8․3 Comparisons to Other Works

Kiss the Sky is often compared to other contemporary romance novels for its intense emotional depth and complex character dynamics․ Fans draw parallels to works by authors like Colleen Hoover and Sylvia Day, praising its unique blend of ambition and vulnerability․ The book’s exploration of addiction and relationships sets it apart, while its collaborative writing style mirrors the success of similar co-authored series․ Readers frequently note its addictive storytelling, making it a standout in the romance genre․ Its raw, unfiltered approach to sensitive topics has also drawn comparisons to bestselling novels in the same category․

Educational and Research Value

Kiss the Sky offers insights into character development and narrative techniques, making it a valuable resource for literary studies and psychological research on addiction and relationships․

9․1 Academic Insights and Analysis

Kiss the Sky provides rich material for academic analysis, particularly in studying character development, narrative techniques, and psychological themes․ The novel’s exploration of addiction, relationships, and ambition offers insights into human behavior and societal pressures․ Its complex characters, such as Loren Hale and Lily Calloway, allow for deep psychological analysis․ The book’s collaborative authorship by Becca and Krista Ritchie also makes it a subject of interest in studies of co-authorship dynamics․ Additionally, its popularity in young adult literature makes it a valuable case study for understanding contemporary reader preferences and cultural impact․

9․2 Use in Literary Studies

Kiss the Sky serves as a valuable text in literary studies, offering insights into contemporary themes like ambition, addiction, and relationships․ Its narrative structure and character dynamics provide fertile ground for analyzing psychological depth and interpersonal conflicts․ The novel’s exploration of vulnerability and growth aligns with studies of character development in young adult literature․ Additionally, its collaborative authorship by Becca and Krista Ritchie makes it a unique case study for examining co-authorship dynamics and their impact on storytelling․ The book’s themes and emotional resonance make it a fitting choice for courses on contemporary literature, psychology, and sociology․

9․3 Availability in Libraries and Institutions

Kiss the Sky is widely accessible in libraries and institutions, both in print and digital formats․ Many libraries offer the book through platforms like OverDrive and Perlego, making it easily accessible to students and researchers․ The PDF and EPUB versions are also available for download through academic databases and e-book platforms․ Additionally, the print edition is stocked in university libraries, supporting literary studies and research․ Its inclusion in institutional collections highlights its relevance for academic purposes, ensuring accessibility for scholars and readers interested in contemporary literature and psychological studies․

Kiss the Sky captivates readers with its intense portrayal of ambition, addiction, and complex relationships, leaving a lasting impact on young adult literature and its audience․

10․1 Final Thoughts on “Kiss the Sky”

Kiss the Sky is a compelling exploration of ambition, addiction, and complex relationships, offering readers a raw and emotional journey․ The story of Loren Hale and Lily Calloway, set against the backdrop of reality TV, delves into the challenges of fame and personal growth․ With its intense character dynamics and thought-provoking themes, the book resonates deeply with fans of contemporary romance and drama․ Available in PDF and EPUB formats, it provides an accessible way to experience this gripping tale․ The novel’s ability to balance vulnerability with resilience makes it a standout in young adult literature․

10․2 Recommendations for Readers

Kiss the Sky is highly recommended for fans of contemporary romance and character-driven stories․ Readers who enjoy emotional depth and complex relationships will find Loren and Lily’s journey captivating․ The book’s exploration of ambition, addiction, and resilience makes it a compelling choice for those interested in personal growth narratives․ Available in PDF and EPUB formats, it’s easily accessible for digital readers․ Fans of the Addicted Series will appreciate its continuation, while newcomers can enjoy it as a standalone story․ A must-read for anyone seeking a raw, emotional, and thought-provoking experience․

10․3 Future Prospects and Sequels

Kiss the Sky has left a lasting impact, sparking anticipation for future installments in the Addicted Series․ Fans eagerly await potential sequels, hoping to delve deeper into Loren and Lily’s evolving journey․ The Ritchie sisters have hinted at exploring new storylines, possibly expanding on supporting characters․ With its dedicated fan base and critical acclaim, the series is poised for continued success․ Readers can expect more emotional depth and character growth, ensuring the legacy of Kiss the Sky endures in the literary world․